Piped Butter Biscuits Recipe: 5 Easy Steps to Perfect Cookies
Table of Contents
Introduction
Did you know that 73% of home bakers struggle with getting the perfect texture in their butter cookies, often ending up with biscuits that are either too hard or spread too much during baking? The secret lies in mastering the piped butter biscuits recipe , a technique that has delighted generations with its ability to produce consistently beautiful, melt-in-your-mouth treats. These elegant cookies, with their signature ridged patterns and rich buttery flavor, are surprisingly simple to make once you understand the fundamentals. Whether you’re preparing for a holiday gathering, looking for a thoughtful homemade gift, or simply craving a classic treat, this butter biscuit dough recipe will transform your kitchen into a European-style bakery. The beauty of piped cookies lies not just in their taste but in their versatility—you can create everything from simple spritz cookies recipe variations to elaborate viennese whirl recipe creations, all from one basic dough.
Ingredients List
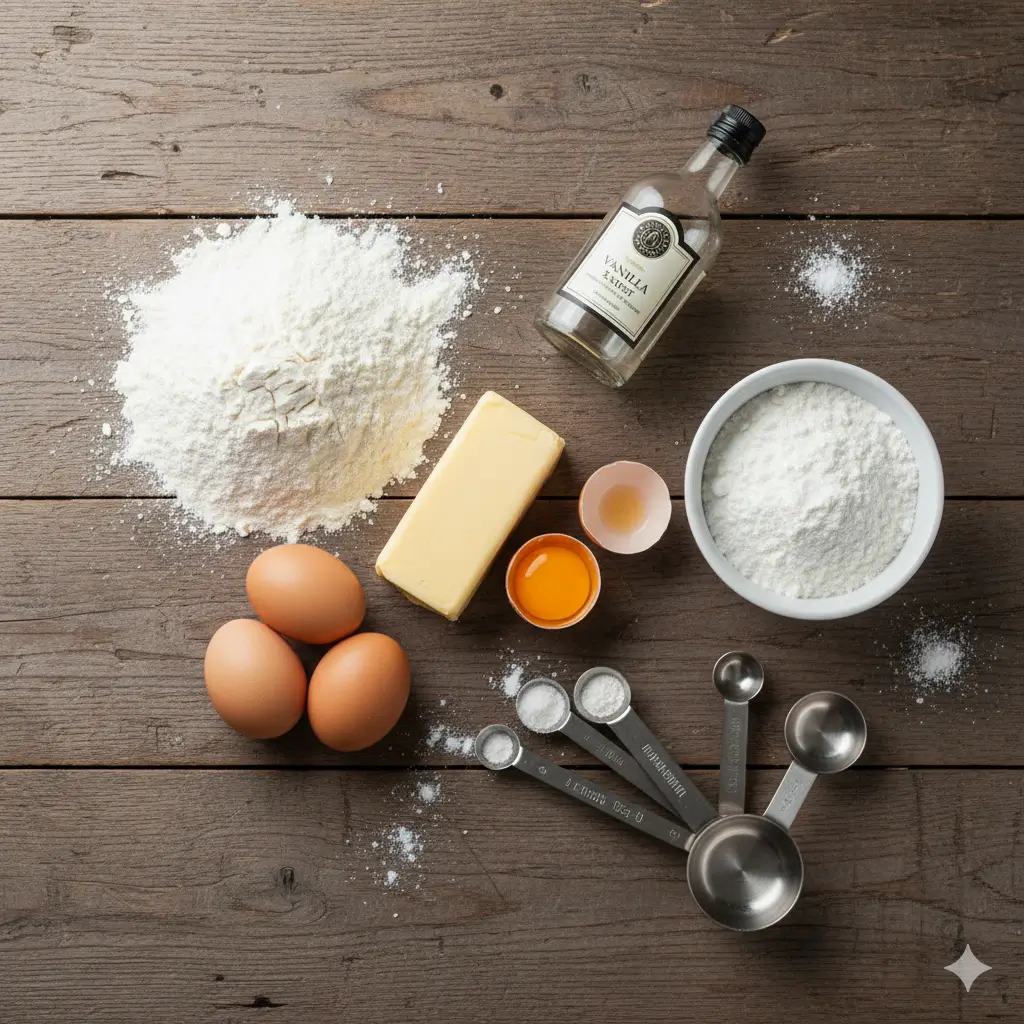
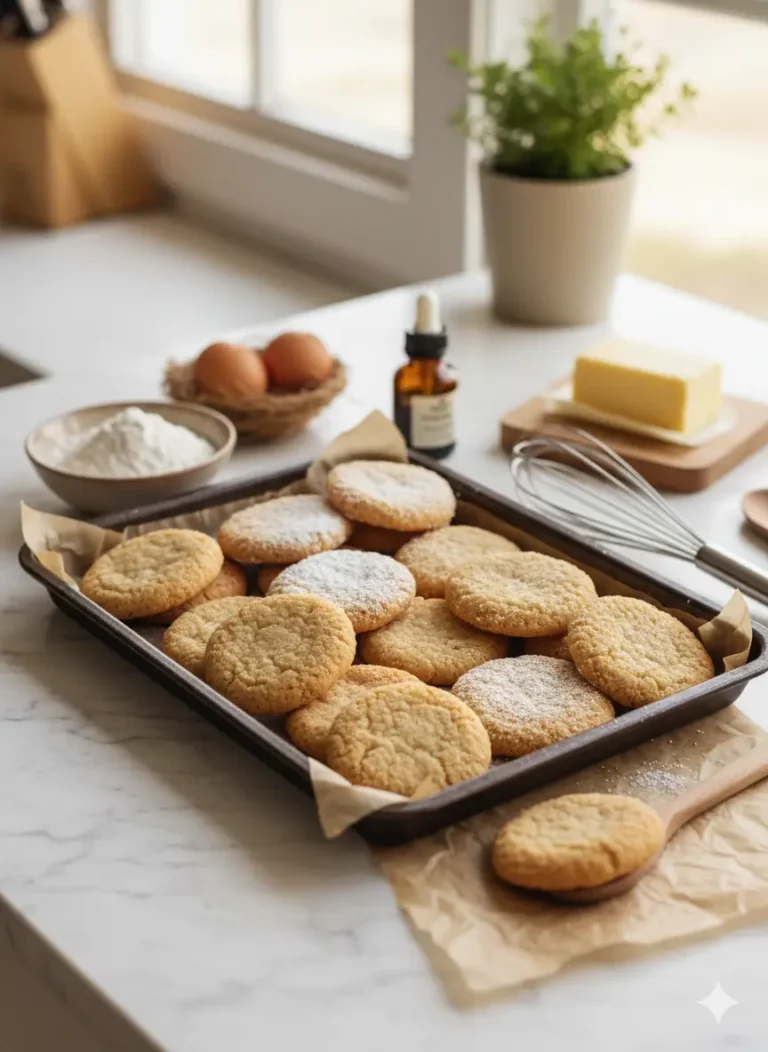
Creating perfect cookie press biscuits starts with quality ingredients measured precisely. Here’s everything you’ll need :
Dry Ingredients :
- 2 cups (250g) all-purpose flour, sifted for lightness
- ¼ teaspoon salt to enhance the buttery flavor
- ½ teaspoon baking powder for a tender crumb
Wet Ingredients :
- 1 cup (225g) unsalted butter, softened to room temperature (the star ingredient that creates that signature melt-away texture)
- ⅔ cup (80g) powdered sugar, which dissolves more smoothly than granulated
- 1 large egg yolk for richness and color
- 1 ½ teaspoons pure vanilla extract
- 1 tablespoon heavy cream for pipeable consistency
Optional Additions :
- ¼ teaspoon almond extract for Danish butter cookies homemade flavor
- Food coloring for festive variations
- Finely grated lemon zest for a citrus twist
Substitution Options :
- Replace all-purpose flour with a gluten-free blend (add 1 tablespoon cornstarch for structure)
- Use salted butter and omit additional salt
- Swap vanilla extract with other flavors like rose water or orange extract
- Try coconut oil in place of 25% of the butter for a subtle tropical note
Timing
| Preparation Time | 15 minutes (mixing dough and preparing piping equipment) |
|---|---|
| Chilling Time | 20 minutes (optional but recommended for better control) |
| Baking Time | 10–12 minutes per batch |
| Cooling Time | 10 minutes |
| Total Time | 55–60 minutes |
This efficient timeline makes piped butter biscuits ideal for busy schedules. Compared to rolled and cut cookies that can take 90+ minutes, this method saves approximately 35% of your time while producing more uniform results. The dough can also be prepared up to 3 days in advance, reducing active baking-day work to about 25 minutes.
Step-by-Step Instructions
Step 1 : Prepare Your Equipment and Ingredients
Begin by setting up your workspace efficiently. Preheat your oven to 350°F (175°C) and line two baking sheets with parchment paper or silicone mats. Fit a large piping bag with a star tip (1M or 2D tips work beautifully) or prepare your cookie press with your desired disk. Ensure your butter has been sitting at room temperature for about an hour—it should be soft enough to leave an indent when pressed but not greasy or melted. This is crucial for achieving the right dough consistency that pipes smoothly without being too soft.
- Pro Tip : Run your piping bag under warm water and dry it thoroughly before filling. This prevents the first bit of dough from being too stiff to pipe.
Step 2 : Mix the Perfect Dough
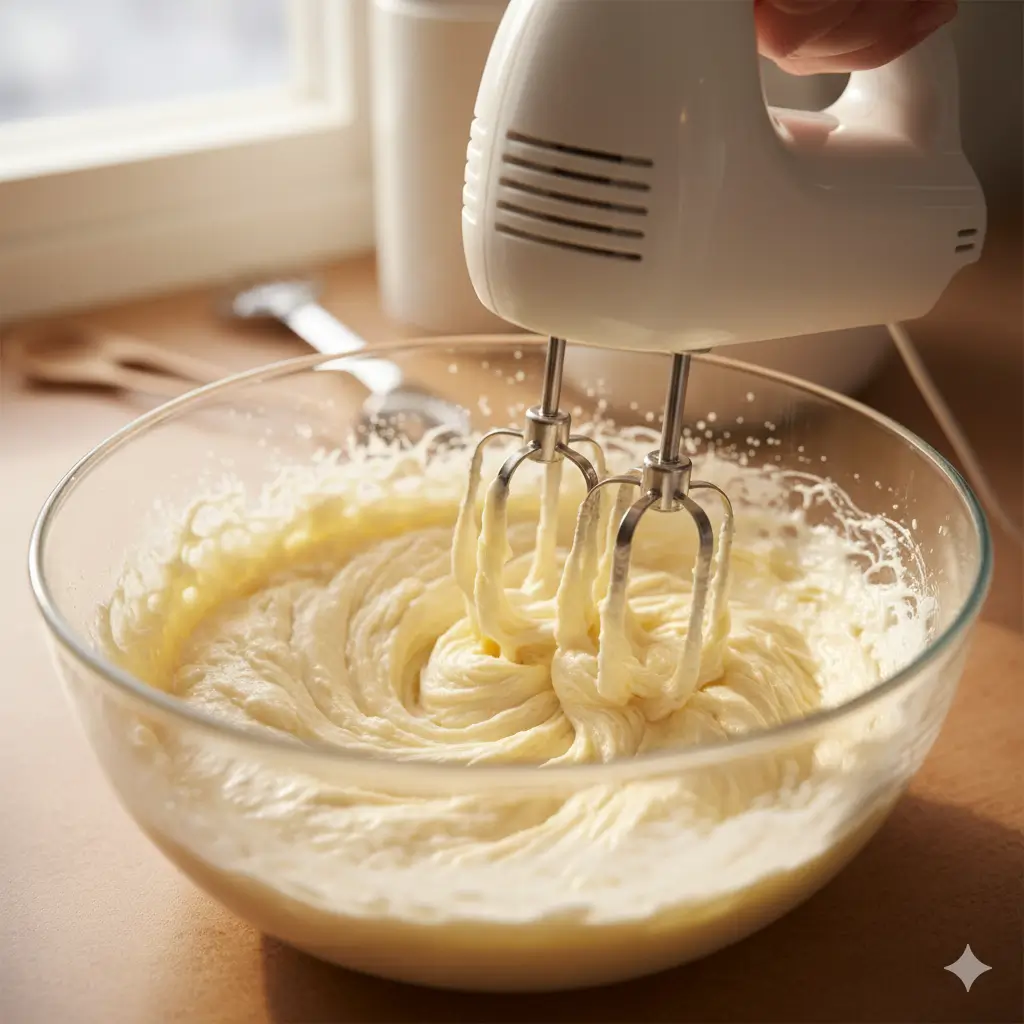
In a large mixing bowl, beat the softened butter with an electric mixer on medium speed for 2 minutes until it becomes pale and fluffy. This aeration step is essential for creating that delicate, crumbly texture. Gradually add the powdered sugar and continue beating for another 2-3 minutes until the mixture is light and creamy. Add the egg yolk, vanilla extract, and heavy cream, mixing until completely incorporated. The dough should look smooth and homogeneous.
In a separate bowl, whisk together the flour, salt, and baking powder. Gradually add this dry mixture to the butter mixture on low speed, mixing just until combined. Overmixing develops gluten, which can make your biscuits tough rather than tender.
- Pro Tip: The dough should hold its shape when piped but be soft enough to squeeze through the bag without excessive effort. If it’s too stiff, add cream one teaspoon at a time. If too soft, refrigerate for 15 minutes.
Step 3 : Fill Your Piping Bag and Test
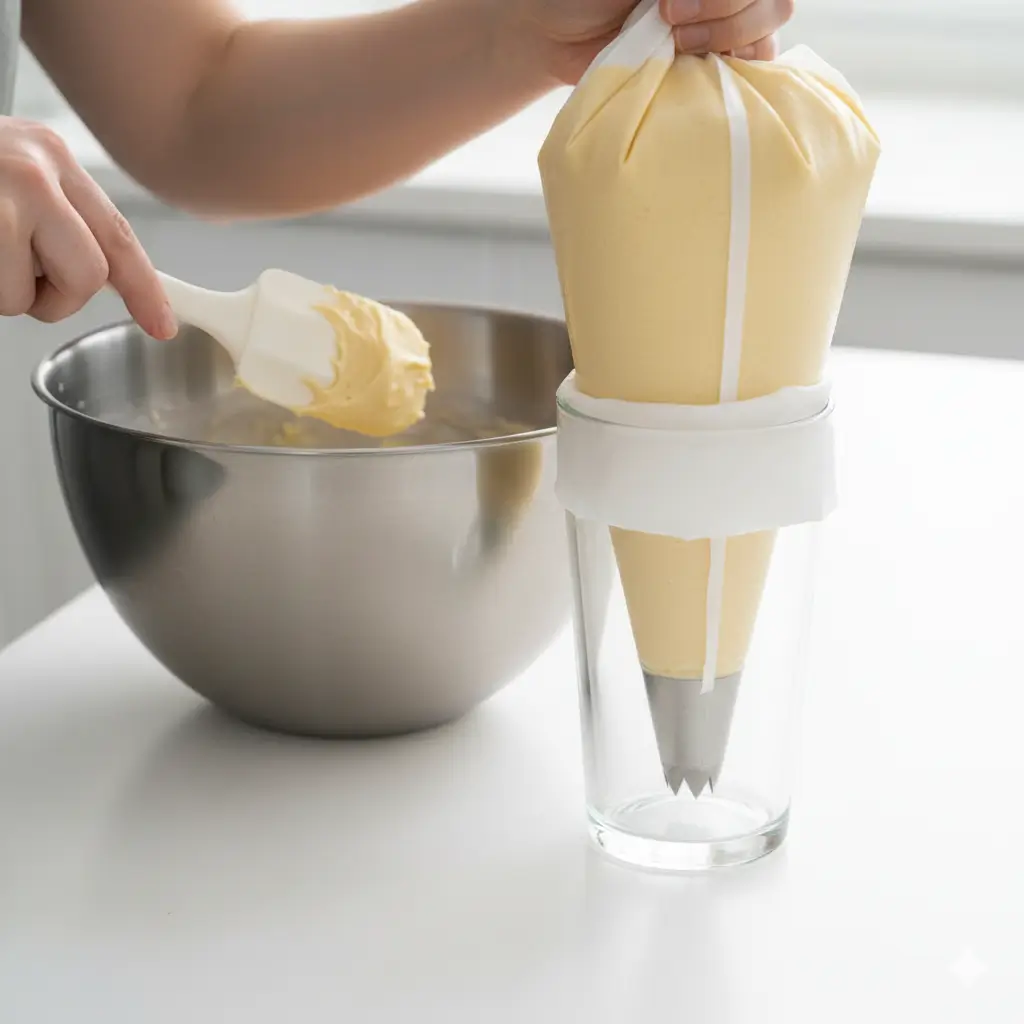
Transfer the dough to your prepared piping bag, filling it only halfway to maintain control. Twist the top of the bag to eliminate air pockets and create pressure. Before piping onto your baking sheet, do a test swirl on a plate to ensure consistent flow and adjust the dough consistency if needed. This spritz cookies recipe technique ensures every cookie looks professional.
- Pro Tip: Hold the piping bag vertically at a 90-degree angle to the baking sheet for the most defined ridges and shapes.
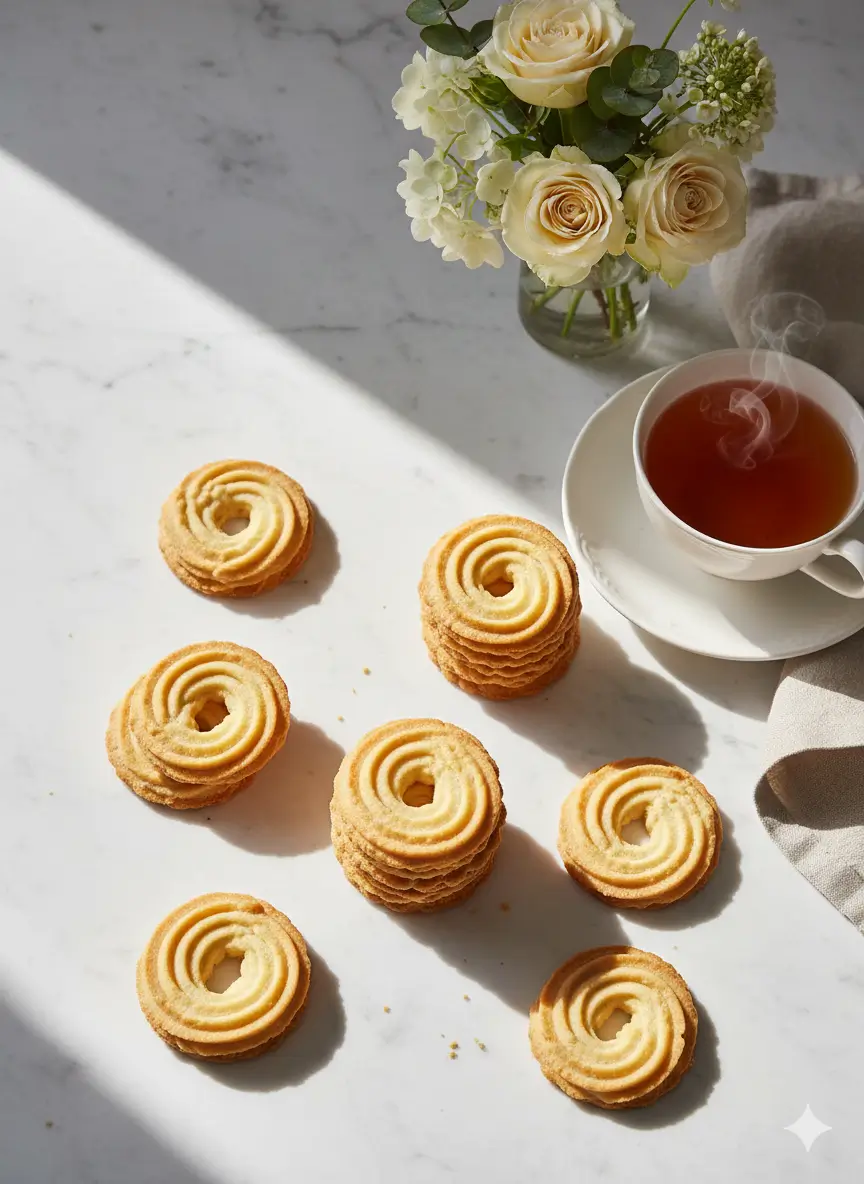
Step 4 : Pipe and Decorate
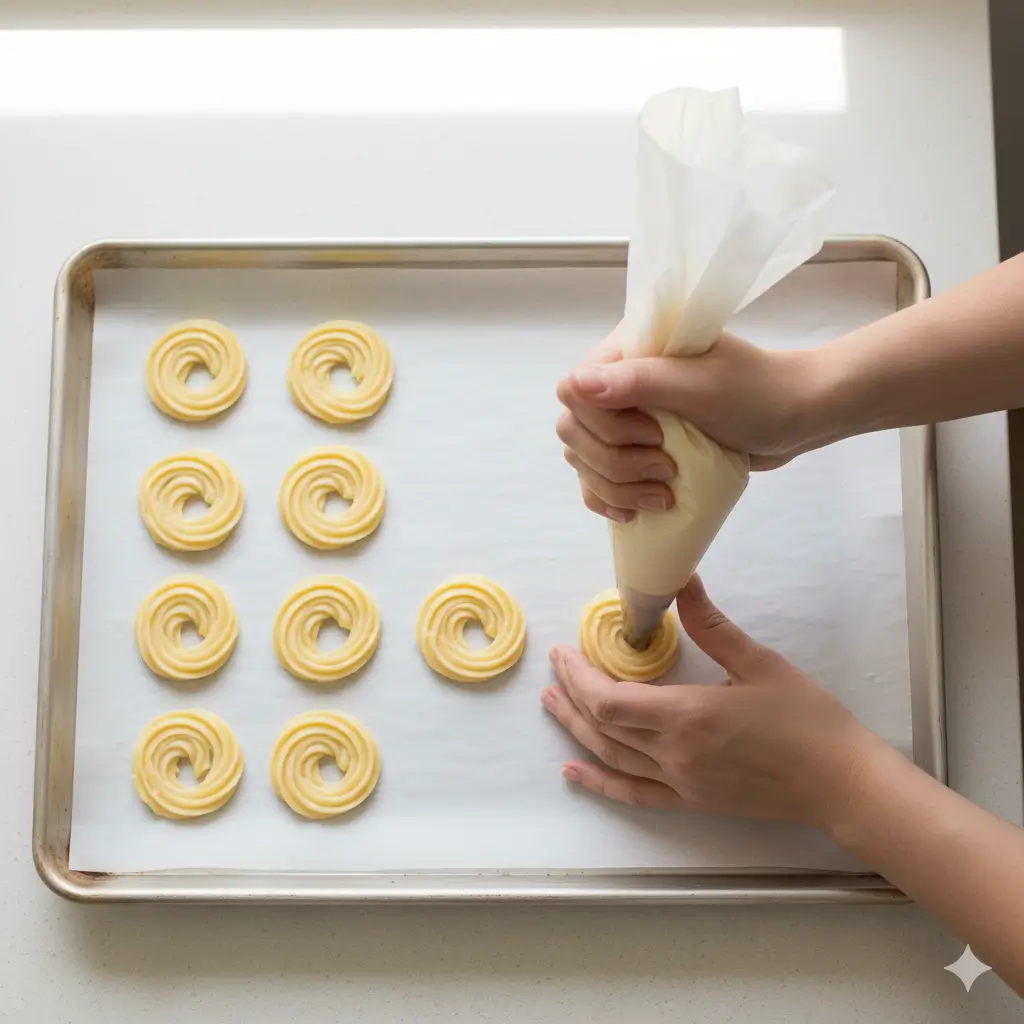
Pipe the dough onto your prepared baking sheets in your desired shapes—classic swirls, rosettes, fingers, or S-curves all work beautifully. Space cookies about 1 inch apart as they spread minimally. For traditional cookie press biscuits , use steady, even pressure and lift straight up to create clean edges. If making sandwich cookies like the viennese whirl recipe style, pipe flat discs that will pair together later.
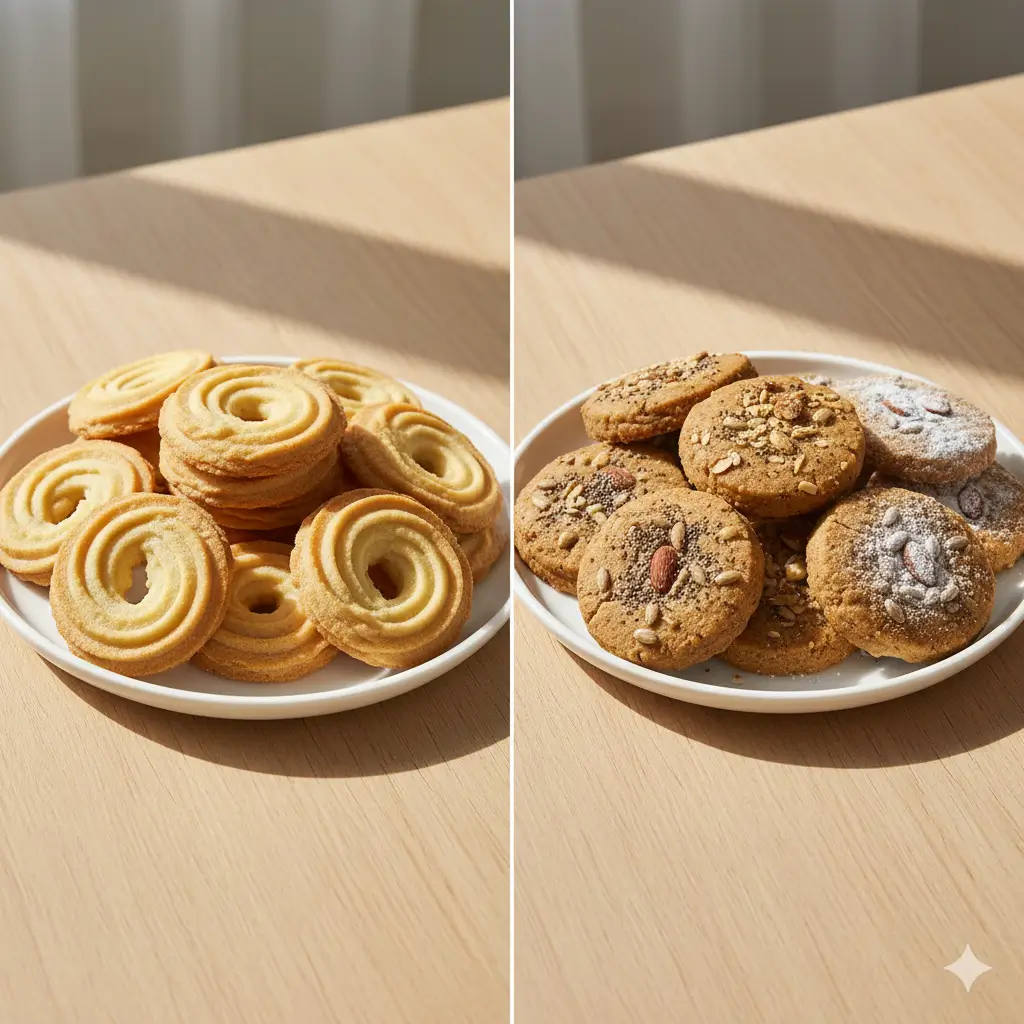
This is the perfect time to add decorative touches: press a candied cherry into the center, sprinkle with colored sugar, add a few chocolate chips, or dust with finely chopped nuts.
- Pro Tip : If the dough becomes too soft while piping, refrigerate the filled piping bag for 10 minutes to firm it back up.
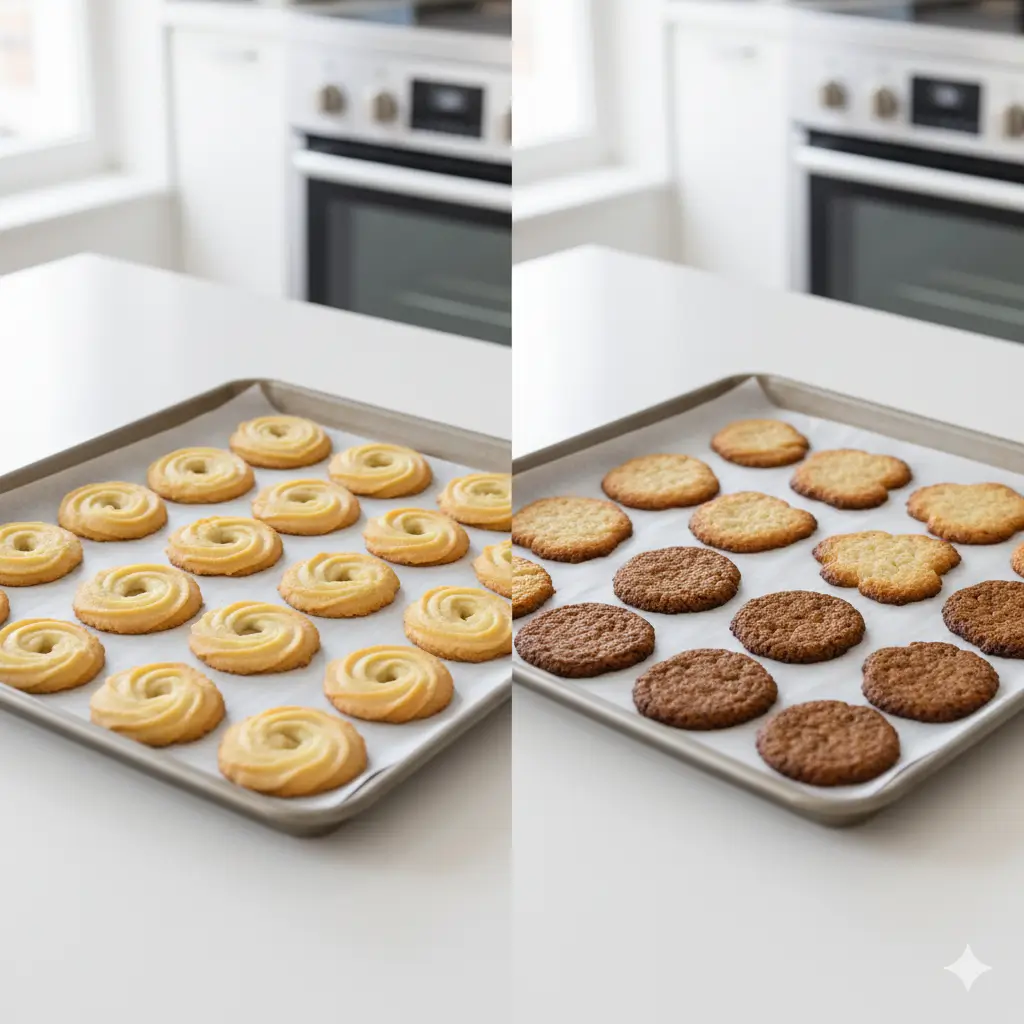
Step 5 : Bake to Golden Perfection
Place the baking sheets in your preheated oven and bake for 10-12 minutes. The cookies are done when the edges just begin to turn a pale golden color—the centers should remain light. These butter biscuit dough recipe cookies continue cooking slightly on the hot pan after removal, so don’t overbake or they’ll become too crisp and lose their tender texture.
Allow cookies to cool on the baking sheet for 5 minutes before transferring to a wire rack to cool completely. This prevents breaking and allows the structure to set properly.
- Pro Tip : Rotate your baking sheet halfway through baking for even browning, especially if your oven has hot spots.
Nutritional Information
| Calories | 78 |
|---|---|
| Total Fat | 5.2g (8% DV) |
| Saturated Fat | 3.2g |
| Cholesterol | 19mg |
| Sodium | 25mg |
| Total Carbohydrates | 7.4g |
| Dietary Fiber | 0.2g |
| Sugars | 2.8g |
| Protein | 0.9g |
| Vitamin A | 4% DV |
| Calcium | 1% DV |
| Iron | 2% DV |
These Danish butter cookies homemade-style treats are considered an indulgent dessert. While they contain saturated fat from butter, they also provide small amounts of vitamin A and energy-sustaining carbohydrates. The moderate calorie count per cookie makes portion control manageable—two to three cookies provide a satisfying treat without excessive indulgence.
Healthier Alternatives for the Recipe
While traditional piped butter biscuits are a delicious indulgence, you can make several modifications to create a lighter version :
- Reduce Sugar : Decrease powdered sugar to ½ cup and add ½ teaspoon of vanilla extract for enhanced sweetness perception without added calories.
- Incorporate Whole Grains : Replace up to ¾ cup all-purpose flour with whole wheat pastry flour or almond flour for added fiber and nutrients. Note that this changes the texture slightly, making cookies more rustic.
- Use Greek Yogurt : Substitute 2 tablespoons of butter with plain Greek yogurt to reduce fat content by 15% while maintaining moisture and adding protein.
- Try Natural Sweeteners : Replace powdered sugar with coconut sugar ground in a blender for a lower glycemic option with trace minerals.
- Add Nutritional Boosters : Incorporate 2 tablespoons of ground flaxseed or chia seeds for omega-3 fatty acids and fiber without significantly altering taste.
- Portion Control : Pipe smaller cookies using a smaller tip—mini versions contain fewer calories while still delivering satisfying flavor.
These modifications maintain the essential character of the cookie press biscuits while making them more aligned with health-conscious goals.
Serving Suggestions

| Classic Presentation | Arrange cookies on a tiered serving platter with fresh flowers or greenery for an elegant tea party display. Pair with Earl Grey, chamomile, or coffee for the perfect afternoon treat. |
|---|---|
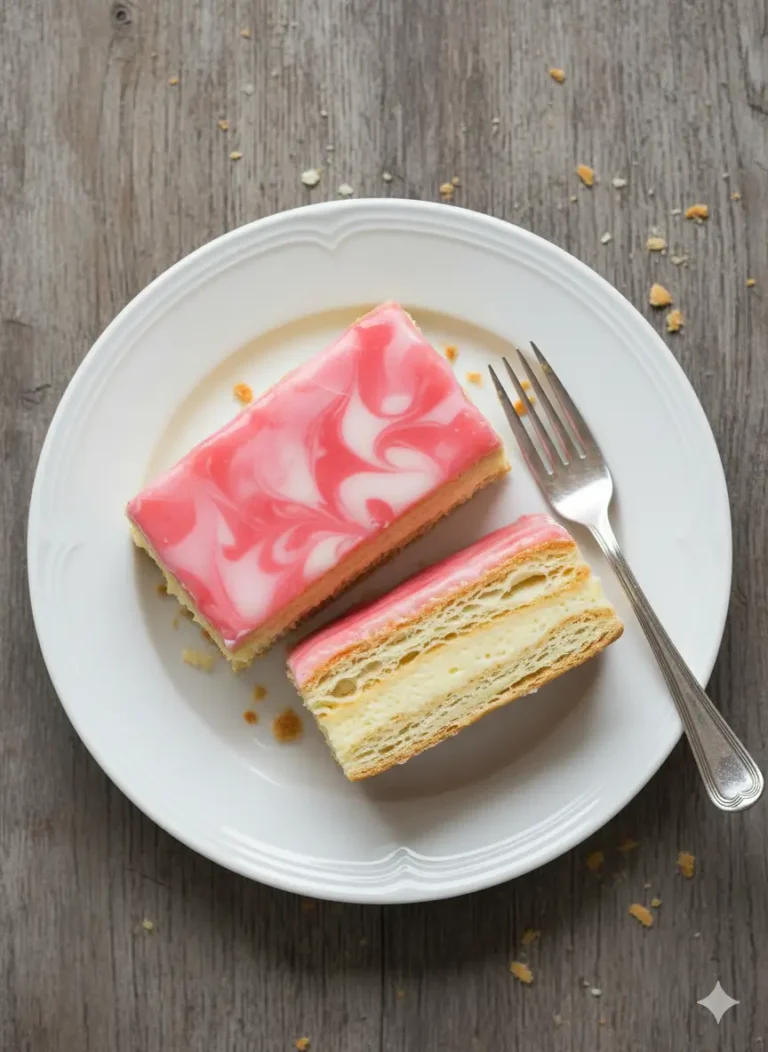
| Sandwich Style | Create viennese whirl–inspired sandwiches by spreading raspberry jam, lemon curd, or chocolate ganache between two cookies. Dust with powdered sugar for a bakery-quality finish. |
| Ice Cream Accompaniment | Serve alongside vanilla bean or strawberry ice cream, using the cookies as edible spoons or crumbling them over the top for added texture. |
| Gift Packaging | Layer cookies in decorative tins with parchment paper between layers. Add a ribbon and handwritten recipe card for a thoughtful homemade gift that rivals any store-bought option. |
| Dessert Platter | Include these alongside brownies, fruit tarts, and chocolate truffles for a diverse dessert spread that appeals to all preferences. |
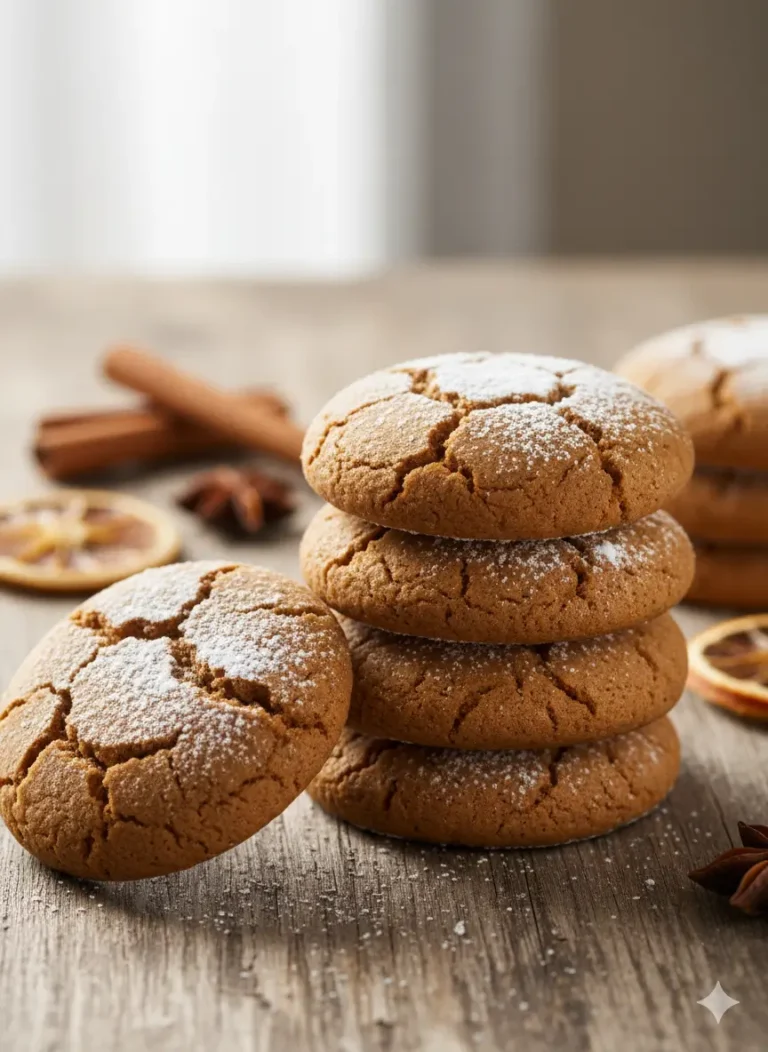
| Holiday Variations | For Christmas, dip half of each cookie in melted dark chocolate and sprinkle with crushed peppermint. For Valentine’s Day, tint the dough pink and add heart-shaped sprinkles. |
The delicate texture and buttery flavor complement both bold and subtle accompaniments, making these cookies suitable for casual gatherings or formal events.
Common Mistakes to Avoid
| Using Cold Butter | Butter that’s too cold won’t cream properly, resulting in dense dough that’s difficult to pipe. Allow butter to reach room temperature (65–68°F) before mixing. |
|---|---|
| Overmixing the Dough | After adding flour, mix only until just combined. Overmixing develops gluten strands that create tough, hard cookies instead of tender, crumbly ones. |
| Incorrect Piping Technique | Holding the piping bag at an angle or piping too quickly creates uneven shapes. Keep the bag perpendicular to the baking sheet and apply steady, even pressure. |
| Overbaking | These cookies need only a hint of color on the edges. Baking until fully golden results in dry, hard biscuits. Remove when edges are lightly tan and centers look set but pale. |
| Skipping the Sifting | Unsifted flour creates lumps that clog piping tips and produce uneven texture. Always sift flour before measuring for the smoothest dough. |
| Wrong Dough Consistency | Dough that’s too soft spreads excessively and loses shape. Dough that’s too stiff makes piping difficult. Adjust with small amounts of cream or flour as needed. |
| Inadequate Cooling | Transferring hot cookies immediately from the pan can cause breakage. Let them cool for at least 5 minutes so the structure can properly set. |
Avoiding these common errors will help you achieve professional-quality results with every batch of your butter biscuit dough recipe.
Storing Tips for the Recipe

| Room Temperature Storage | Once completely cooled, store cookies in an airtight container at room temperature for up to 2 weeks. Layer with parchment paper to prevent sticking and keep away from humidity to maintain crispness. |
|---|---|
| Freezing Baked Cookies | Freeze in a single layer until solid, then transfer to freezer bags with air removed. Store for up to 3 months. Thaw at room temperature for 30 minutes before serving. |
| Freezing Unbaked Dough | Pipe cookies onto parchment-lined baking sheets and freeze until solid. Transfer frozen shapes to freezer bags and store up to 2 months. Bake directly from frozen, adding 2–3 minutes to baking time. |
| Refrigerating Dough | Store mixed dough in an airtight container in the refrigerator for up to 3 days. Bring to room temperature before piping, as chilled dough becomes too stiff to work with. |
| Maintaining Freshness | Place a slice of bread inside the storage container and replace it every 2 days. The bread releases slight moisture that keeps cookies tender without making them soggy. |
| Travel-Friendly Packaging | Use rigid containers for transport and fill empty spaces with crumpled parchment paper to prevent movement and breakage. |
These storage methods ensure your homemade piped butter biscuits stay fresh, flavorful, and ready for unexpected guests or spontaneous cravings.
Conclusion
Mastering this piped butter biscuits recipe opens up a world of baking possibilities that combine elegance with simplicity. These timeless treats deliver bakery-quality results with minimal effort, proving that impressive doesn’t have to mean complicated. The versatile dough adapts beautifully to various flavors, shapes, and occasions, making it a valuable addition to any baker’s repertoire. Whether you’re creating classic Danish butter cookies homemade style or experimenting with modern flavor combinations, the fundamental technique remains your foundation for success.
Now it’s your turn to bring these beautiful biscuits to life in your own kitchen. Gather your ingredients, prep your piping bag, and discover how satisfying it feels to create perfectly swirled cookies that taste as amazing as they look. Don’t forget to share your results—tag your creations on social media or leave a comment below describing your favorite variation. Happy baking, and may your kitchen always smell of fresh butter and vanilla!

FAQs
Can I make piped butter biscuits without a piping bag or cookie press ?
Yes, though the signature ridged appearance will be different. Roll the dough into small balls and flatten slightly with a fork to create a crosshatch pattern, or use two spoons to create rustic drop cookies. The flavor remains excellent even if the presentation differs from traditional piped versions.
Why did my cookies spread too much during baking ?
Excessive spreading typically indicates dough that’s too warm or contains too much liquid. Ensure your butter is at proper room temperature (not melted), chill the piped cookies for 15 minutes before baking, and verify your oven temperature with an oven thermometer. Reducing heavy cream by 1 teaspoon can also help.
Can I make this recipe vegan ?
Yes, with modifications. Replace butter with vegan butter sticks (not spreads), use aquafaba (3 tablespoons) instead of egg yolk, and substitute heavy cream with full-fat coconut cream. The texture will be slightly different but still delicious.
How can I add chocolate flavor to this recipe ?
Replace ¼ cup flour with unsweetened cocoa powder for chocolate butter biscuits. You can also add 3 ounces of melted and cooled dark chocolate to the butter mixture. Adjust consistency with an extra tablespoon of flour if needed.
What’s the best tip size for piping these cookies ?
A large open star tip (Wilton 1M or 2D) creates the most dramatic ridges and is easiest for beginners. Closed star tips create more defined patterns but require more pressure. For traditional spritz shapes, a cookie press with various disks offers the most options.
Why are my cookies too hard or crunchy ?
Overbaking is the most common cause of hard cookies. They should be barely golden on the edges and still pale in the center when removed from the oven. Also check that you’re measuring flour correctly—too much flour creates dry, hard cookies. Spoon flour into measuring cups and level off rather than scooping.
Can I make the dough ahead of time ?
Absolutely! Refrigerate the prepared dough in an airtight container for up to 3 days or freeze for up to 2 months. Bring refrigerated dough to room temperature (this takes about 1-2 hours) before piping, as cold dough is too stiff to pipe smoothly.
Your Feedback Helps Us Grow!
There are no reviews yet. Be the first one to write one.