
Perfect Cheesecake Recipe : 7 Steps to Creamy Perfection
Table of Contents
Introduction
Have you ever wondered why restaurant cheesecakes taste impossibly creamy while homemade versions often crack, sink, or turn out dense? The secret isn’t just expensive ingredients or professional equipment—it’s technique. This Perfect Cheesecake Recipe delivers bakery-quality results in your own kitchen, combining precise steps with foolproof methods to create a velvety, crack-free masterpiece every single time. Whether you’re a novice baker or a dessert enthusiast, mastering this best cheesecake recipe will transform your confidence in the kitchen. In just seven strategic steps, you’ll learn the exact process professional pastry chefs use to achieve that signature New York-style texture: rich, dense, and impossibly smooth. Ready to create a homemade cheesecake that rivals the finest bakeries? Let’s dive into the secrets that make this creamy cheesecake recipe absolutely foolproof.
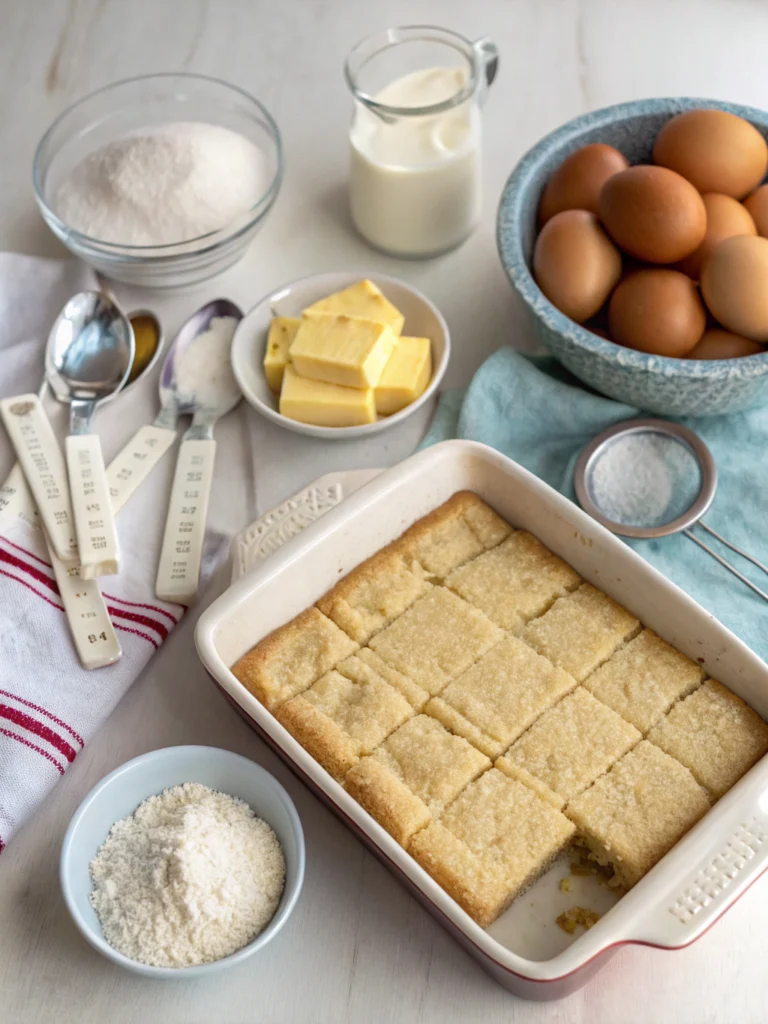
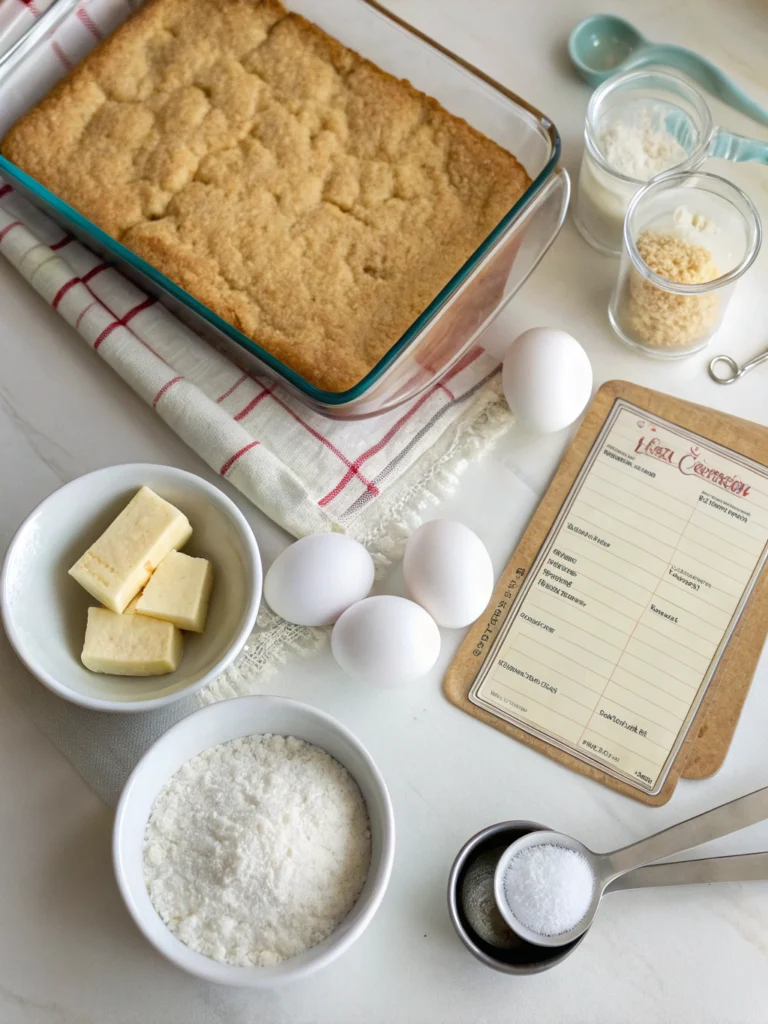
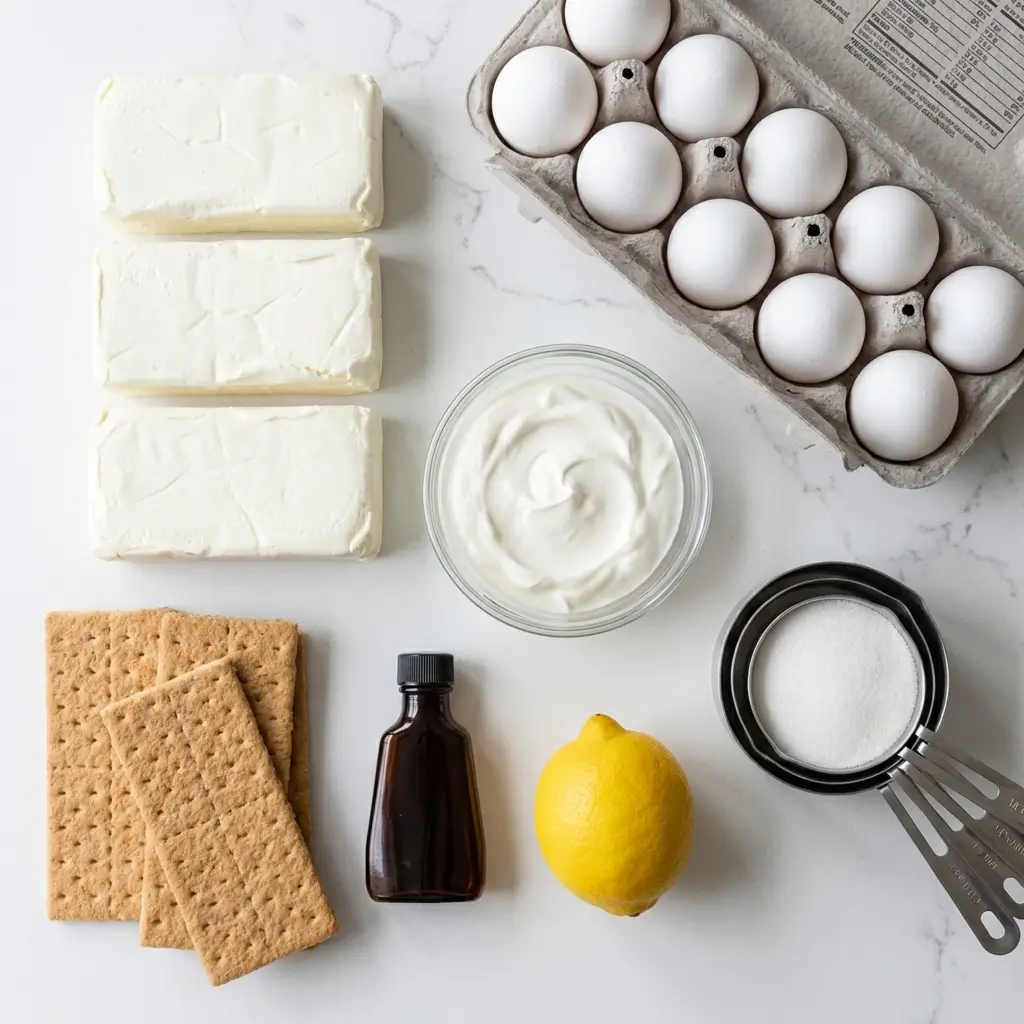
Ingredients List
For the Graham Cracker Crust :
- 200g (2 cups) graham cracker crumbs
- 85g (6 tablespoons) unsalted butter, melted
- 50g (¼ cup) granulated sugar
- Pinch of salt
For the Creamy Cheesecake Filling :
- 900g (32 oz) full-fat cream cheese, softened to room temperature
- 250g (1¼ cups) granulated sugar
- 3 tablespoons all-purpose flour
- 240ml (1 cup) sour cream, room temperature
- 2 teaspoons pure vanilla extract
- 4 large eggs, room temperature
- Zest of 1 lemon (optional, for brightness)
Substitution Tips :
- Crust alternatives : Swap graham crackers with digestive biscuits, vanilla wafers, or Oreo cookies (including the filling) for variation.
- Sour cream substitute : Greek yogurt works beautifully and adds extra tang.
- Lighter version : Use reduced-fat cream cheese (though texture will be slightly less dense).
- Gluten-free option : Replace flour with cornstarch at a 1:1 ratio.
Timing
| Stage | Time Required | Notes |
|---|---|---|
| Preparation Time | 25 minutes | Mixing the crust and cheesecake filling before baking. |
| Baking Time | 55–65 minutes | Slow baking ensures a rich, creamy texture without overcooking. |
| Cooling Time | 4–6 hours (including refrigeration) | Essential step to prevent cracks and allow flavors to fully develop. |
| Total Time | Approximately 6 hours | Includes preparation, baking, and full chilling time. |
| Key Insight: This baked New York cheesecake requires patience, especially during cooling. While no-bake versions need similar chilling time, baking delivers superior texture and authentic flavor in roughly the same overall timeframe. | ||
Step-by-Step Instructions
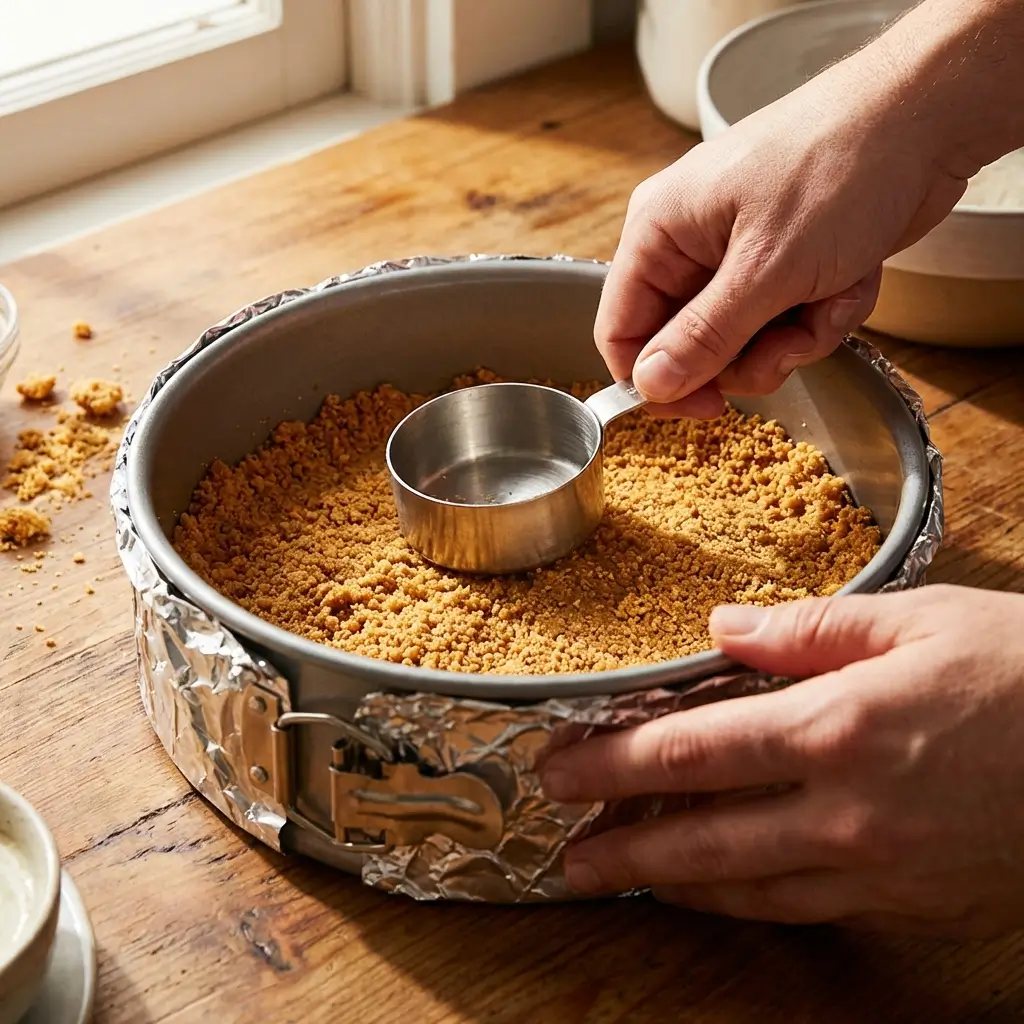
Step 1: Prepare Your Pan and Preheat
Preheat your oven to 160°C (325°F). Wrap the outside of a 23cm (9-inch) springform pan tightly with two layers of heavy-duty aluminum foil—this waterproofs the pan for the water bath method. Grease the inside with butter or non-stick spray.
Pro tip: Foil prevents water seepage during the water bath, which is essential for even, gentle cooking that prevents cracks.
Step 2: Create the Perfect Graham Cracker Crust
Combine graham cracker crumbs, melted butter, sugar, and salt in a bowl. Mix until the texture resembles wet sand. Press firmly into the bottom of your prepared pan, using the bottom of a measuring cup to create an even, compact layer.
- Expert insight : Pre-baking the crust for 10 minutes at 160°C creates a barrier that prevents sogginess from the creamy filling. Let it cool while you prepare the filling.
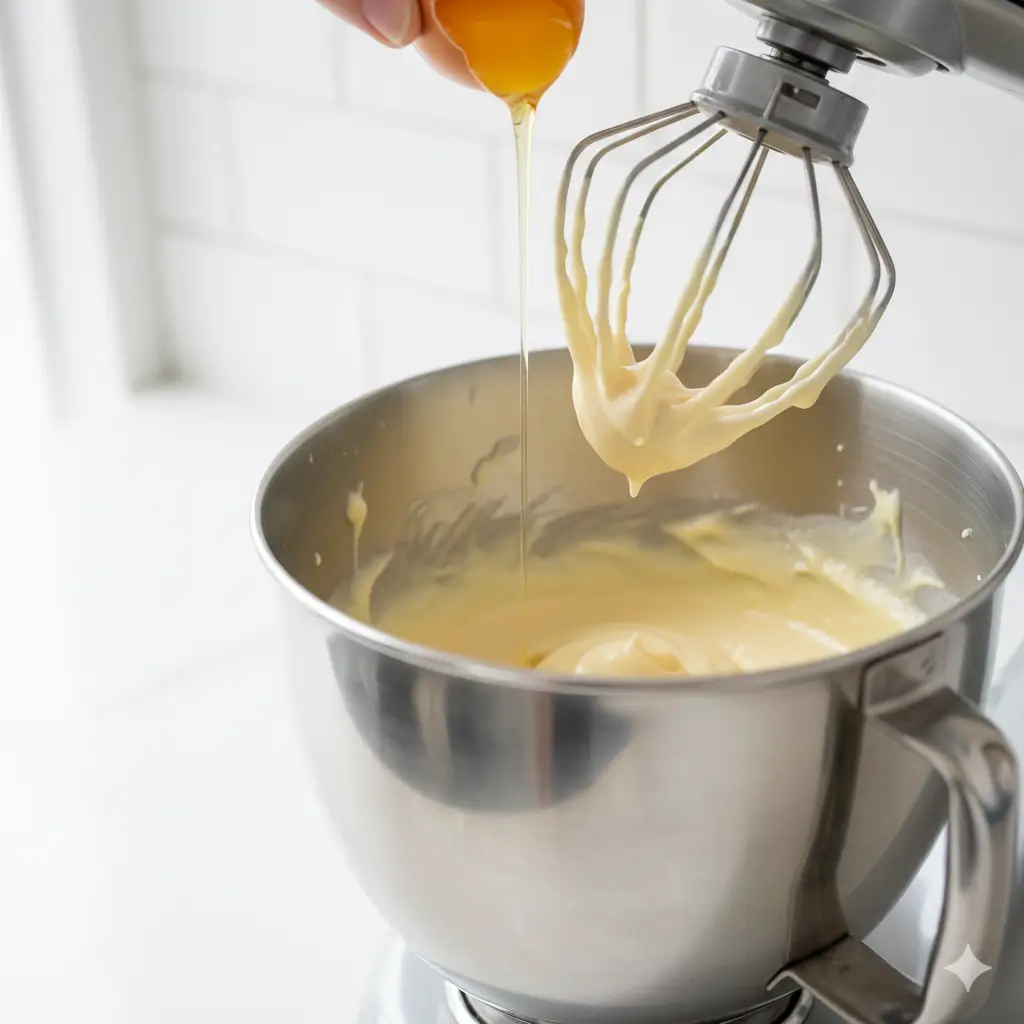
Step 3: Mix the Silky Cheesecake Filling
Beat the softened cream cheese on medium-low speed for 2–3 minutes until completely smooth with no lumps. Scrape down the bowl frequently. Add sugar and flour, beating until just combined. Mix in sour cream and vanilla extract until silky.
- Critical technique : Overmixing incorporates excess air, which causes cracks during baking. Keep mixer speed low and stop as soon as ingredients are incorporated.
Step 4: Add Eggs Gently, One at a Time
Add eggs one at a time on the lowest mixer speed, beating for only 10–15 seconds after each addition. The mixture should be smooth but not airy.
- Game-changer tip : Room temperature eggs blend seamlessly without overworking the batter. Cold eggs require extra mixing, which introduces unwanted air bubbles that lead to cracking.
Step 5: Pour and Smooth the Filling
Pour the luscious filling over the cooled crust. Gently tap the pan on the counter 3–4 times to release any trapped air bubbles. Use a spatula to smooth the top into an even layer.
- Precision matters : Air pockets expand during baking and create surface imperfections. This simple tapping step ensures flawless texture.
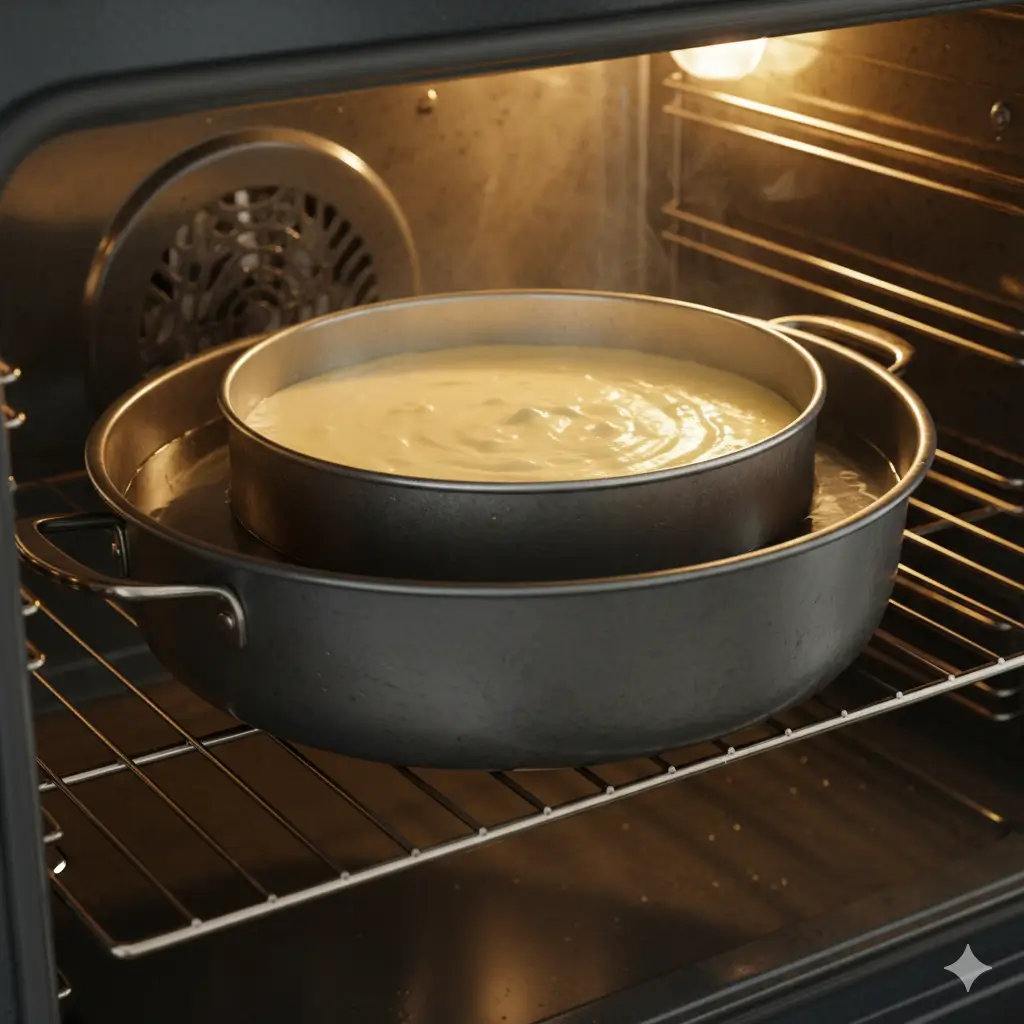
Step 6: Bake in a Water Bath for Even Heat
Place the foil-wrapped springform pan inside a larger roasting pan. Pour hot water into the roasting pan until it reaches halfway up the sides of the springform pan. Bake for 55–65 minutes. The cheesecake is done when the edges are set but the center still jiggles slightly (about 7–10cm diameter).
- Temperature science : The water bath maintains consistent, gentle heat around 100°C, preventing the extreme temperature fluctuations that cause cracking. The residual heat continues cooking the center during cooling.
Step 7: Cool Gradually to Prevent Cracking
Turn off the oven and crack the door open about 10cm. Let the cheesecake cool inside the oven for 1 hour—this gradual temperature change prevents thermal shock. Remove from oven, take off the foil, and cool completely at room temperature for another hour. Refrigerate uncovered for at least 4 hours (preferably overnight).
- Professional secret : Rapid cooling causes the cheesecake to contract too quickly, creating surface cracks. Patience here is the difference between amateur and professional results.
Nutritional Information
| Nutrient | Amount per Slice |
|---|---|
| Calories | ~380 |
| Protein | 7g |
| Carbohydrates | 32g |
| Fat | 26g |
| Saturated Fat | 15g |
| Fiber | 0.5g |
| Sugar | 24g |
| Sodium | 310mg |
| Calcium | 8% of Daily Value |
| Health Note: Homemade cheesecake provides calcium from cream cheese and sour cream, plus protein that helps slow sugar absorption. While indulgent, it contains fewer additives and preservatives than store-bought versions, giving you full control over ingredient quality. | |
Healthier Alternatives for the Recipe
Transform this Perfect Cheesecake Recipe into a lighter option without sacrificing too much creaminess :
- Reduce fat : Use ⅔ full-fat cream cheese and ⅓ Neufchâtel (reduced-fat cream cheese) for 20% less fat.
- Cut sugar : Decrease sugar to 200g and add 2 tablespoons of honey for natural sweetness with lower glycemic impact.
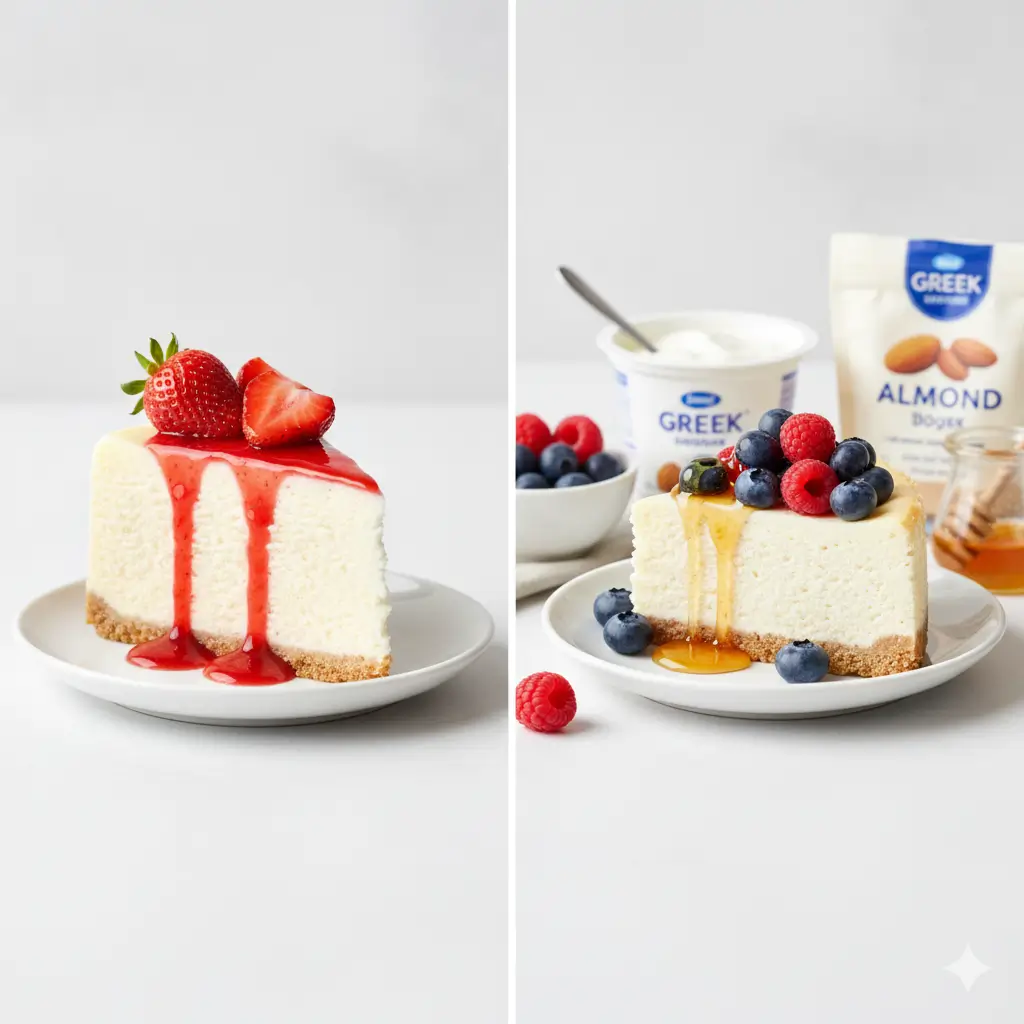
- Boost protein : Replace half the sour cream with Greek yogurt for extra protein and tanginess.
- Whole grain crust : Use whole wheat graham crackers or swap half the crumbs with ground almonds for fiber and healthy fats.
- Portion control : Bake in individual 10cm ramekins for built-in portion management (adjust baking time to 25–30 minutes).
- Natural sweetness : Top with fresh berries instead of sugary sauces—berries add antioxidants and vibrant color.
Serving Suggestions
| Serving Style | Description |
|---|---|
| Classic Elegance | Serve plain slices with a light dusting of powdered sugar and fresh mint leaves for minimalist sophistication. |
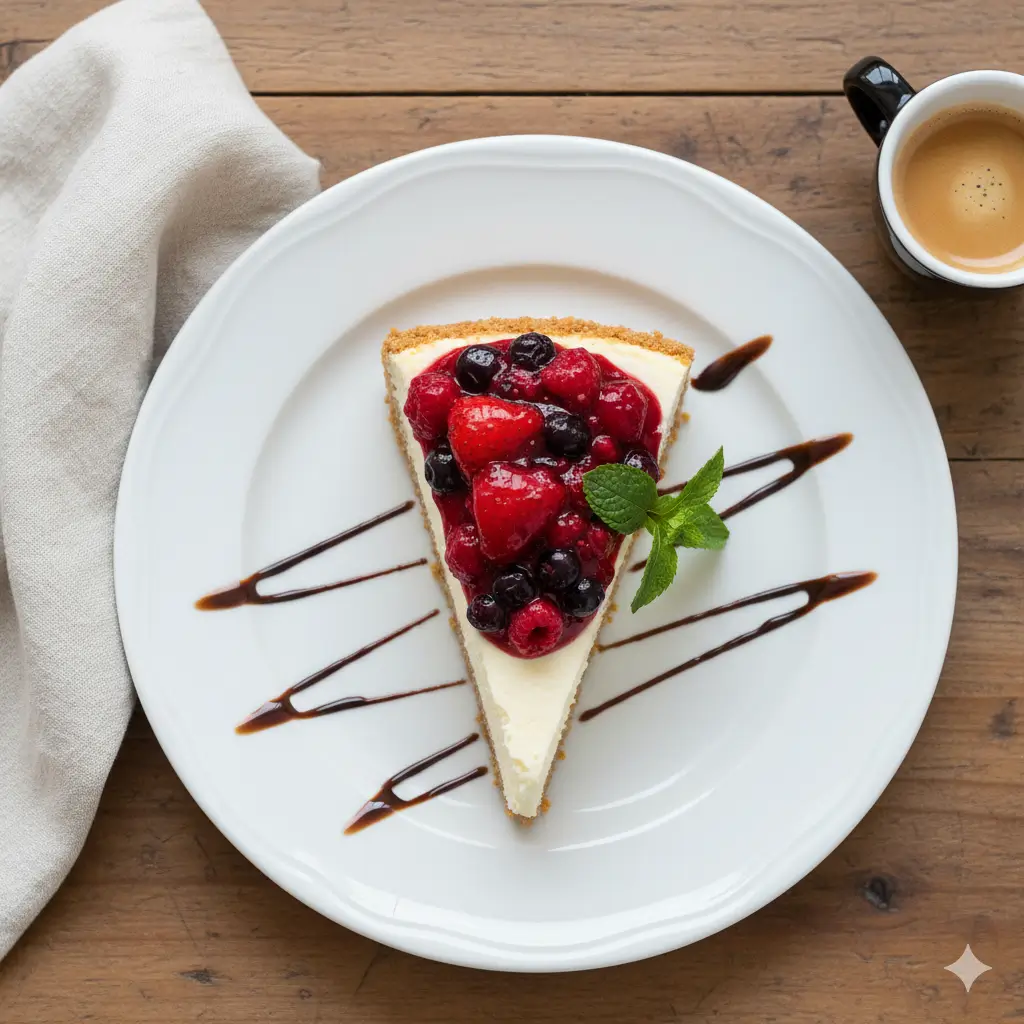
| Berry Compote | Top with warm mixed berry sauce made from strawberries, blueberries, and raspberries simmered with a touch of sugar. |
| Chocolate Lovers | Drizzle with dark chocolate ganache and sprinkle with chocolate shavings for a decadent contrast. |
| Caramel Pecan | Add homemade salted caramel sauce and toasted pecans for Southern-style richness. |
| Lemon Curd | Spread tangy lemon curd over slices for bright, refreshing acidity that cuts through the richness. |
| Coffee Pairing | Serve alongside espresso or cappuccino—the bitterness balances the sweetness beautifully. |
| Seasonal Twist | Add pumpkin spice in fall, peppermint in winter, or fresh peach slices in summer for a festive variation. |
Common Mistakes to Avoid
| Mistake | Why It Matters |
|---|---|
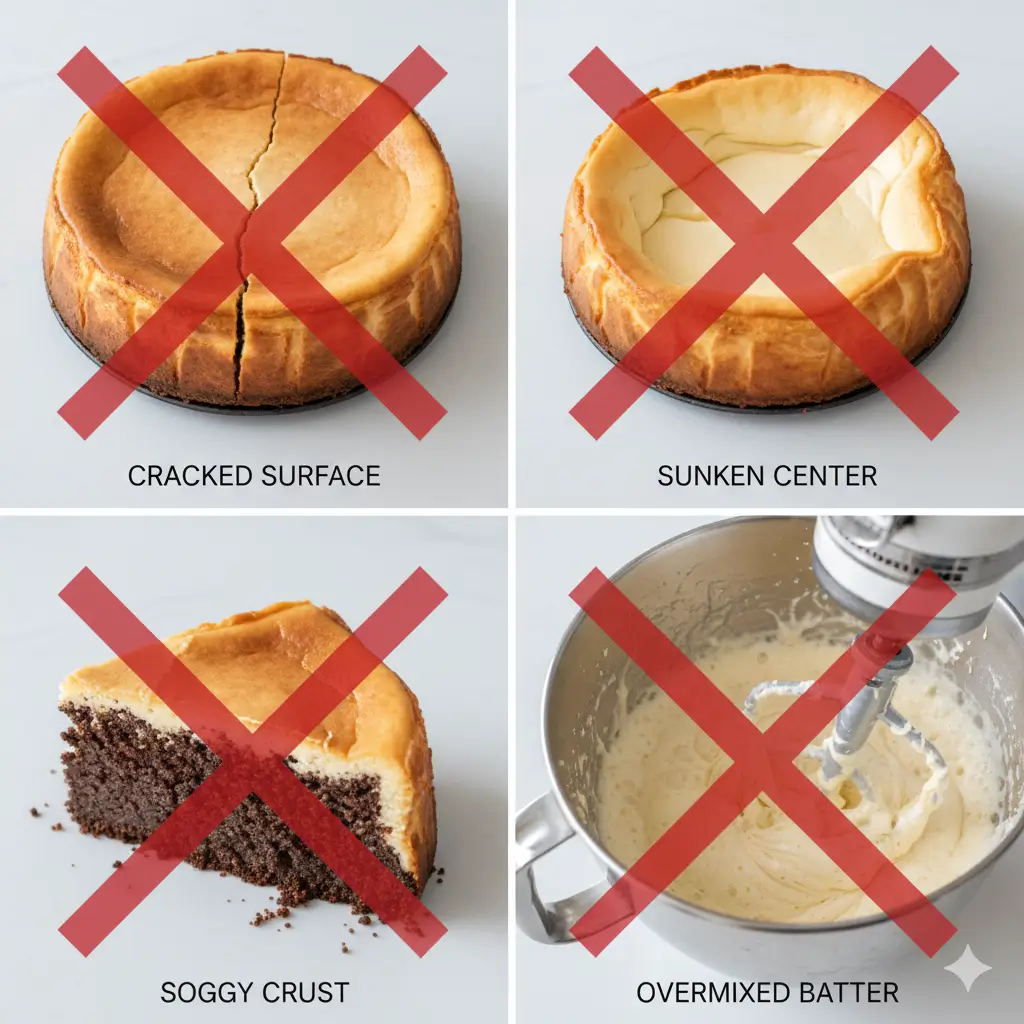
| Using Cold Ingredients | Cold cream cheese creates lumps that won’t smooth out, even with extended mixing. Always bring ingredients to room temperature (about 1 hour on the counter). |
| Overmixing the Batter | Too much beating incorporates air that expands during baking and causes cracks. Mix on low speed and stop once just combined. |
| Skipping the Water Bath | Without moisture, dry oven heat leads to uneven cooking and surface cracks. A water bath is essential for crack-free cheesecake. |
| Opening the Oven Door | Temperature fluctuations can cause the cheesecake to fall or crack. Avoid peeking until baking is complete. |
| Overbaking | A perfectly baked cheesecake should still jiggle slightly in the center. It continues cooking while cooling. Overbaking results in dryness and graininess. |
| Rushing the Cooling Process | Removing cheesecake too quickly causes thermal shock, leading to cracks. Follow a gradual cooling method for best results. |
| Cutting While Warm | Warm cheesecake is fragile and messy. Refrigerate for at least 4 hours before slicing for clean, professional cuts. |
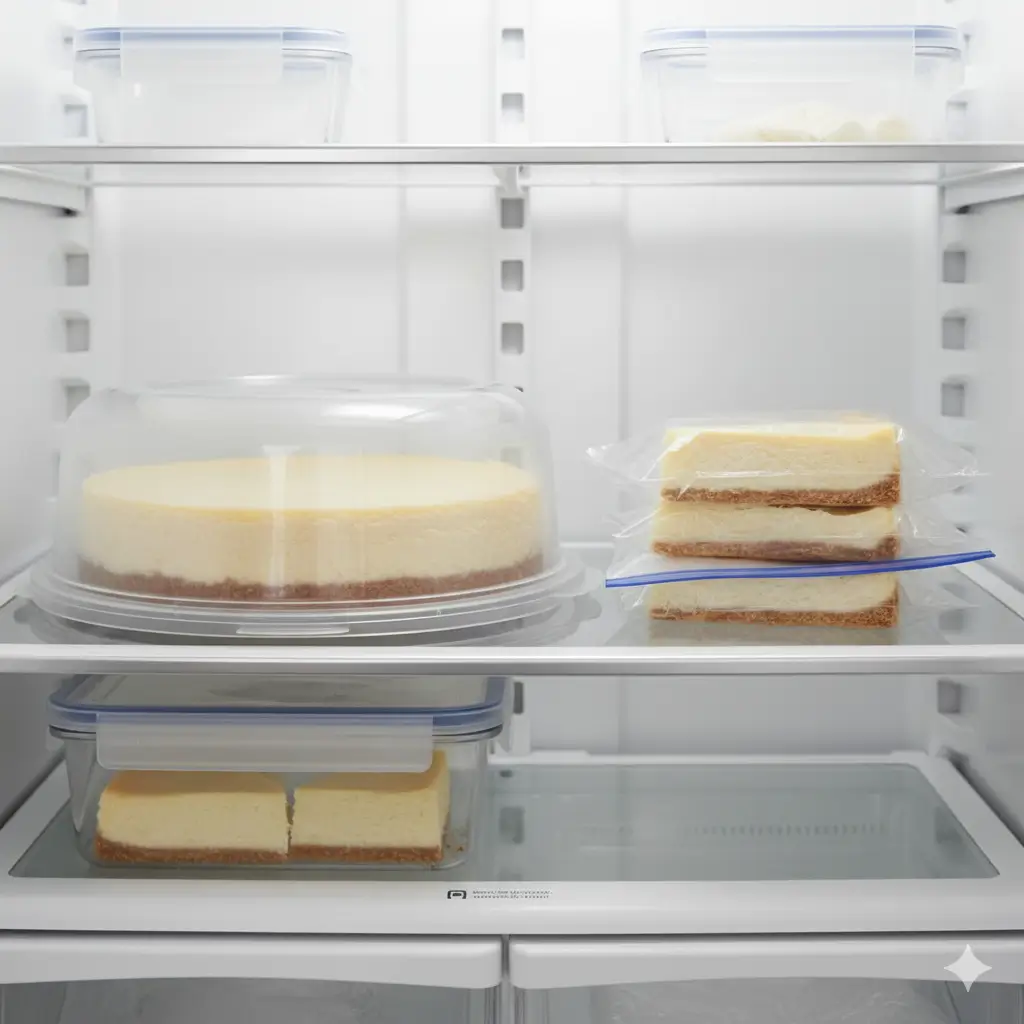
Storing Tips for the Recipe
| Storage Method | Best Practice |
|---|---|
| Refrigeration | Cover tightly with plastic wrap or store in an airtight container for up to 5 days. Flavor improves after 24 hours as it melds. |
| Freezing Whole | Wrap the cheesecake (without toppings) in plastic wrap, then aluminum foil. Freeze for up to 2 months. Thaw overnight in the refrigerator before serving. |
| Freezing Slices | Individually wrap slices in plastic wrap and place in freezer bags. This makes it easy to thaw single servings as needed. |
| Preventing Condensation | When thawing, keep the cheesecake covered to prevent moisture from collecting on the surface. |
| Topping Timing | Add fresh fruit, sauces, or whipped cream just before serving. These do not freeze well and may make the surface soggy. |
| Crust Protection | If the crust softens during storage, briefly toast slices under the broiler (watch carefully) to restore crispness. |
Conclusion
This Perfect Cheesecake Recipe demystifies the art of creating restaurant-quality desserts at home. By following these seven precise steps—from proper ingredient temperature to the crucial water bath and gradual cooling—you’ll achieve the creamy, crack-free texture that defines an exceptional homemade cheesecake. The techniques you’ve learned apply to countless variations, giving you the foundation to experiment with flavors while maintaining that signature velvety consistency. Whether you’re serving this easy cheesecake for a special celebration or simply treating yourself to weekend baking, the results will impress everyone at your table. Don’t wait for the perfect occasion—master this creamy cheesecake recipe today, share your beautiful creation on social media, and explore our other dessert guides to expand your baking repertoire. Your journey to cheesecake perfection starts now.

FAQs
Why did my cheesecake crack on top ?
- Cracking usually results from three causes: overbaking (the center should still jiggle), sudden temperature changes (always cool gradually), or overmixing the batter (which incorporates excess air). Using a water bath provides moisture and even heat distribution, significantly reducing crack risk.
Can I make this cheesecake without a water bath ?
- While possible, results won’t match the creamy texture of a water bath cheesecake. Without it, use lower temperature (150°C/300°F) and place a pan of water on the oven’s bottom rack to add humidity. Expect slightly different texture and higher crack probability.
How do I know when my cheesecake is perfectly done ?
- The edges should be set and slightly puffed, while the center (about 7–10cm diameter) should still jiggle like firm jello when you gently shake the pan. An instant-read thermometer should register 65–70°C in the center. It will continue cooking during cooling.
Can I substitute low-fat cream cheese ?
- Yes, but expect a less rich, slightly less creamy texture. Never use fat-free cream cheese—it contains too much moisture and stabilizers that prevent proper setting. For best results, use at least ⅔ full-fat cream cheese.
Why is my cheesecake dense and heavy instead of creamy ?
- Overmixing or using cold ingredients are the primary culprits. Cold cream cheese doesn’t blend smoothly and requires excessive mixing, which deflates the batter. Always use room temperature ingredients and mix on low speed until just combined.
How far in advance can I make this cheesecake ?
- Cheesecake actually improves with time as flavors meld. Make it 1–2 days ahead and store covered in the refrigerator. Add toppings within 2–3 hours of serving to maintain presentation quality.
Can I use a different pan size ?
- A 23cm (9-inch) springform pan is ideal. Smaller pans require longer baking time and may overflow; larger pans create a thinner cheesecake that bakes faster. Adjust baking time by checking the jiggle test rather than relying solely on timing.
Your Feedback Helps Us Grow!
There are no reviews yet. Be the first one to write one.