Mini Cheesecakes No Bake : 6 Quick & Creamy Ideas
Table of Contents
Introduction
Imagine indulging in a rich and creamy dessert without ever touching your oven. Sound too good to be true? Think again! With mini cheesecakes no bake, you can enjoy all the decadence of classic cheesecake in a simple, fuss-free way. In this post, we’ll share six quick and creamy ideas that will satisfy your sweet tooth while keeping preparation easy and stress-free.
Ingredients List

To make these delectable mini cheesecakes, you’ll need:
- Cream cheese, softened
- Sweetened condensed milk
- Lemon juice
- Vanilla extract
- Graham cracker crumbs
- Butter, melted
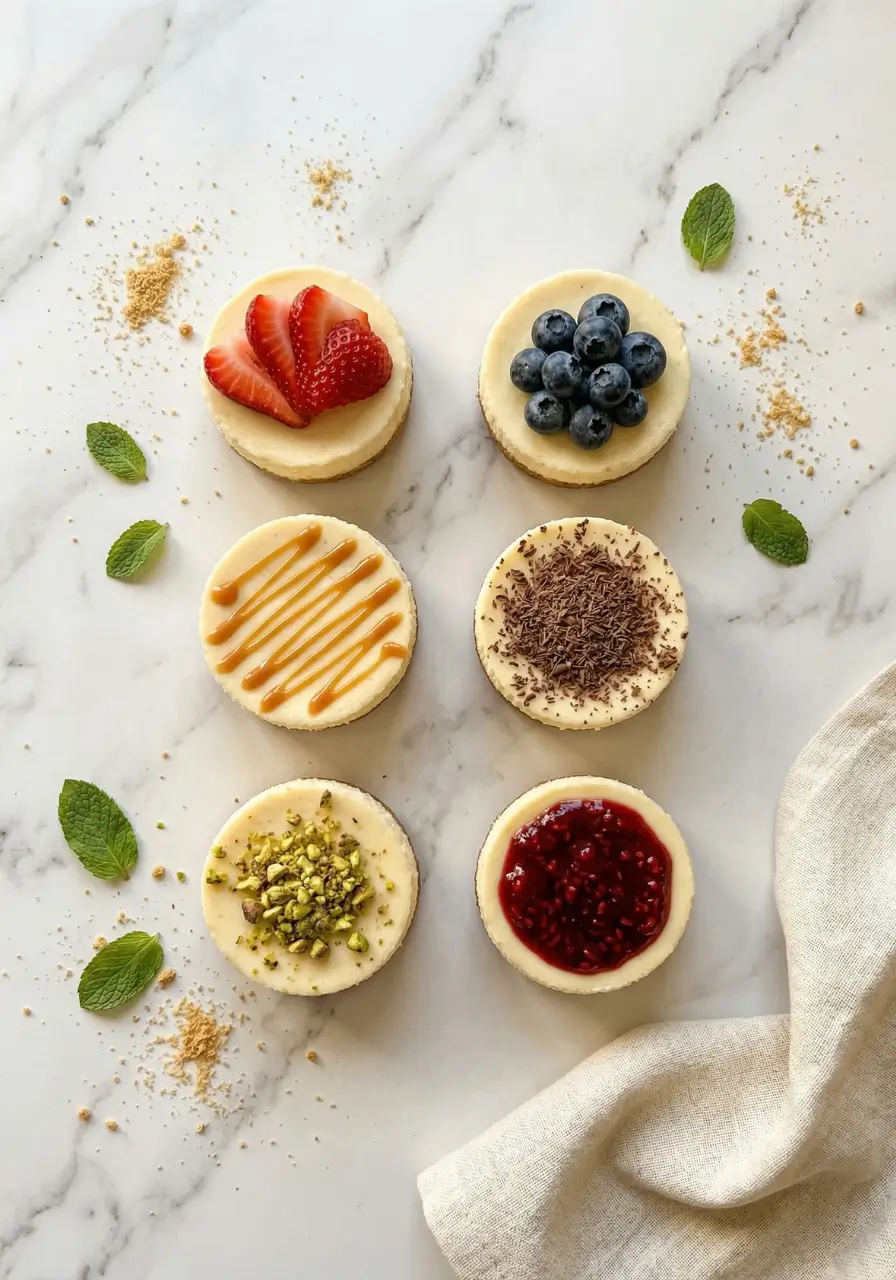
For the toppings, the options are endless! Consider fresh berries, chocolate shavings, caramel sauce, or crushed nuts to elevate your creations.
Timing
| Recipe Timeline | |
|---|---|
| Prep Time | 15 minutes |
| Chill Time | 2-3 hours |
| Total Time | ~2.5 hours |
That’s right, you can have these no-bake mini cheesecakes ready in just 2.5 hours
20% Faster! ⚡
Perfect for last-minute cravings or when you need a quick, impressive dessert!
Step-by-Step Instructions
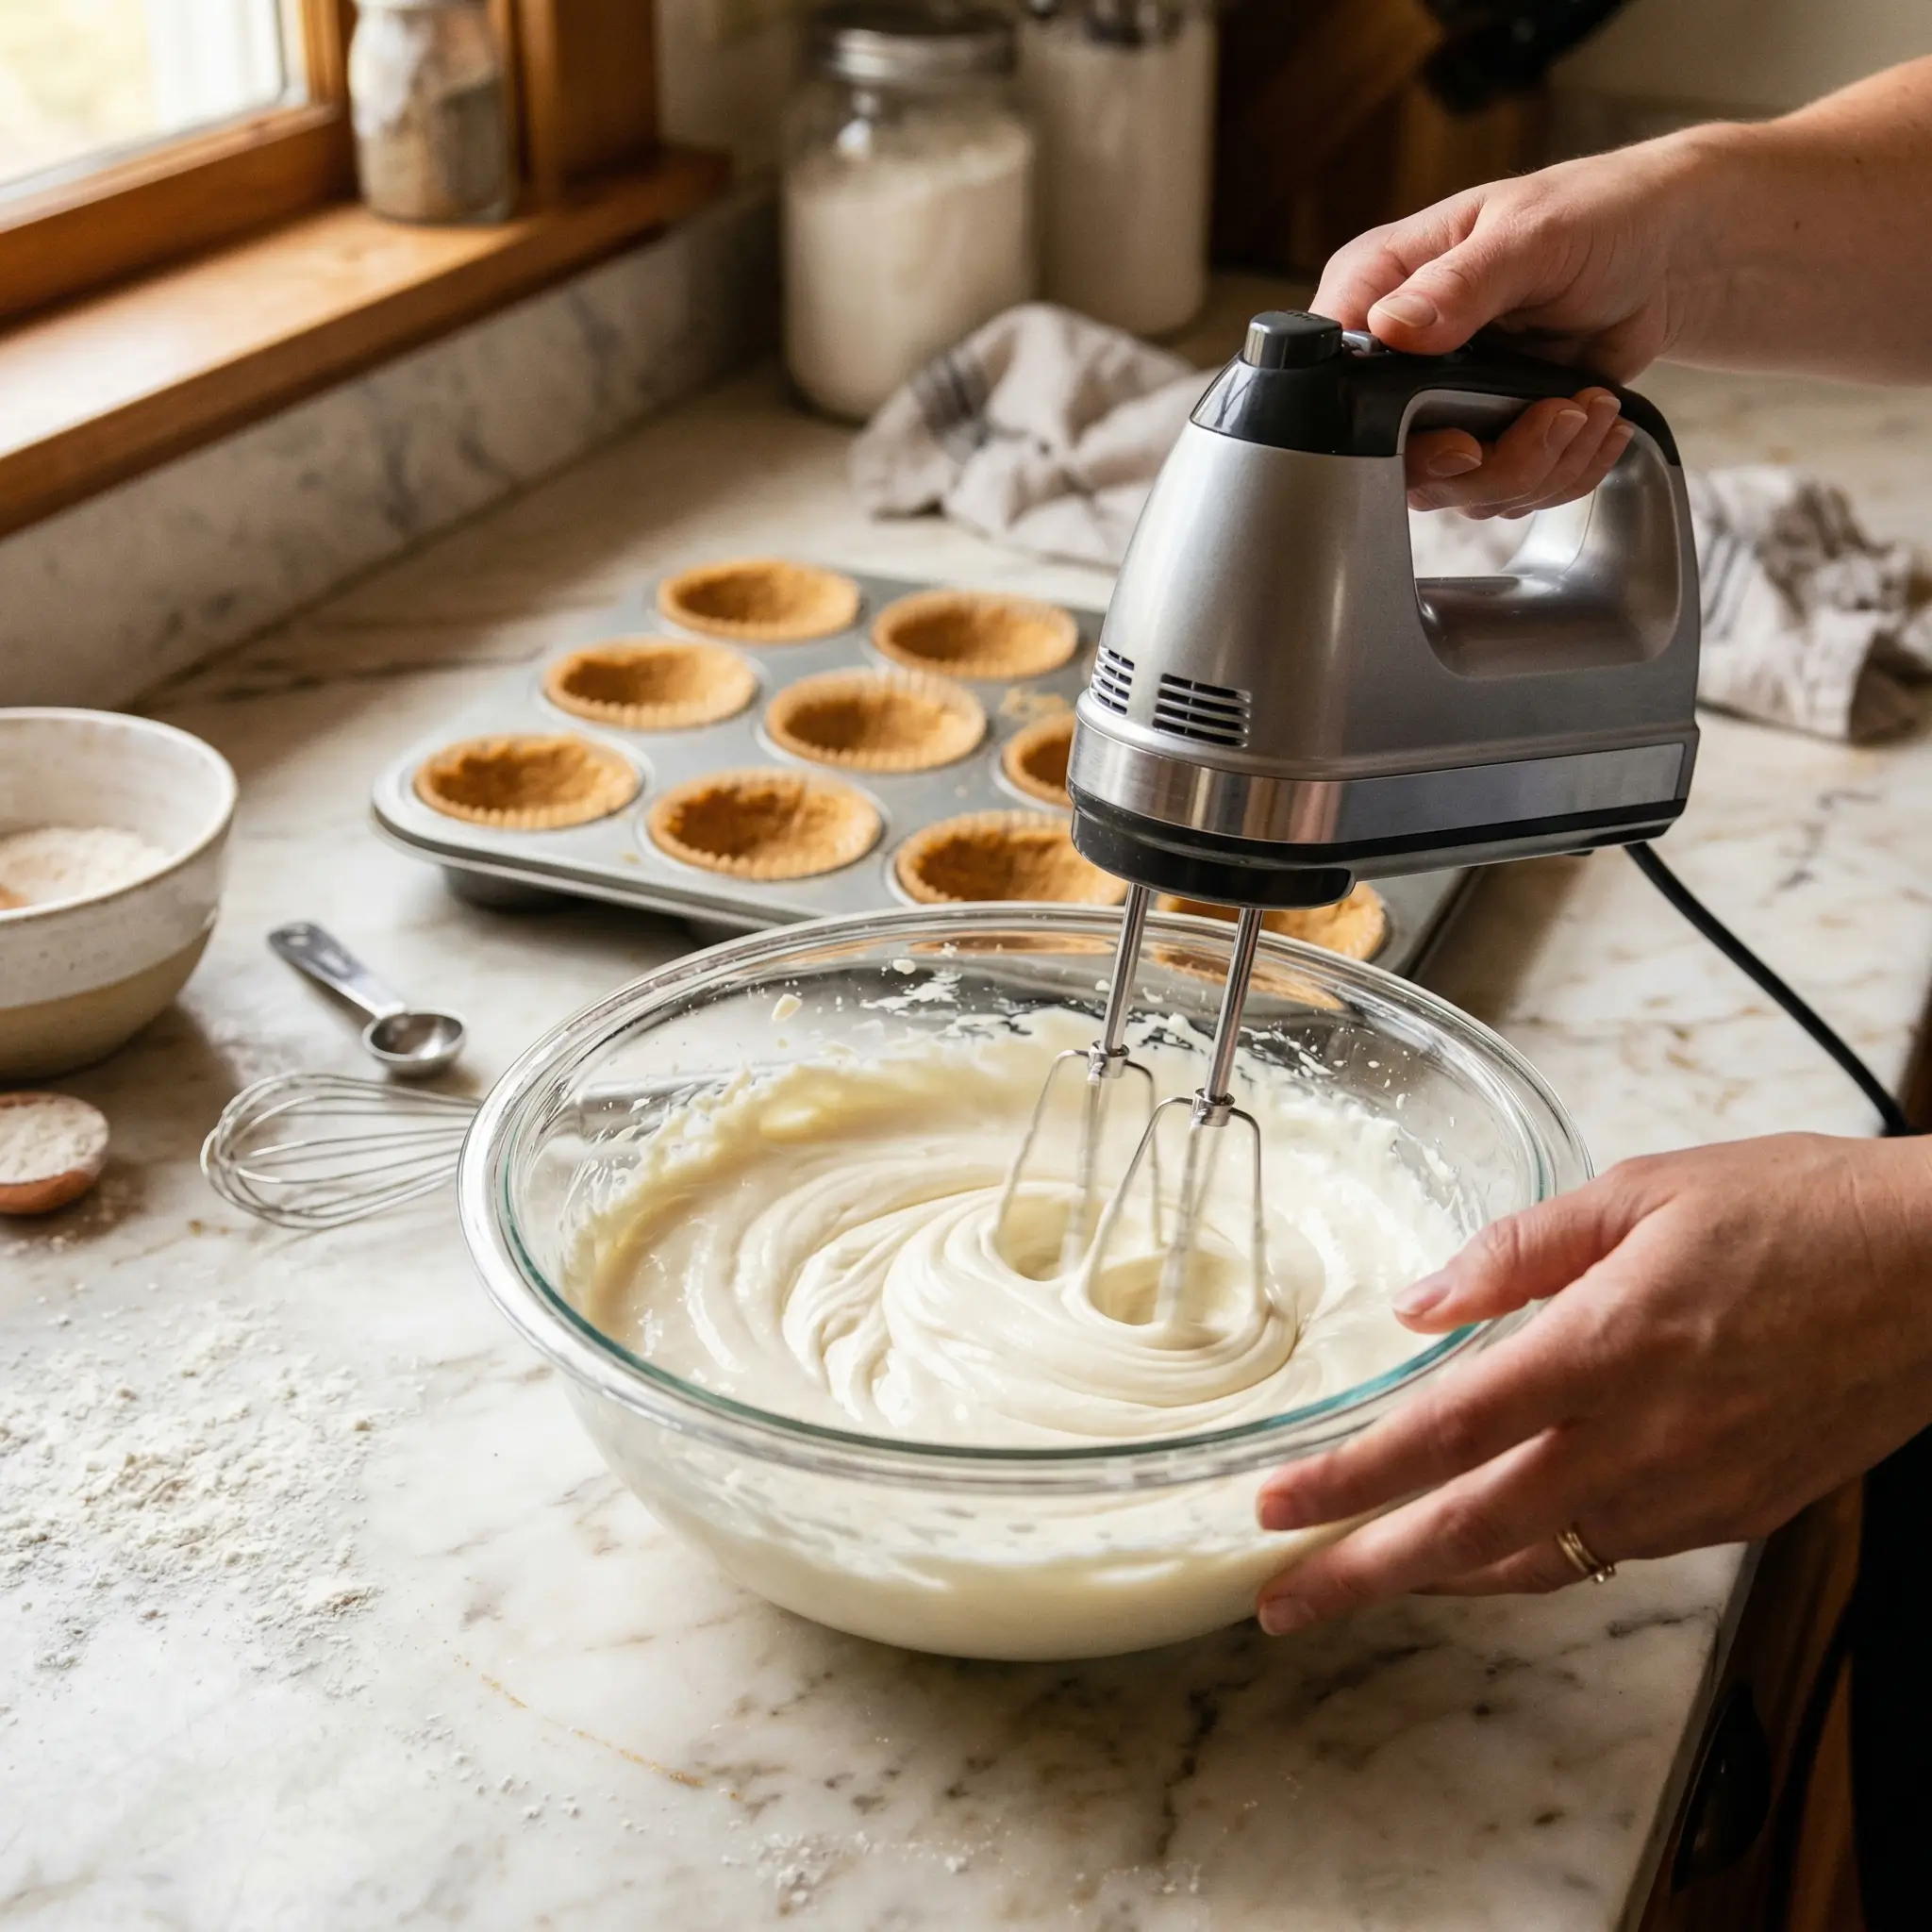
In a large bowl, combine the softened cream cheese, sweetened condensed milk, lemon juice, and vanilla extract. Beat with a hand mixer until smooth and creamy.
In a separate bowl, mix together the graham cracker crumbs and melted butter until well combined.
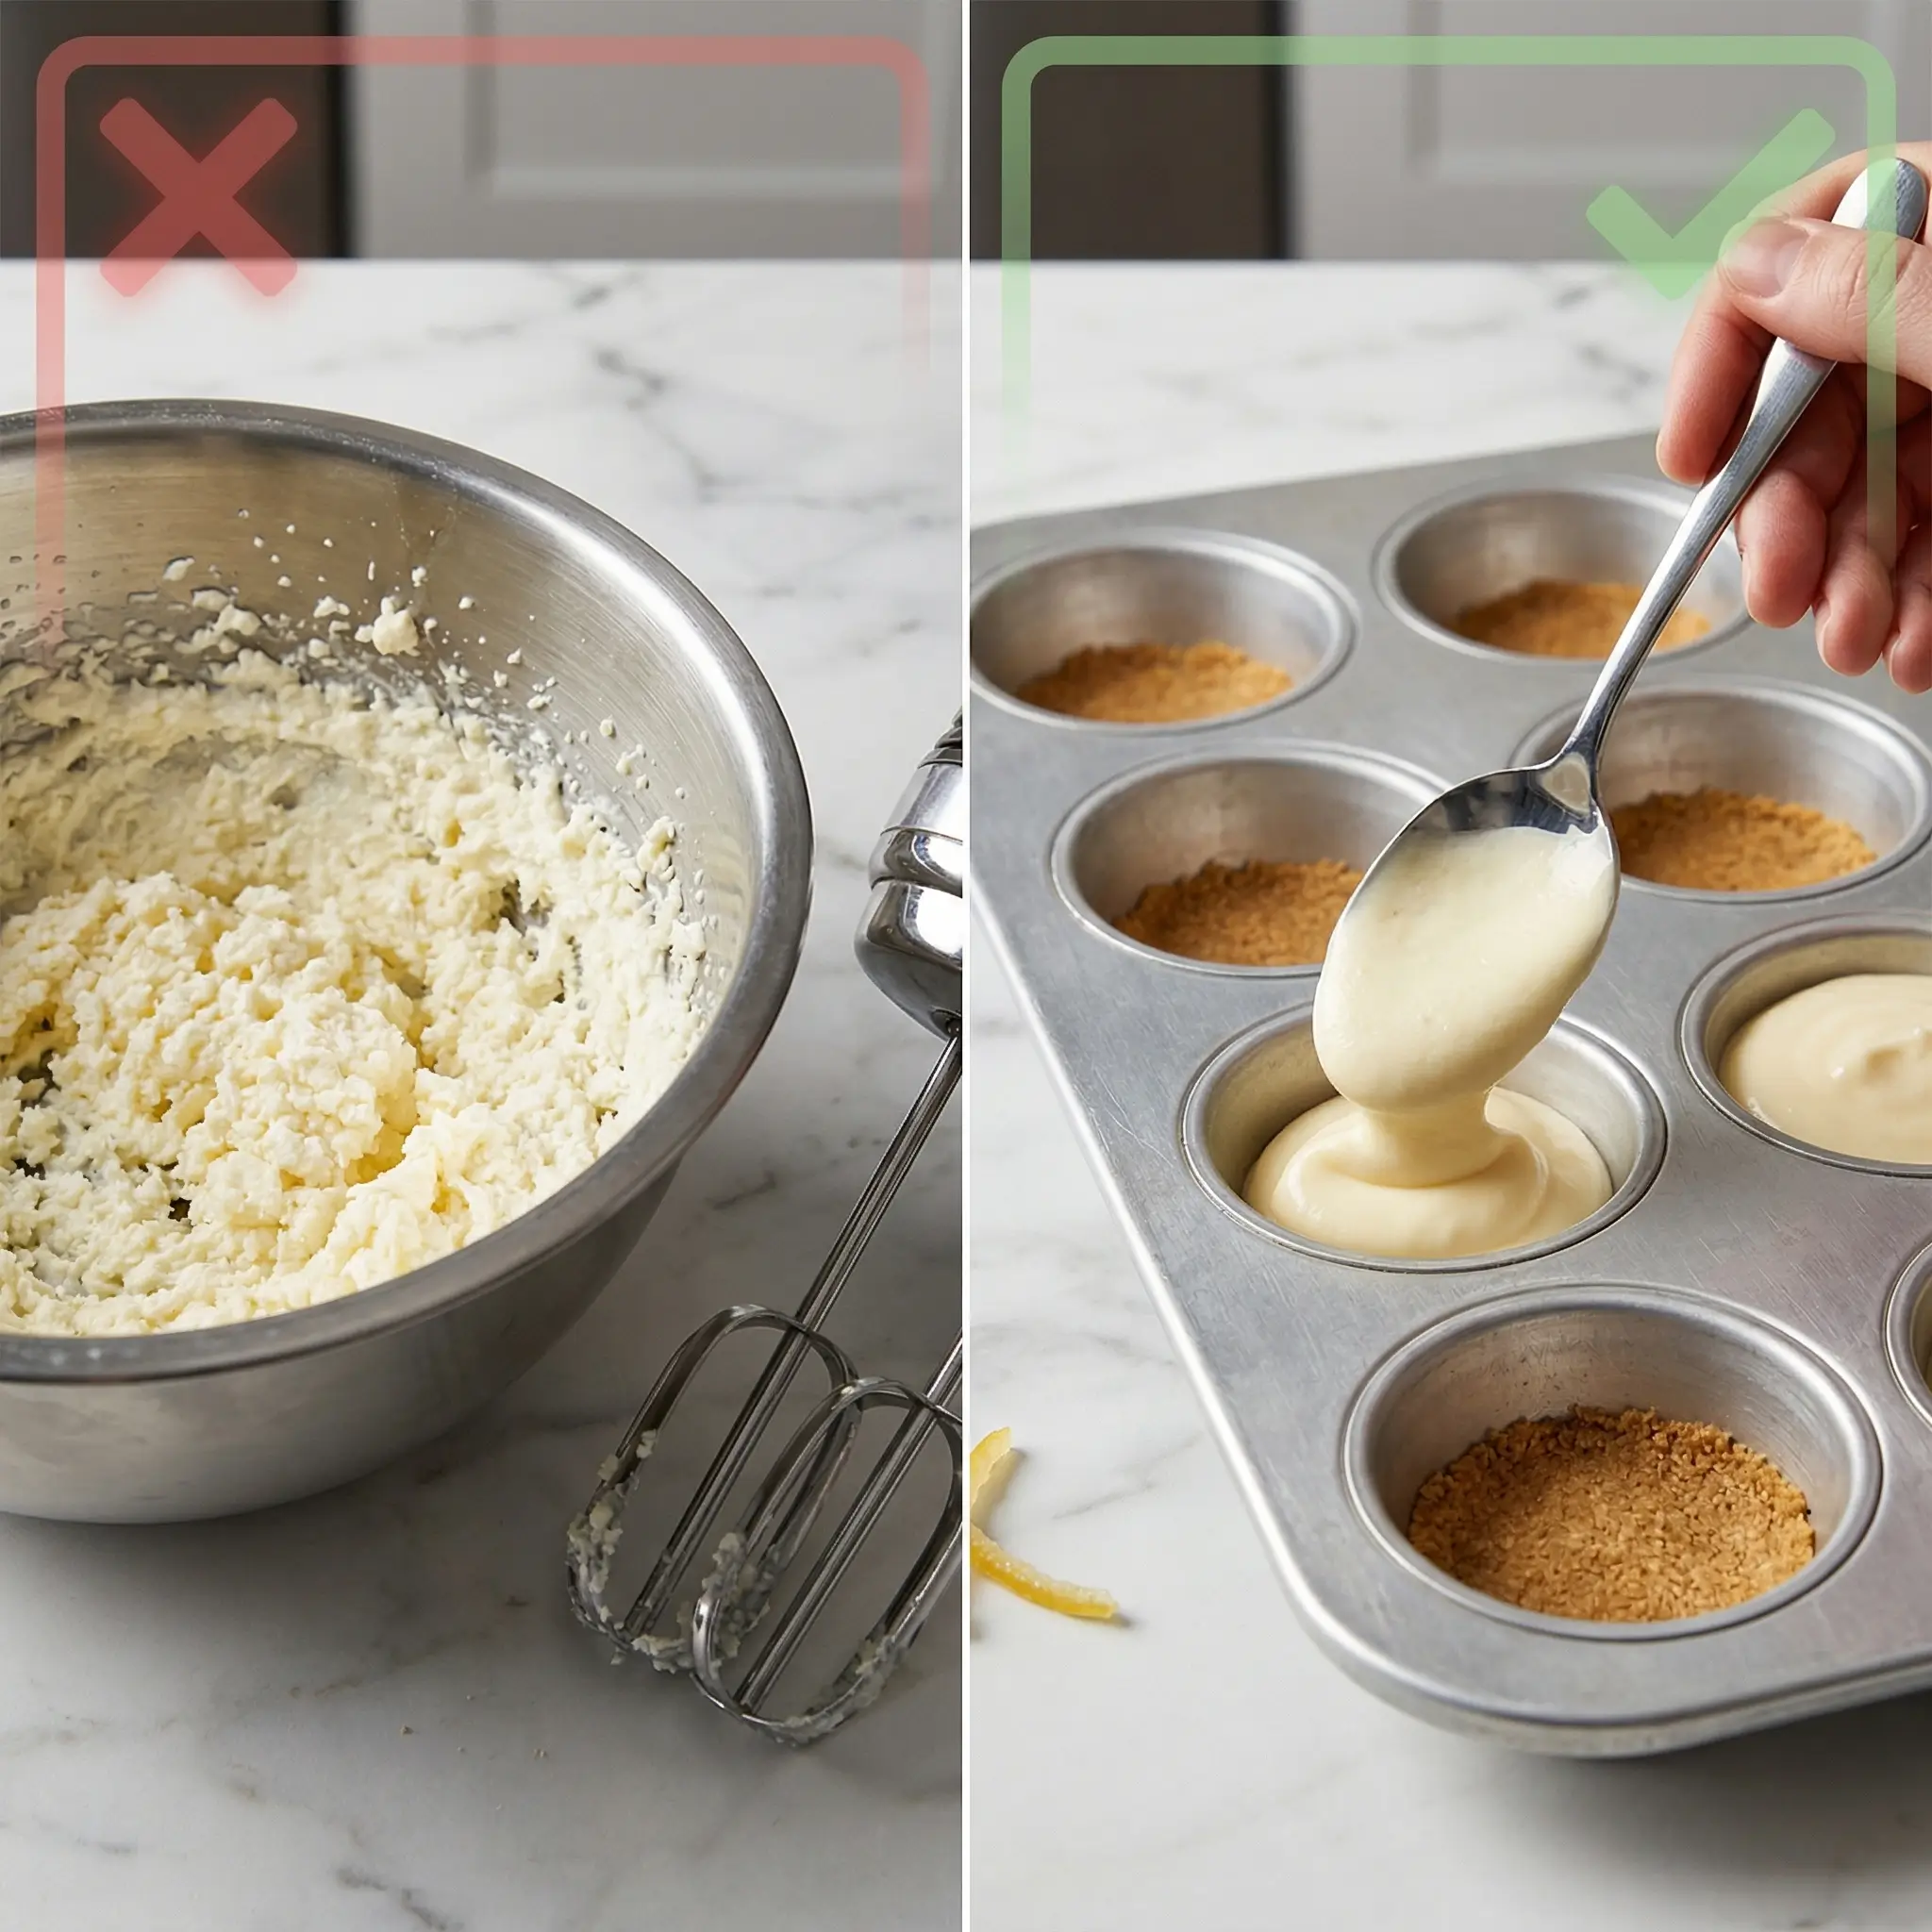
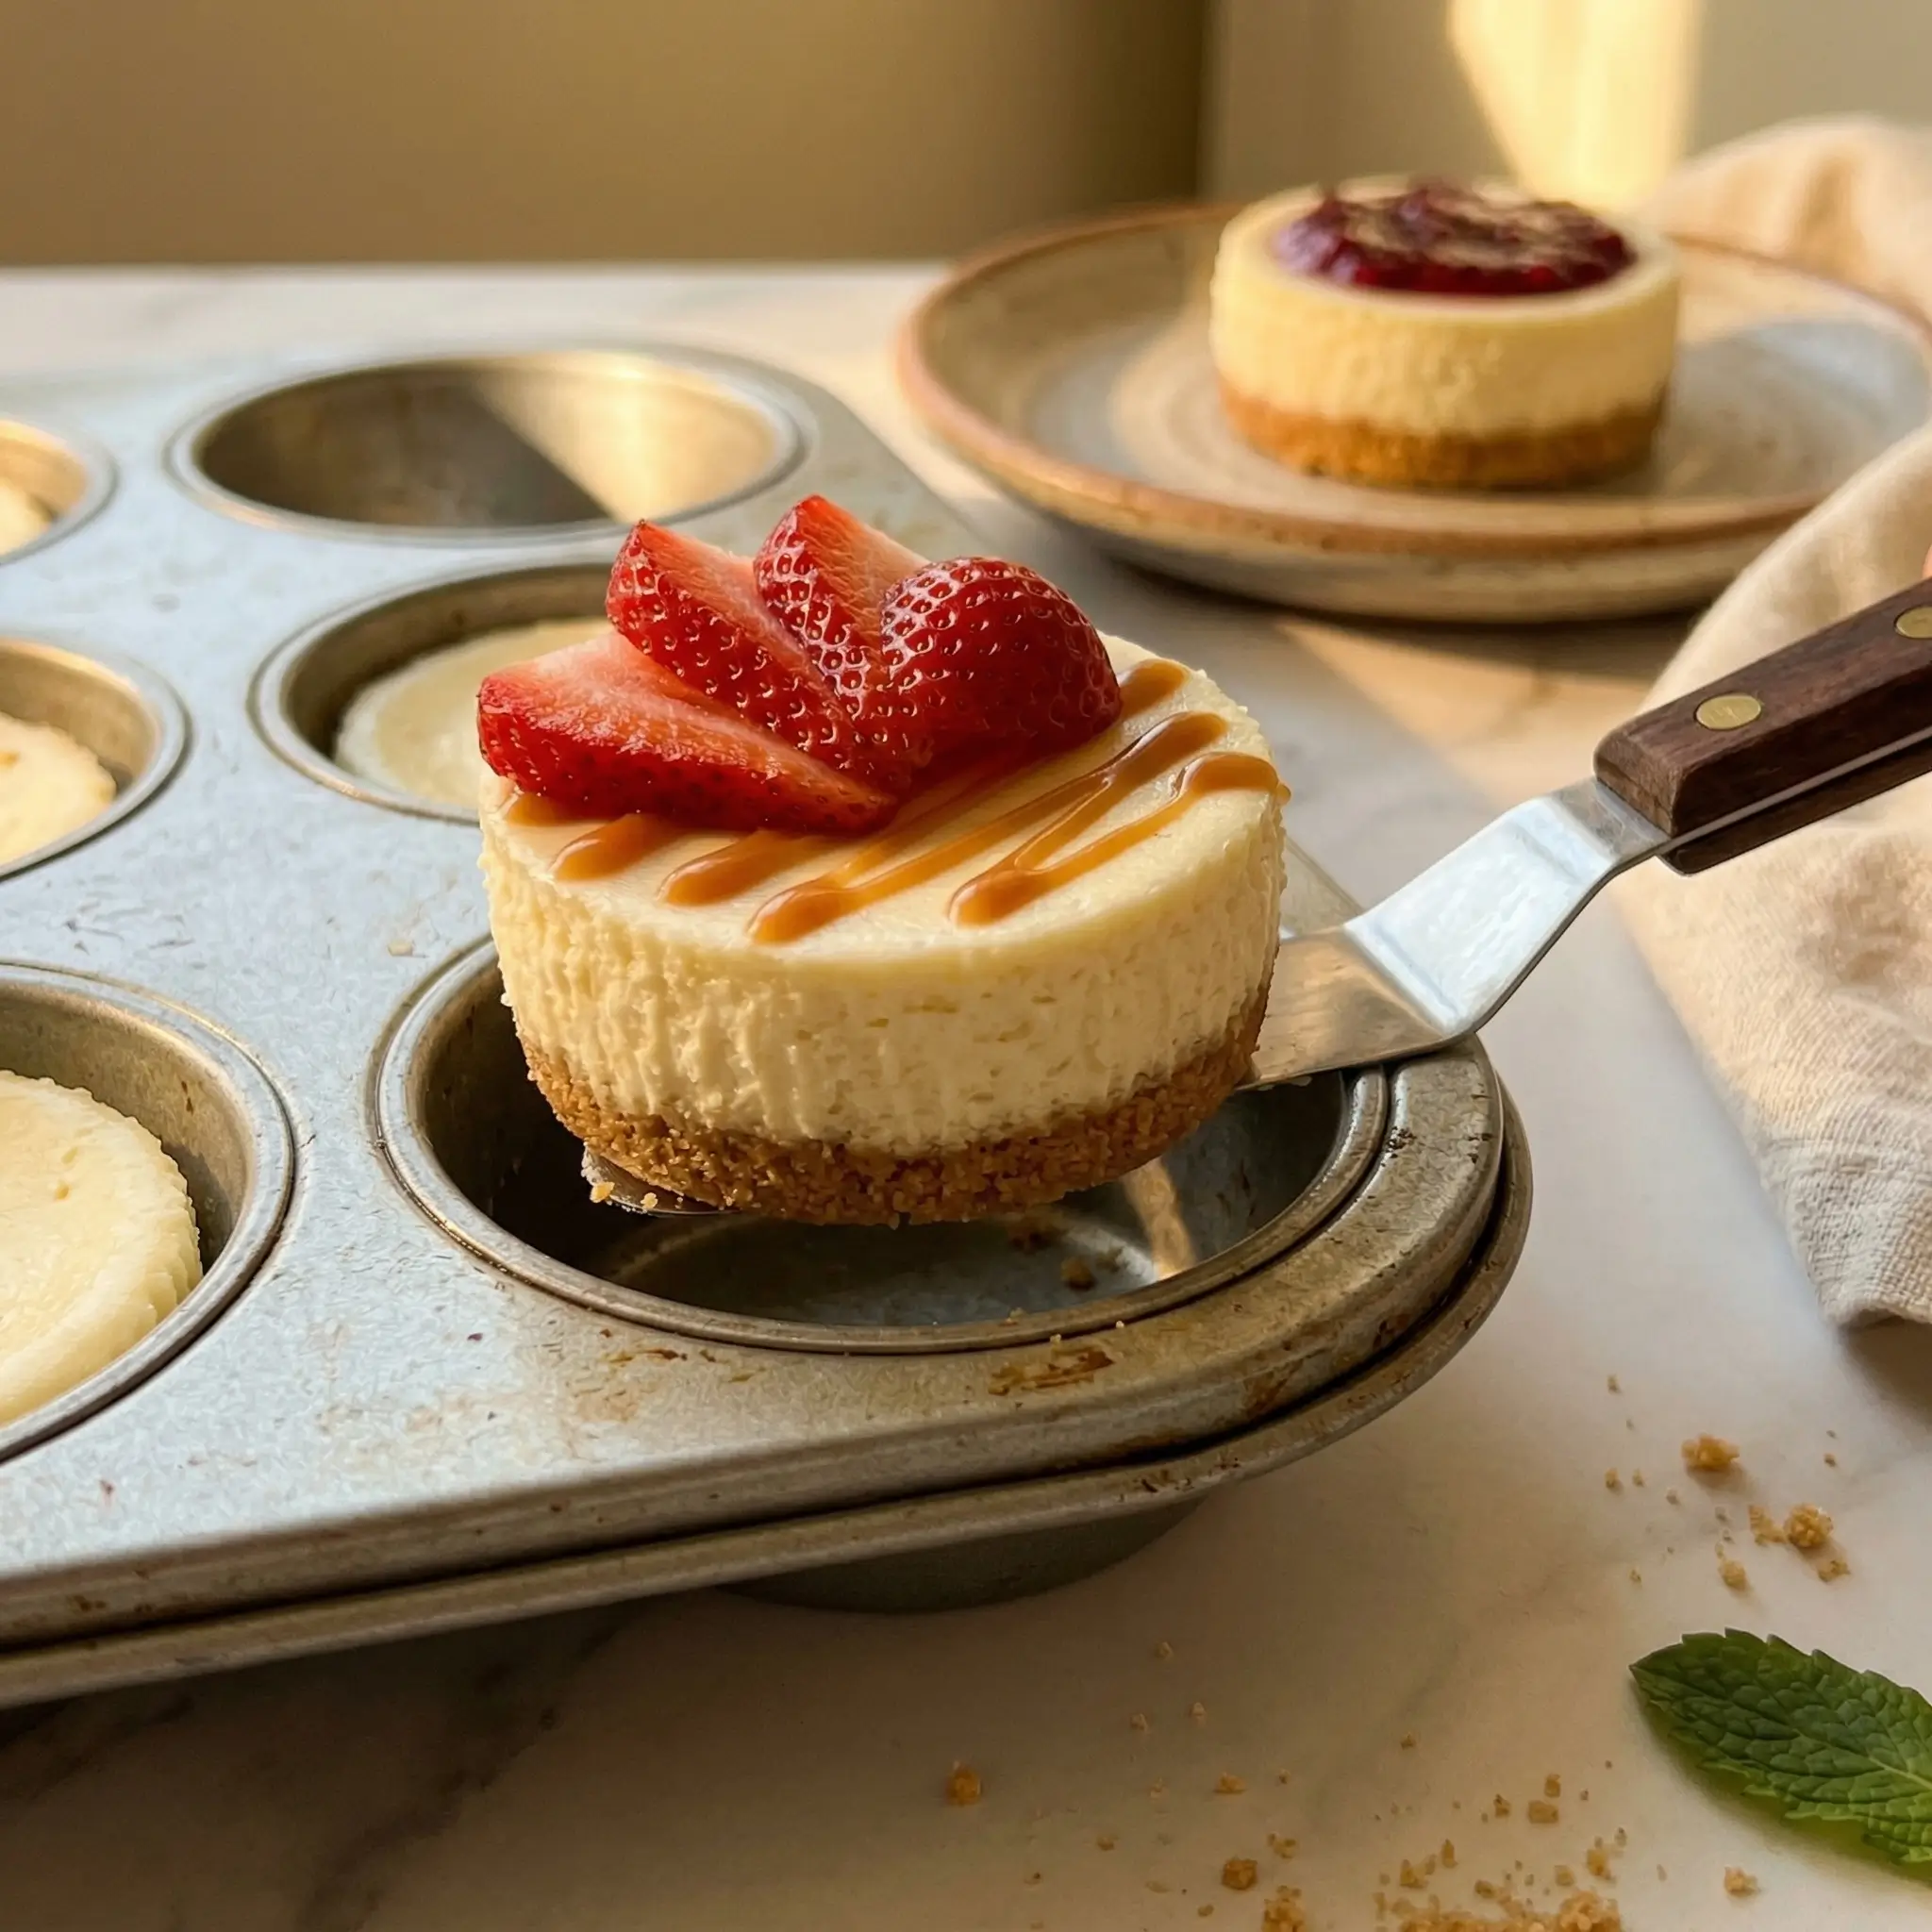
Divide the graham cracker mixture evenly among the cups of a mini cheesecake pan or muffin tin, pressing the crumbs firmly into the bottom.
Spoon the cream cheese mixture over the graham cracker crusts, filling each cup about three-quarters full.
Refrigerate the mini cheesecakes for 2-3 hours, or until set.
Once chilled, top the mini cheesecakes with your desired toppings and serve.
Nutritional Information
Each mini cheesecake contains approximately:
| Per Serving | |
|---|---|
| Calories | 200 |
| Fat | 12g |
| Carbohydrates | 18g |
| Protein | 5g |
Nutritional values are approximate and may vary based on specific ingredients used.
Healthier Alternatives for the Recipe

A few small swaps can lighten these up without wrecking the texture or flavor.
| Ingredient | Healthier Alternatives |
|---|---|
| Cream Cheese Substitutes | Replace up to half the cream cheese with full-fat Greek yogurt. It keeps the filling creamy while cutting some of the fat and calories. Don’t go beyond half — the filling gets too soft and won’t set properly. Low-fat cream cheese also works, but avoid fat-free entirely; it tends to turn watery and the texture suffers. |
| Sweetened Condensed Milk | Sugar-free sweetened condensed milk (brands like Carnation make one) is a straightforward swap — same quantity, same method, noticeably less sugar. If you want to skip condensed milk altogether, you can blend softened cream cheese with a couple tablespoons of honey or maple syrup instead. The result is a slightly less rich filling, but still good. |
| The Crust | Graham crackers are the classic, but they’re not your only option. Almond flour mixed with melted butter and a pinch of salt makes a lower-carb crust that actually holds together well. Rolled oats blended coarsely and mixed with coconut oil give a more wholesome, slightly chewy base. Crushed dates pressed directly into the tin skip the butter entirely and add natural sweetness — though the texture is denser and more like an energy ball than a traditional crust. |
| Toppings | If you’re already making lighter swaps, it’s worth rethinking the toppings too. Fresh fruit adds natural sweetness without extra sugar. A spoonful of nut butter on top adds protein. A light dusting of cacao powder instead of chocolate sauce keeps the chocolate flavor without the added sugar. |
Serving Suggestions
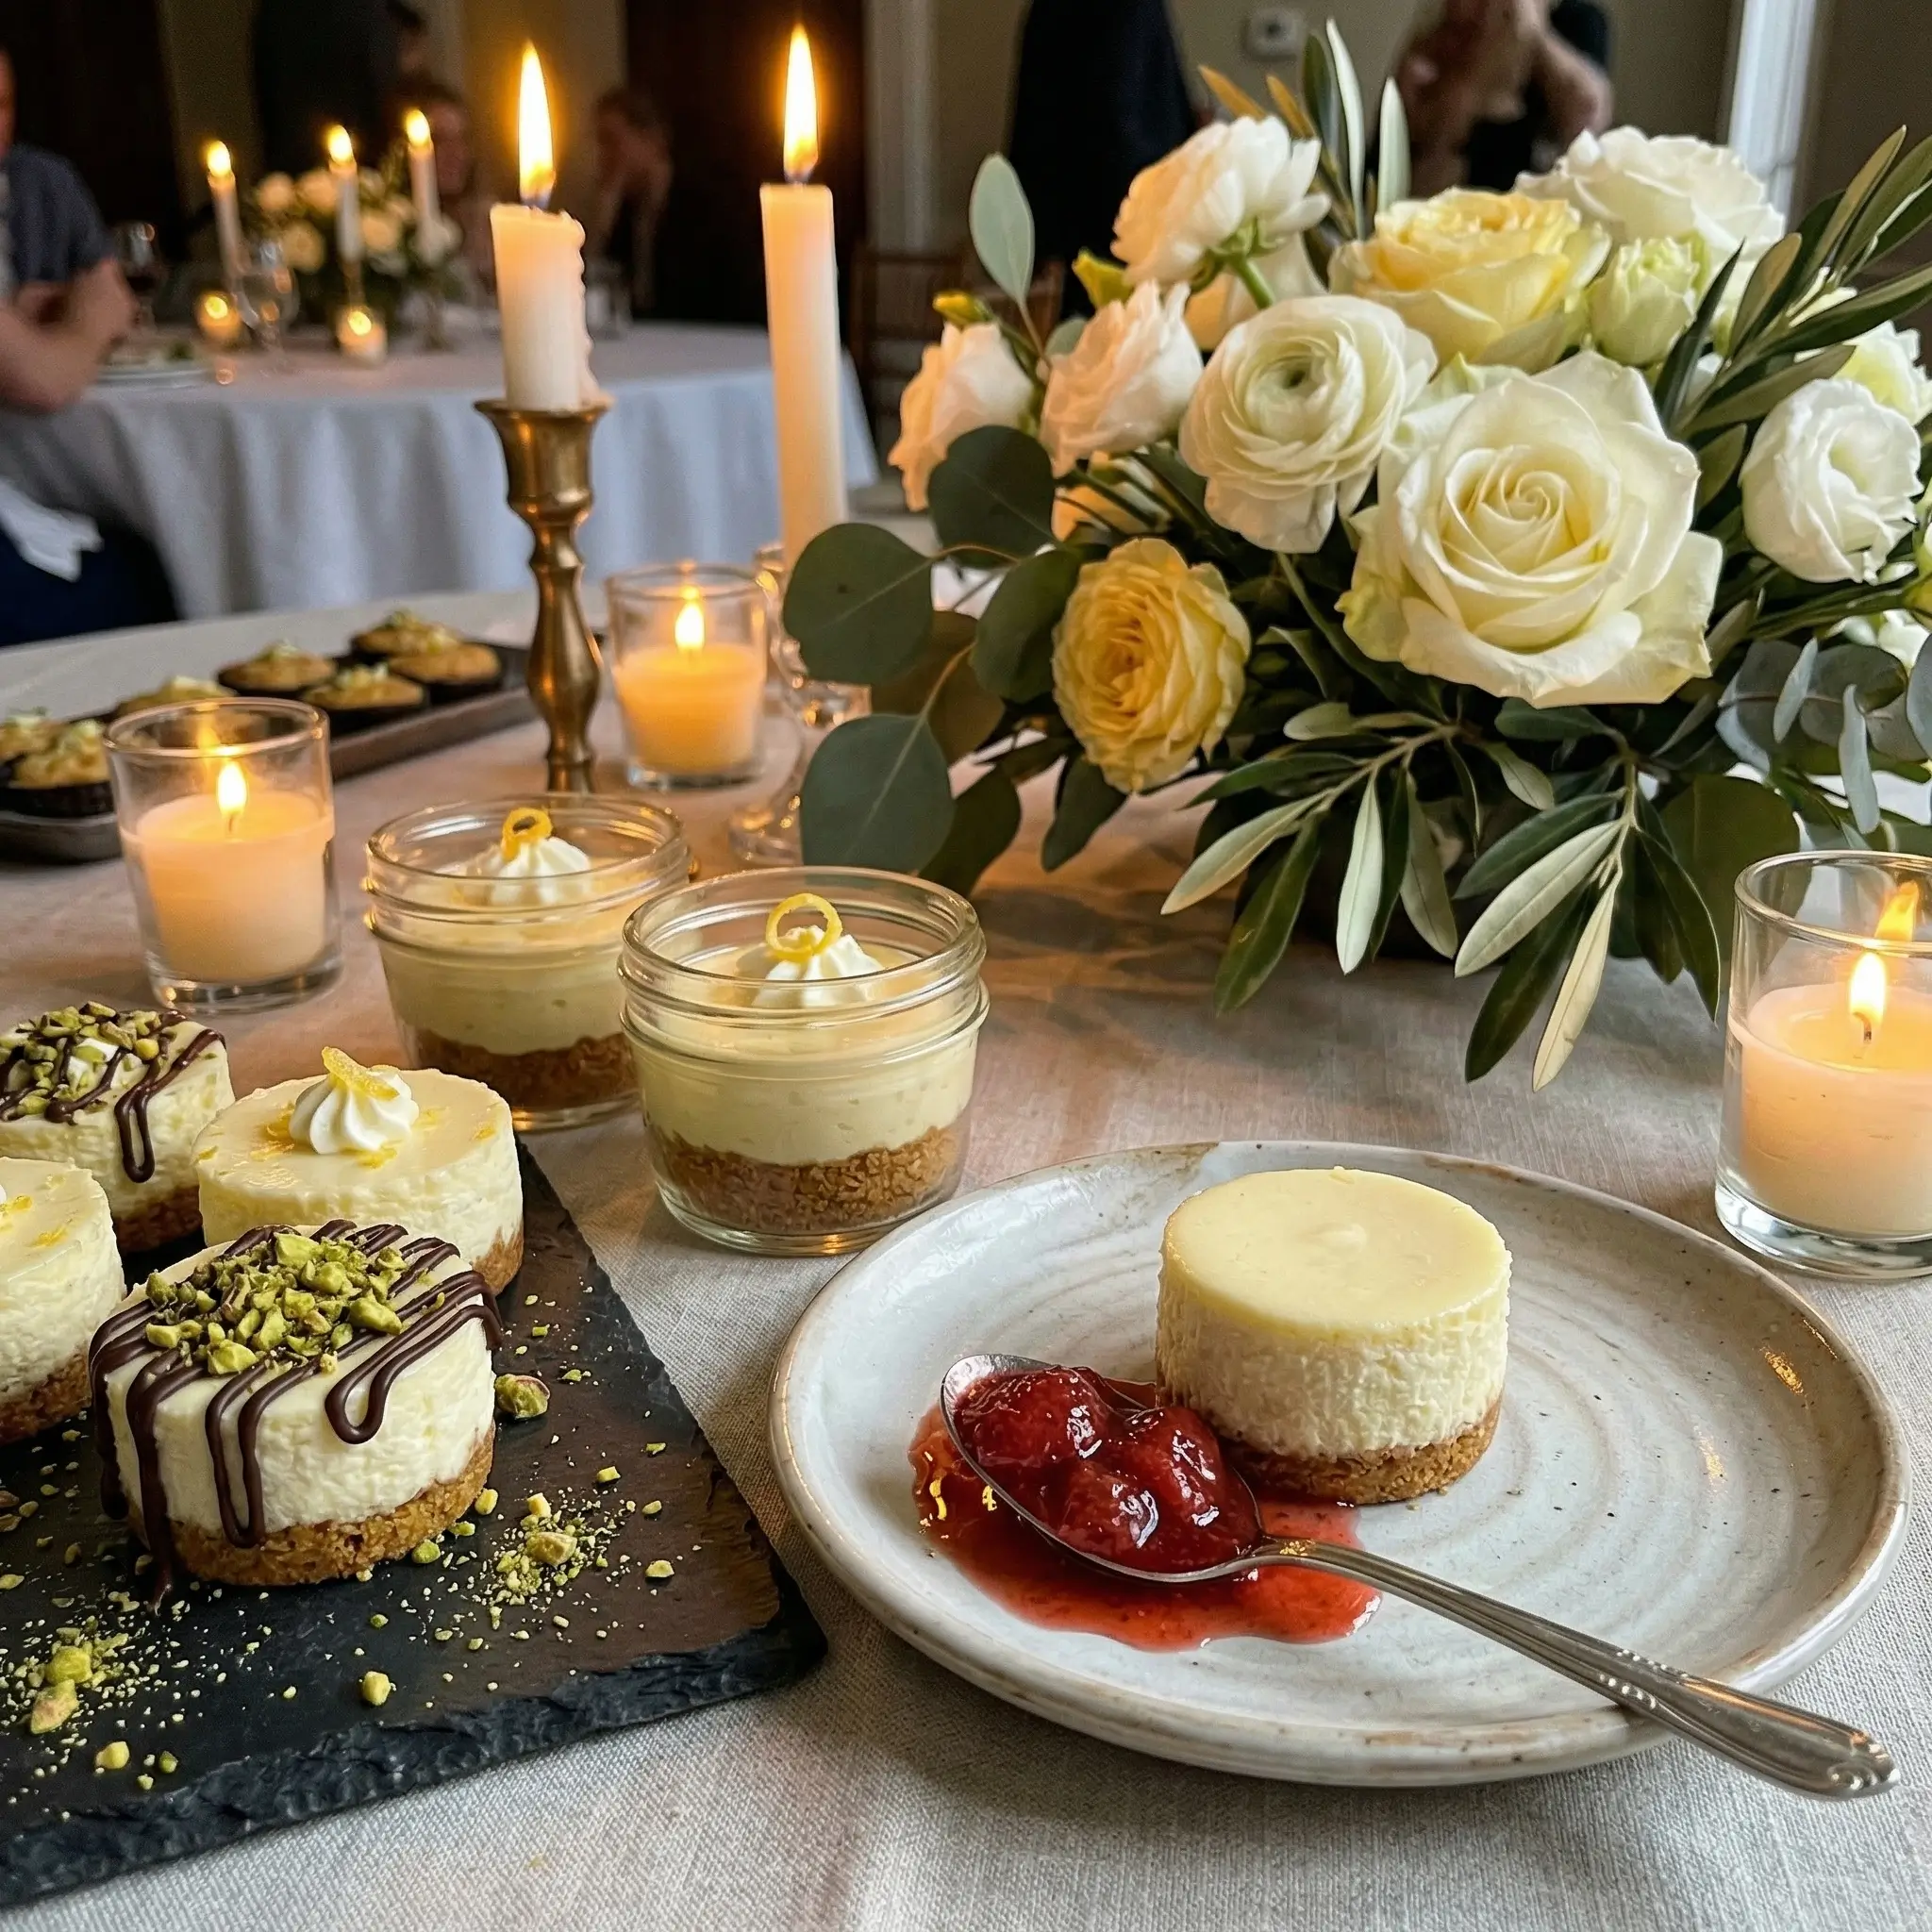
Mini cheesecakes are one of those desserts that work in almost any setting — a casual weeknight treat, a dinner party dessert, a potluck contribution that travels well. How you serve them changes the whole feel.
| Occasion | Serving Ideas |
|---|---|
| For Casual Settings | Keep it simple. Set them out on a flat board or plate with a bowl of fresh berries on the side and let people top their own. Strawberries, raspberries, and blueberries all work well. A small jar of honey nearby doesn’t hurt either. |
| For Dinner Parties or Gatherings | Presentation matters a bit more here. Arrange them on a slate board or white platter, drizzle a little caramel or melted dark chocolate over the tops just before serving, and scatter some crushed pistachios or toasted coconut flakes around them. They look like you put in significantly more effort than you did. |
| Jar or Glass Presentation | Skip the pan entirely and build them directly in small glass jars or dessert glasses — layer the crust at the bottom, spoon the filling on top, and let them chill in the jars. This works especially well for outdoor events or picnics since there’s no risk of them sliding around on a plate. It also makes portion control easier and gives guests something to hold. |
| Seasonal Variations | Match the toppings to the season. In summer, go with fresh mango chunks or a spoonful of strawberry compote. Fall calls for a thin layer of spiced apple butter or a dusting of cinnamon. Around the holidays, crushed peppermint and a drizzle of white chocolate work well and look the part. |
| As Part of a Dessert Spread | If you’re putting out multiple desserts, mini cheesecakes sit well next to things like brownies or cookies without competing too much. Their small size means guests can grab one without committing to a full slice of something, which usually means they disappear faster than you’d expect. |
Take them out of the fridge about 10 minutes before serving. Straight from the fridge they can be a little too firm — a few minutes at room temperature softens the filling just enough to get that smooth, creamy texture you’re going for.
Common Mistakes to Avoid
These three problems come up constantly with no-bake cheesecakes. Each one is easy to fix once you know what’s actually happening.
| # | Mistake & Solution |
|---|---|
| 1 |
Overbeating the Cream Cheese Mixture This is the most common one. The goal when mixing is smooth and creamy — not fluffy. Once you push past that point, the proteins in the cream cheese start to break down and the texture turns grainy and slightly curdled. It won’t look obviously wrong in the bowl, but you’ll feel it in the finished cheesecake.
Mix on medium speed, stop as soon as the lumps are gone, and resist the urge to keep going. If you’re adding the condensed milk, pour it in gradually rather than all at once. A hand mixer works better here than a stand mixer because it’s easier to stop at the right moment. |
| 2 |
Not Chilling Long Enough Two hours is the bare minimum. Three is better. The filling needs time to firm up properly — pulling them out too early gives you a soft, almost mousse-like center that doesn’t hold its shape when you bite into it or try to remove them from the pan.
If you’re in a hurry, the freezer can help. Give them 45 minutes in the freezer instead of 2 to 3 hours in the fridge — but transfer them to the fridge for the last 15 minutes so the texture evens out. A good way to check: gently press the center of one with your fingertip. It should feel firm with just a slight give — not jiggly, not completely rigid. |
| 3 |
Using Cream Cheese That’s Too Cold or Too Warm This one trips people up in both directions. Cold cream cheese straight from the fridge doesn’t blend properly — you end up with lumps no matter how long you mix. On the other side, cream cheese that’s been left out too long gets too soft and the filling won’t set up the way it should.
Let it sit out for 20 to 30 minutes before you start. Room temperature here means slightly cool to the touch, not warm. If you press a finger into the block and it leaves a clean indent without resistance, it’s ready. |
Skipping the parchment or liners in the muffin tin. It doesn’t affect the filling itself, but getting the cheesecakes out cleanly without them is genuinely difficult. Paper liners or a light spray of cooking oil before you press in the crust saves a lot of frustration later.
Storing Tips for the Recipe

No-bake cheesecakes actually store really well, which makes them a great make-ahead dessert. Here’s how to keep them tasting fresh however long you need.
| Method | Storage Instructions |
|---|---|
| 🧊 |
In the Fridge
Up to 5 Days Once set, keep them in an airtight container or cover the pan tightly with plastic wrap. The main enemies here are moisture and fridge odors — cream cheese absorbs surrounding smells quickly, so an open plate in the fridge for a couple of days will start to taste like whatever else is in there. If you’ve already added toppings like fresh fruit or caramel drizzle, those are better added fresh each day rather than stored on top. Fresh berries release juice as they sit and can make the surface of the filling wet and slightly soggy by day two. Dry toppings like crushed nuts or chocolate shavings are fine to leave on. Store them in a single layer if possible. Stacking them risks the tops getting dented or the toppings transferring onto the bottom of the cheesecake above. |
| ❄️ |
In the Freezer
Up to 2 Months These freeze surprisingly well. Let them set fully in the fridge first, then freeze them uncovered on a flat tray for about an hour until solid. Once firm, wrap each one individually in plastic wrap and store them together in a freezer-safe bag or container. The individual wrapping step matters — it prevents them from sticking together and protects the texture. To thaw, move them to the fridge the night before you need them. Give them at least 6 to 8 hours. Don’t thaw at room temperature — the filling softens unevenly and can turn slightly watery on the outside while still being too firm in the center. Add any fresh toppings after thawing, not before freezing. |
| 🎯 |
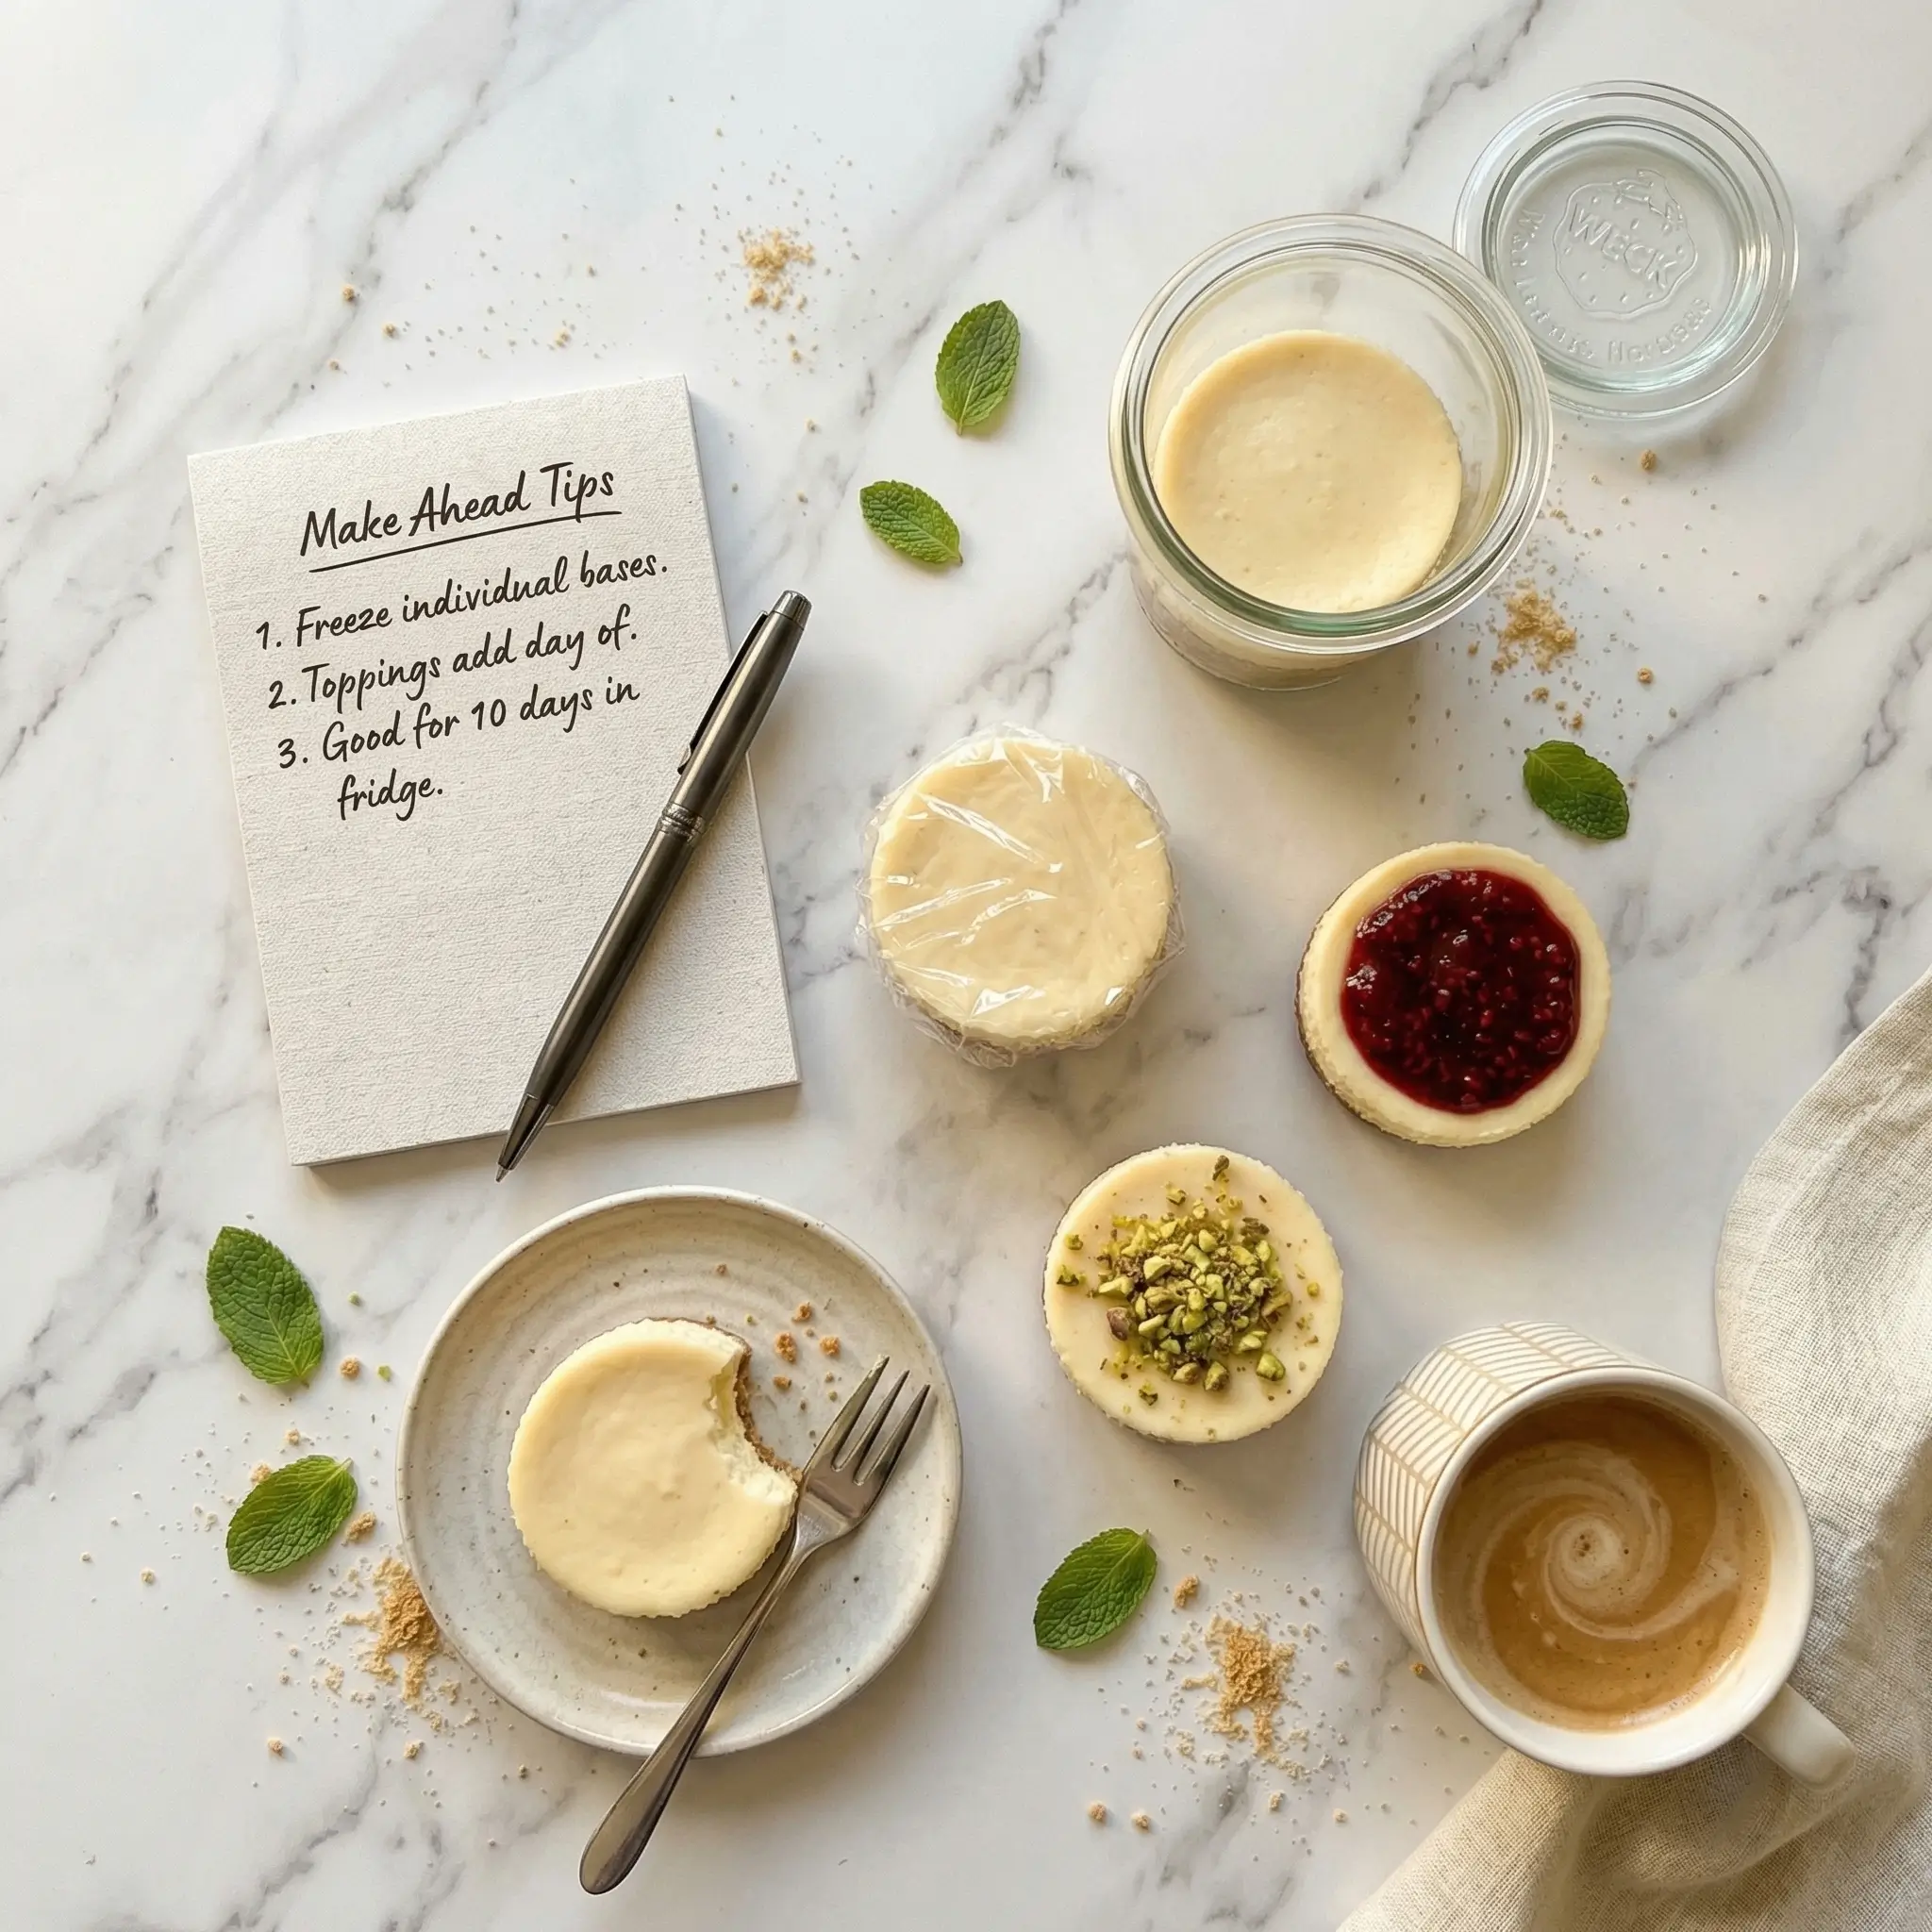
Making Components Ahead of Time
Prep in Stages If you’re planning for an event, you can break the prep into stages across a couple of days. The crust mixture — graham cracker crumbs and melted butter — can be made up to 3 days ahead and kept in a sealed container in the fridge. Press it into the pan whenever you’re ready. The cream cheese filling can be made a day ahead and stored in a covered bowl in the fridge. Give it a brief stir before spooning it into the crusts — it firms up slightly overnight but loosens again with a quick mix. Fully assembled cheesecakes without toppings can be made up to 2 days ahead and kept covered in the fridge. This is actually the best approach for dinner parties — everything is done, nothing to rush, and the extra chill time only improves the texture. |
The filling stays creamy for the first 2 to 3 days. By day 4 or 5 it’s still safe to eat but the texture gets slightly denser and the crust can soften a bit from the moisture in the filling. Not bad, just different. If you know you won’t finish them within 3 days, freezing a portion early is worth doing rather than waiting until the last minute.
Conclusion
No-bake mini cheesecakes are the perfect solution for satisfying your sweet tooth without the hassle of turning on the oven. With six delicious ideas to choose from, you’re sure to find a new favorite. So, what are you waiting for? Grab your ingredients and start whipping up these quick and creamy treats today!
FAQs
Q: Can I make these mini cheesecakes ahead of time ?
- A : Absolutely! The no-bake mini cheesecakes can be made up to 5 days in advance and stored in the refrigerator.
Q: Can I use a different type of crust besides graham crackers ?
- A : Definitely! Feel free to experiment with different crust options, such as crushed Oreos, vanilla wafers, or even a nut-based crust.
Q: Can I freeze the mini cheesecakes ?
- A : Yes, you can freeze the no-bake mini cheesecakes for up to 2 months. Just be sure to thaw them in the refrigerator before serving.
Q: Do I have to use a mini cheesecake pan, or can I use a regular muffin tin ?
- A : You can use a regular muffin tin to make these no-bake mini cheesecakes. Just be sure to adjust the portion sizes and chilling time accordingly.
Your Feedback Helps Us Grow!
There are no reviews yet. Be the first one to write one.