Best 5 Fudgy Caramel Layered Brownies : Easy Recipe
Table of Contents
Introduction: The Ultimate Guide to Fudgy Caramel Layered Brownies
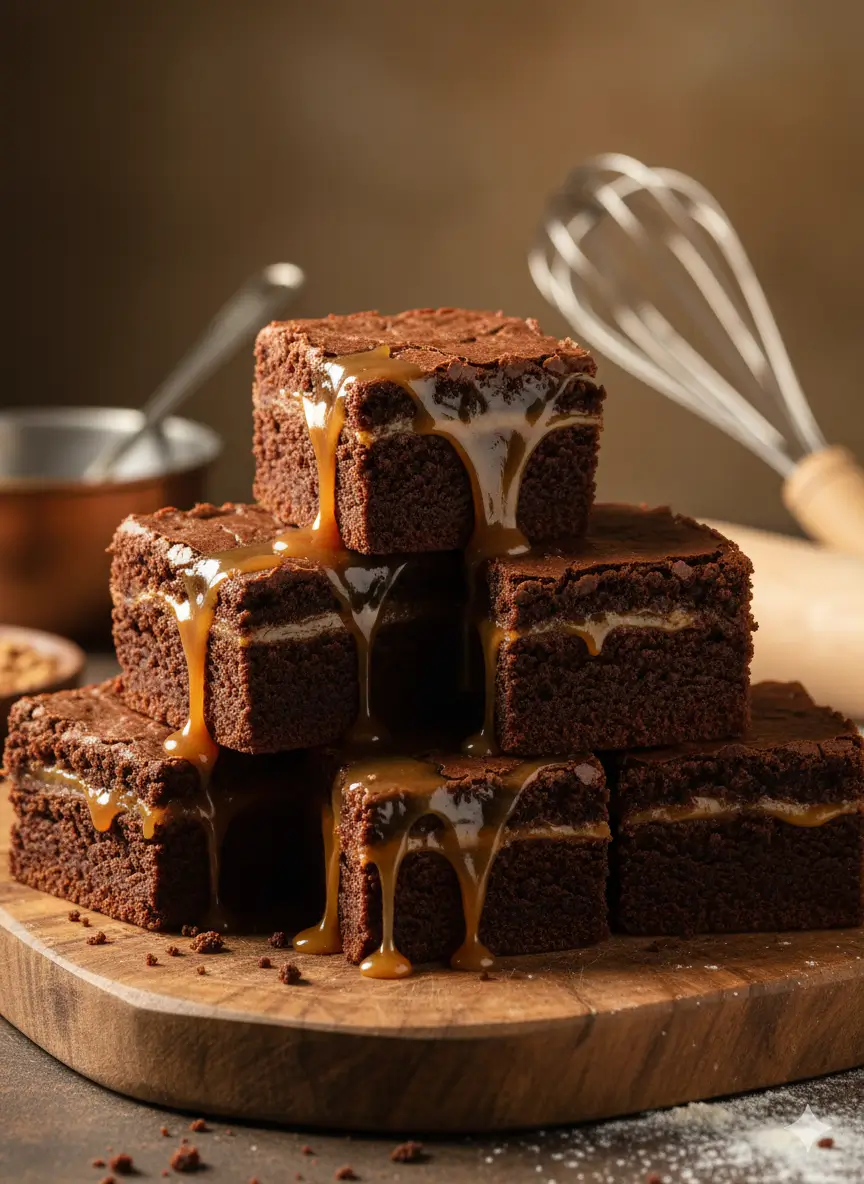
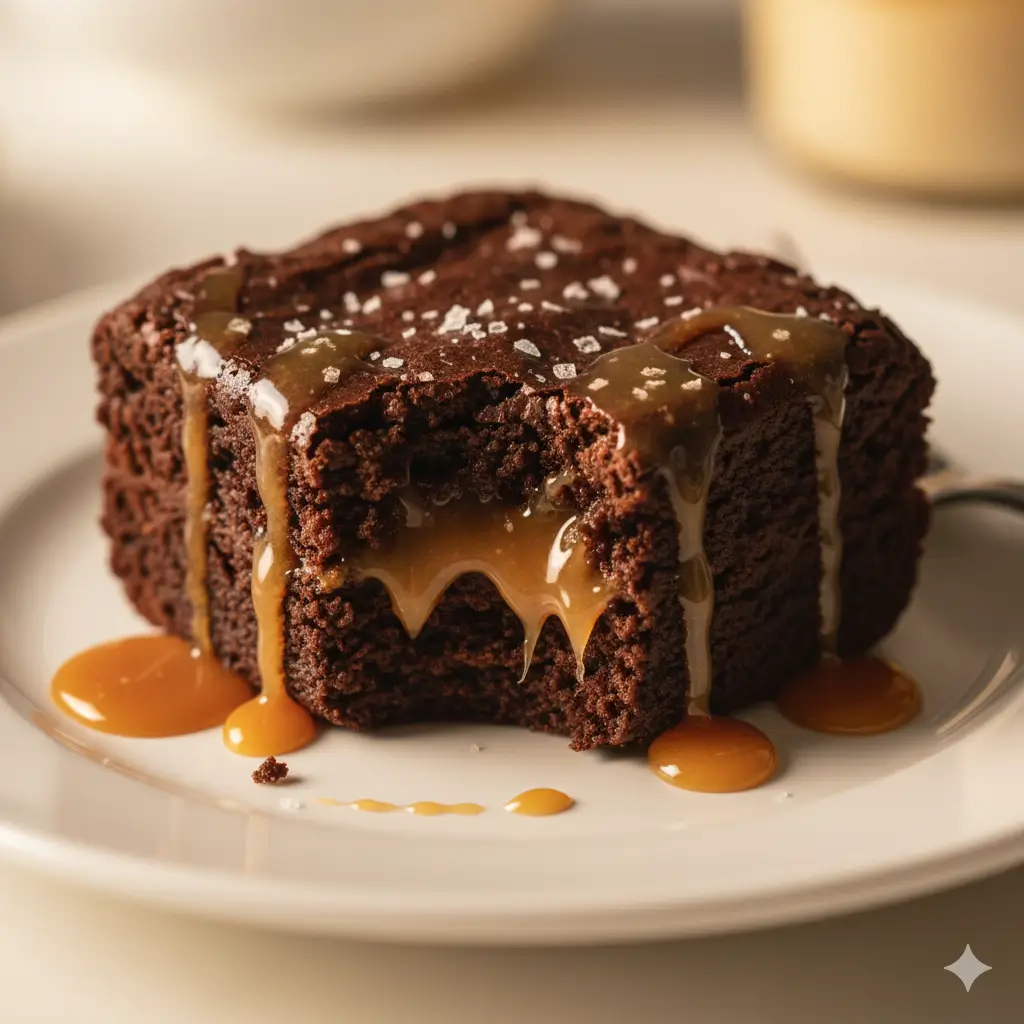
There are desserts, and then there is the fudgy caramel layered brownie. It’s the zenith of indulgence—a symphony of textures where a crisp, crinkly top yields to a dense, moist, chocolate base, followed by a gooey, rich caramel core. If you crave that combination of deep cocoa intensity and buttery sweetness, you’ve found your ultimate guide.
We understand that achieving the perfect, non-seeping caramel layer alongside a truly fudgy base can seem daunting. That’s why we’ve distilled decades of baking expertise into this single, definitive easy recipe. Not only will we teach you the non-negotiable science behind perfect layers, but we’ll also show you the best 5 fudgy caramel layered brownies variations, ensuring you have a new favorite for every occasion. Prepare yourself for baking success and dessert glory!
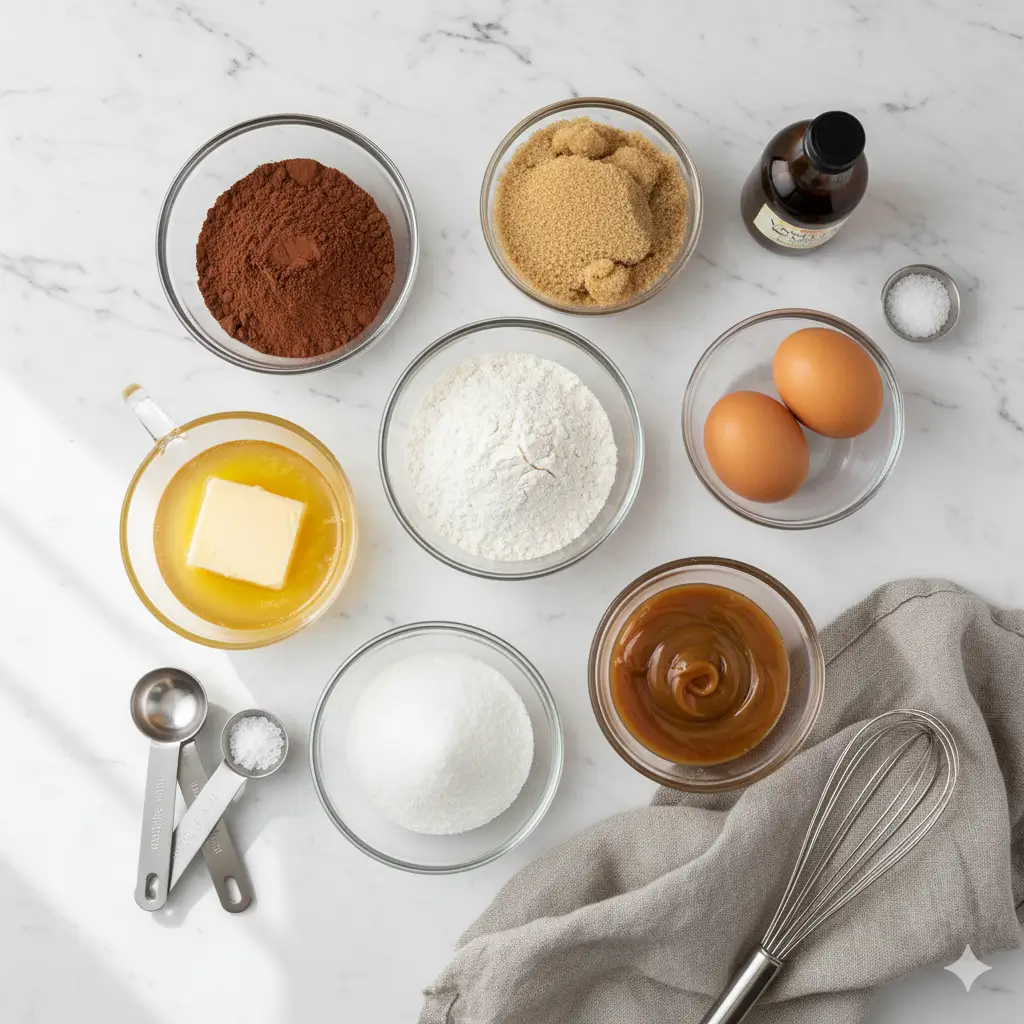
Essential Ingredients List
The success of any great dessert recipe lies in using quality ingredients and treating them correctly. This simple list will form the foundation for every one of our five best brownie variations.
Dry Ingredients
| Ingredient | Quantity | Notes |
|---|---|---|
| All-Purpose Flour | 1 cup | Spooned and leveled—do not scoop! |
| Granulated Sugar | 1 cup | For sweetness and structure. |
| Light Brown Sugar | 1/2 cup, packed | Adds moisture and chewiness. |
| Unsweetened Cocoa Powder | 1/2 cup | Use high-quality Dutch-process for a rich color and flavor. |
| Salt | 1 teaspoon | Balances the sweetness and amplifies the chocolate flavor. |
Fats and Liquids
| Ingredient | Quantity | Notes |
|---|---|---|
| Unsalted Butter | 1/2 cup (1 stick) | Melted, not just softened — key for fudgy texture. |
| Large Eggs | 2 | Room temperature is best for better emulsification. |
| Vanilla Extract | 1 teaspoon | Use pure vanilla only for the best flavor. |
The Caramel Component
| Ingredient | Quantity | Notes |
|---|---|---|
| Pre-made Caramel | 1 cup | Use a thick, good quality sauce, or follow our easy homemade instructions below. |
| Optional: Flaky Sea Salt | 1/2 teaspoon | To be sprinkled over the caramel layer. |
The Fudgy Brownie Base : Secrets to a Perfect Foundation
Before we get to the caramel, we must master the base. What makes a brownie truly fudgy versus cakey isn’t magic; it’s basic baking science.
Fudgy vs. Cakey : The Fat and Flour Ratio
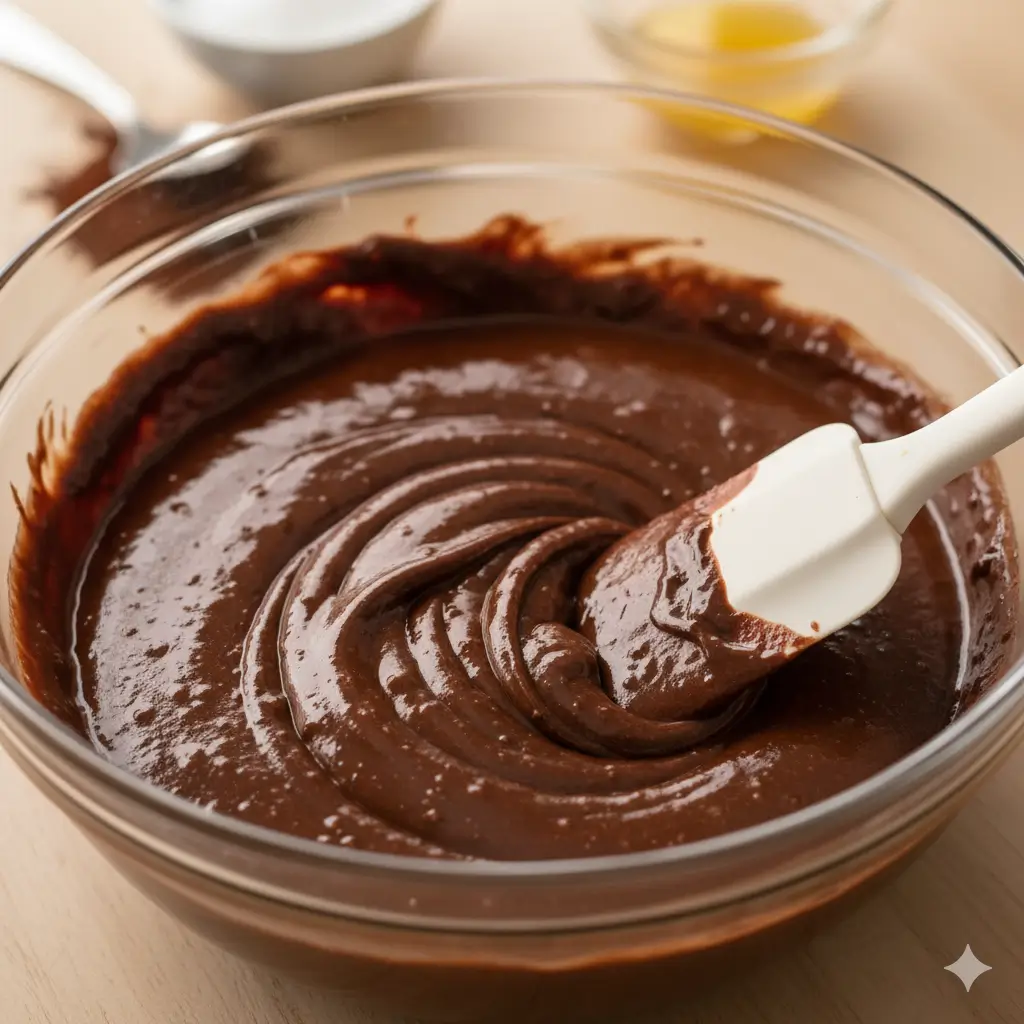
This is the most critical E-E-A-T signal: More fat and less flour equals fudgy. We rely on melted butter (our primary fat source) rather than creaming butter and sugar. Melted butter creates a dense, moister crumb because it allows the sugar to dissolve completely. By keeping the flour ratio relatively low, we limit gluten development, ensuring that satisfyingly heavy, almost truffle-like texture that defines the best brownies. If your brownies are dry or tough, you likely used too much flour or mixed too long.
Cocoa or Chocolate ? Choosing Your Depth of Flavor
While some recipes call for melted chocolate, relying primarily on high-quality Dutch-process cocoa powder creates a deeper, less sweet, and more intense chocolate flavor, which pairs beautifully with the richness of the caramel. If you desire an even richer flavor, you can substitute 1/4 cup of the cocoa powder with 2 ounces of melted, unsweetened baking chocolate, but be sure to cool the chocolate slightly before adding it.
The Mix Factor : Knowing When to Stop
Once you introduce the flour and cocoa mixture, stop mixing the instant you see no dry streaks. Over-mixing develops gluten, which is the enemy of the fudgy texture. Use a rubber spatula, not a mixer, and stir just until combined. This is a non-negotiable rule for perfect homemade brownies.
The Core Caramel Layer Technique
The caramel layer is the star, but it can quickly ruin your brownies if it sinks or seeps into the bottom layer. These secrets ensure a clean, distinct layer every time.
Store-Bought vs. Homemade Caramel
For the ultimate easy recipe, a high-quality, thick store-bought caramel sauce is perfectly acceptable. Look for brands specifically labeled “topping” or “dip” rather than “syrup,” as the viscosity needs to be high to prevent sinking. If you opt for homemade, make a thick, stovetop caramel (sugar, water, butter, and cream) that is cooled to room temperature before use. Homemade offers superior flavor, but store-bought offers speed.
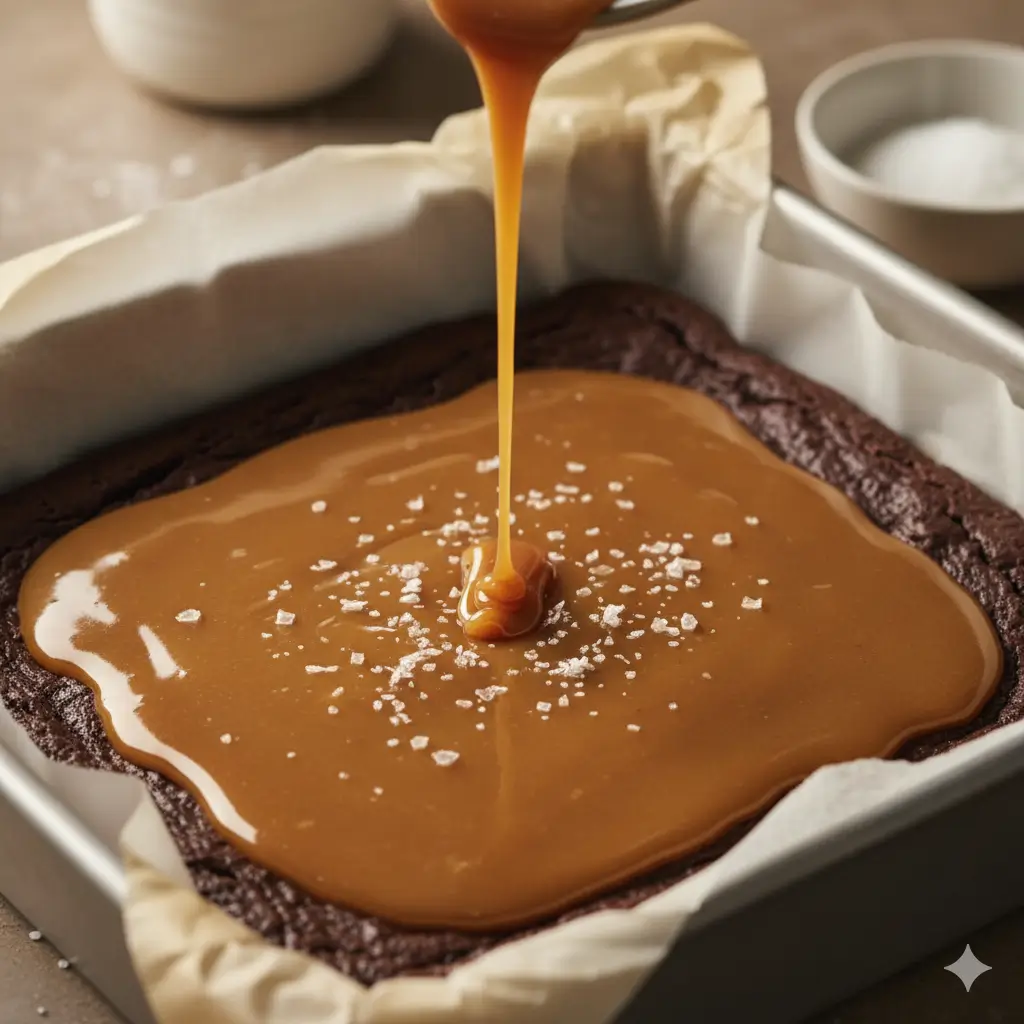
The Crucial Pour and Freeze Technique
This is the second most vital step in making layered caramel brownies. Once your caramel is ready :
| Step | Action | Details |
|---|---|---|
| Thicken | Mix in 1 tablespoon of flour or cornstarch per cup of caramel (optional). | Helps prevent the caramel layer from sinking — a great guarantee for perfect layering. |
| Pour | Pour the thickened caramel onto parchment paper lined on a separate baking sheet. | Spread it evenly to roughly the size of your brownie pan for even layering. |
| Freeze | Place the caramel sheet in the freezer until solid. | Typically takes 30–45 minutes. A frozen caramel sheet ensures clean, distinct brownie layers. |
| Tip: Applying a solid, frozen sheet of caramel drastically reduces the chance of the caramel bleeding into the lower layer when the top batter is added. | ||
Salting the Caramel : Elevating the Dessert Recipe
For that professional, complex flavor profile, finish your caramel with a touch of salt. A sprinkle of flaky sea salt (like Maldon) over the caramel layer before the final bake cuts through the richness, balancing the sugar and chocolate beautifully. This small touch transforms the dish into truly exceptional fudgy caramel layered brownies.
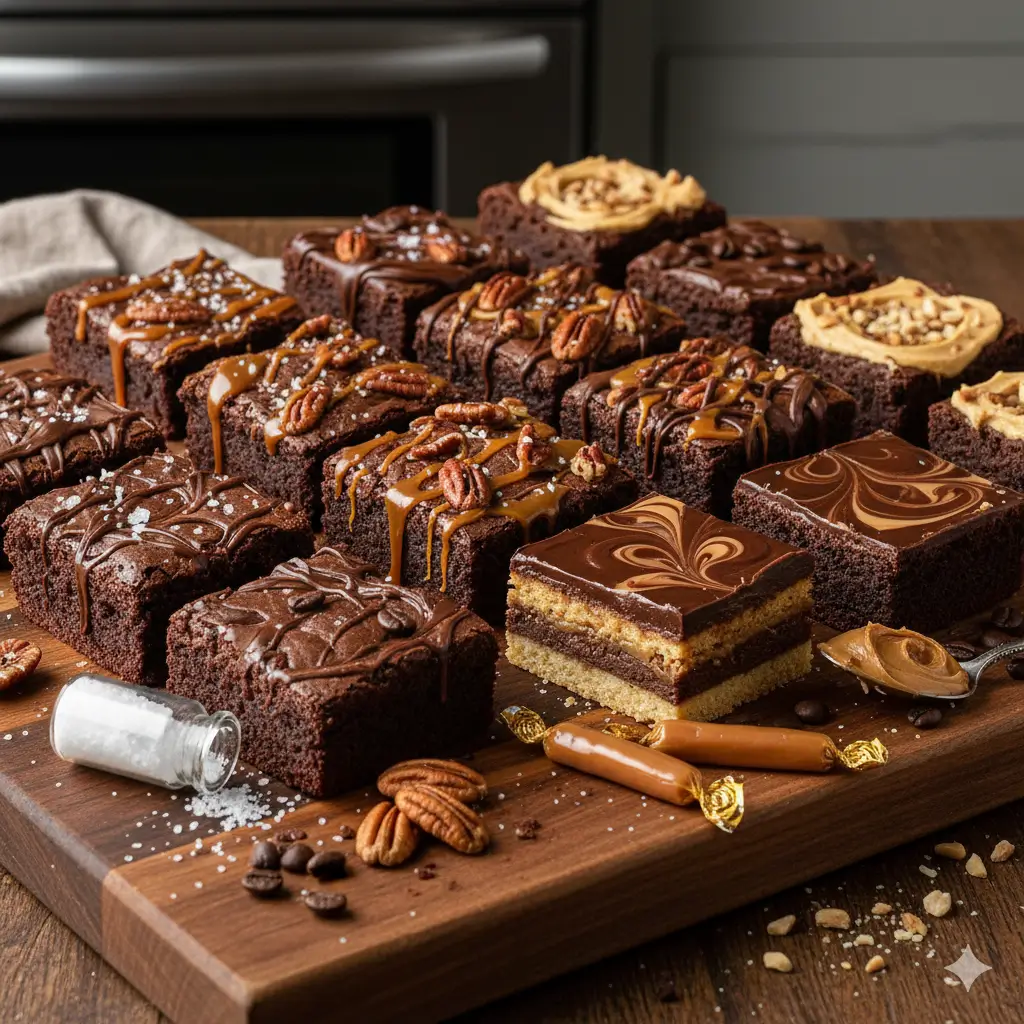
Best 5 Versions : Mastering the Fudgy Caramel Layered Brownies
Once you master the base and the caramel layer, you can customize your creation. Here are the five best variations :
1. Classic Sea Salt Caramel Brownies
The simple benchmark. Use the base recipe, the thick caramel layer, and finish the top with an extra generous sprinkle of flaky sea salt after cooling. Simple, elegant, and the reason these are the best brownies.
2. Pecan Turtle Layer Brownies
After the caramel layer is applied, sprinkle 1/2 cup of toasted pecans evenly over the caramel before adding the top layer of batter. Once cooled, drizzle the entire surface with melted milk chocolate ganache, creating a truly rich, decadent dessert recipe.
3. Twix Bar Style Brownies
Before adding the bottom brownie batter, press a layer of shortbread cookie crumbs (or finely crushed vanilla wafers mixed with a little melted butter) into the bottom of the pan. Partially bake the shortbread, then add the brownie base, followed by the caramel. This version delivers a wonderful added crunch and a nod to the classic candy bar.
4. Espresso Swirl Brownies
For the adult palate, add 1 tablespoon of instant espresso powder to the dry ingredients for a deep, complex mocha flavor. For the caramel layer, mix 1 teaspoon of espresso powder with 1 tablespoon of hot water, cool it, and swirl this concentrated coffee mixture into the caramel before freezing.
5. Peanut Butter Ripple Brownies
The ultimate combination. Before adding the top layer of brownie batter, gently dollop 1/4 cup of creamy peanut butter over the caramel layer. Use a knife to create a gentle ripple effect. The peanut butter will bake into a soft, distinct layer alongside the caramel.
Step-by-Step Assembly
This instructional guide applies to all variations of homemade brownies.
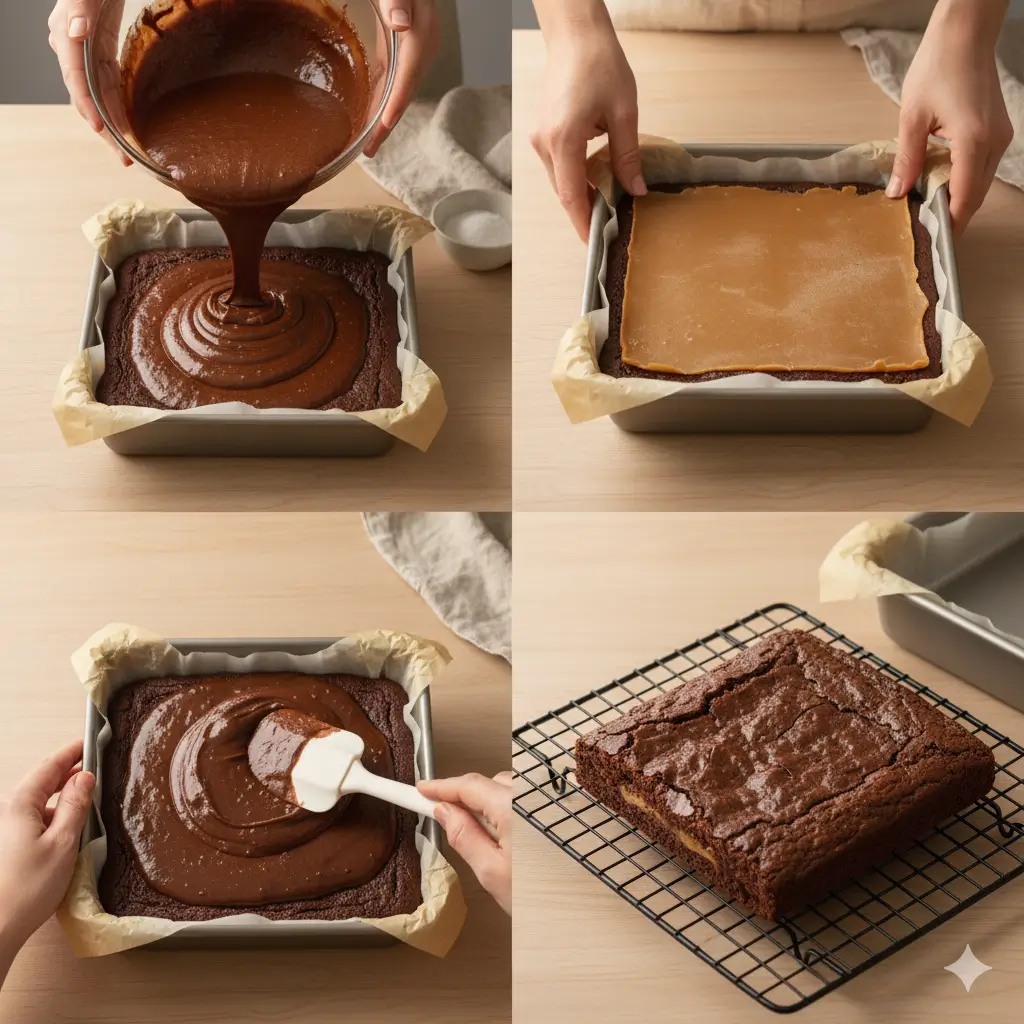
1. Bake the Base (Partial Bake)
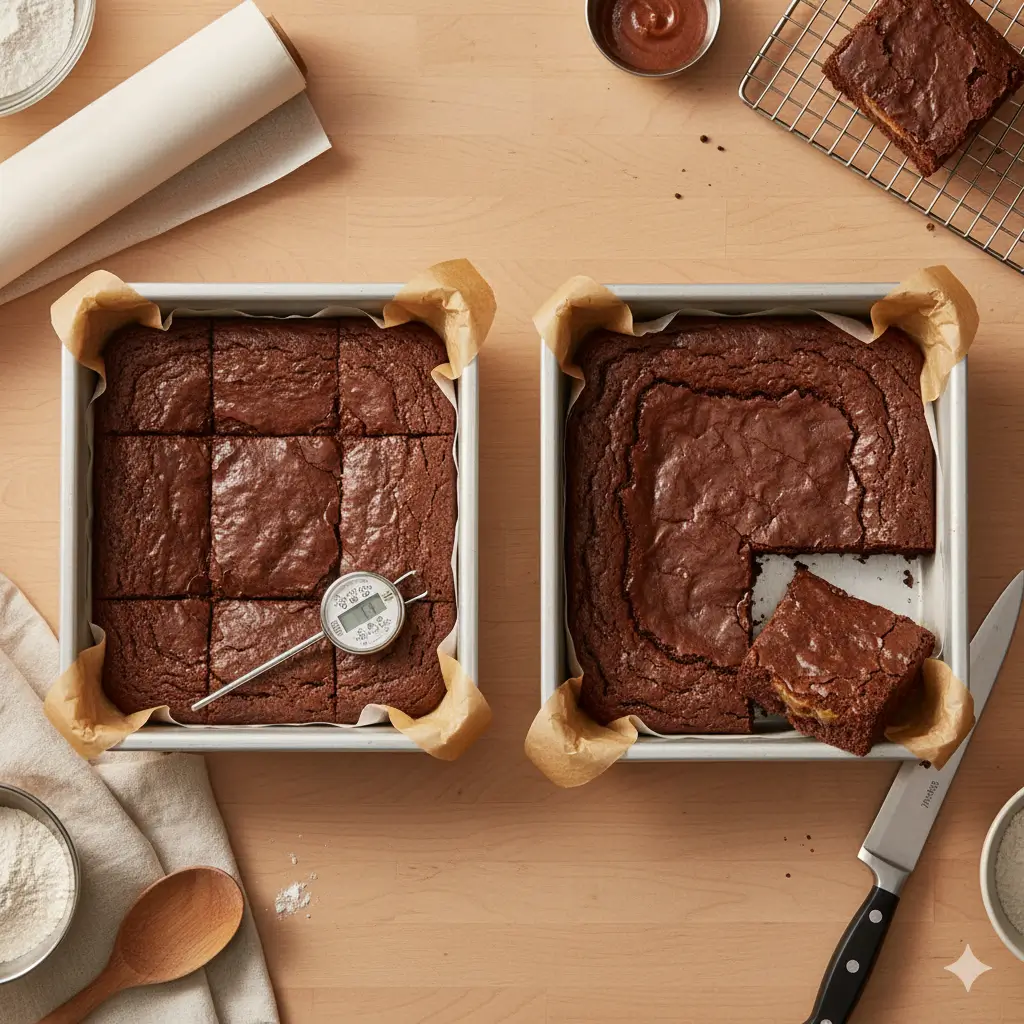
Pour half of your fudgy brownie batter into a greased and parchment-lined 8×8 inch pan. Bake at 350°F (175°C) for 18-20 minutes. The edges should be set, but the center should still look wet. Remove from the oven.
2. Layer the Caramel (Chill Technique)
Allow the partially baked base to cool for about 10 minutes. If using the frozen caramel sheet (recommended), place it gently over the warm base. If using liquid caramel, carefully pour and spread the caramel over the warm base.
3. Top Layer Application (The Gentle Spread)
Pour the remaining brownie batter over the caramel layer. This requires patience. Spoon the batter gently around the edges first, then fill in the middle. Use an offset spatula to spread the batter very carefully to cover the caramel without piercing or disrupting it.
4. Final Bake and Cooling (The Hardest Wait)
Return the pan to the oven and bake for another 25-30 minutes, or until a toothpick inserted into the edge comes out with moist, fudgy crumbs attached. The center should still look soft. Remove, and the hardest part begins: let the brownies cool completely—preferably for 2 hours or longer—before cutting.
Troubleshooting and Expert Tips
These final tips ensure your fudgy caramel layered brownies turn out perfectly.
| Issue | Explanation & Solution |
|---|---|
| Avoiding the Sinking Center | A common cause of a sunken center is often an oven temperature that is too low, causing the brownie batter to cook slowly and deflate. Always use an oven thermometer to verify your oven is running true to temperature, and avoid opening the oven door unnecessarily. |
| Perfect Clean Cuts (The Chill Factor) | Never cut warm brownies. The caramel layer will ooze, and the fudgy interior will tear. For professional-looking squares, chill the cooled brownies in the refrigerator for at least 30 minutes. Use a large, sharp knife dipped in hot water and wiped clean between each cut. This creates clean, sharp edges. |
Conclusion
You are now equipped with the expert knowledge to conquer this decadent creation. From understanding the fudgy science of the base to implementing the crucial freezing technique for the caramel layer, you have everything you need to bake the best brownies. Whether you choose the Classic Sea Salt or the bold Espresso Swirl, this easy recipe ensures every piece is rich, layered, and pure dessert perfection. Go ahead—your baking victory awaits!
Frequently Asked Questions (FAQs)
Why are my brownies dry/cakey instead of fudgy ?
- The primary reason is too much flour or over-mixing. Ensure you spoon your flour into the measuring cup (rather than scooping) to avoid compacting it. And remember, stop mixing the second you see no dry streaks of flour.
Can I freeze these caramel brownies ?
- Yes! Fudgy caramel layered brownies freeze exceptionally well. Once they are fully cooled and cut, place them in an airtight, freezer-safe container, separated by parchment paper. They will keep for up to three months. Thaw them at room temperature for several hours before serving.
How long does homemade caramel last ?
- If you make a large batch of homemade caramel, store it in an airtight jar in the refrigerator. It will last for up to two weeks. Always warm it slightly before using it for the layering process to make it easier to spread.
What is the best pan size for thick brownies ?
- We recommend a metal 8×8 inch pan for the thickest, chewiest, and most satisfying homemade brownies. A 9×13 inch pan will produce thinner brownies, requiring a reduced baking time.
Your Feedback Helps Us Grow!
There are no reviews yet. Be the first one to write one.