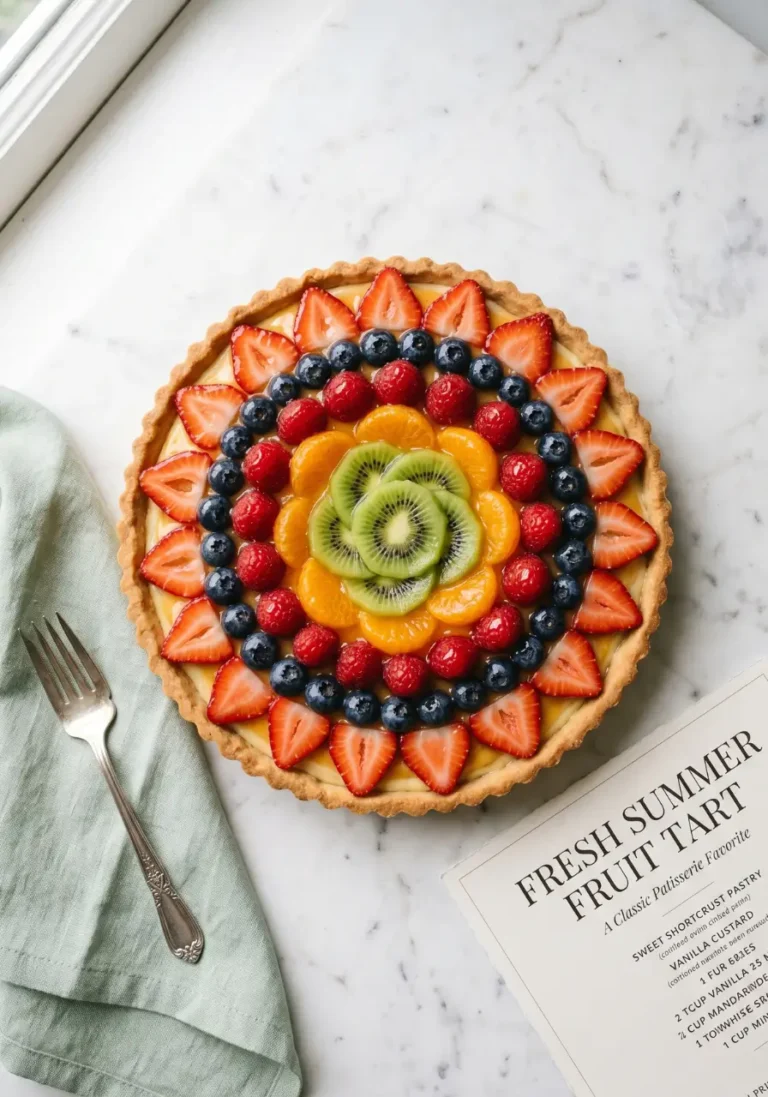
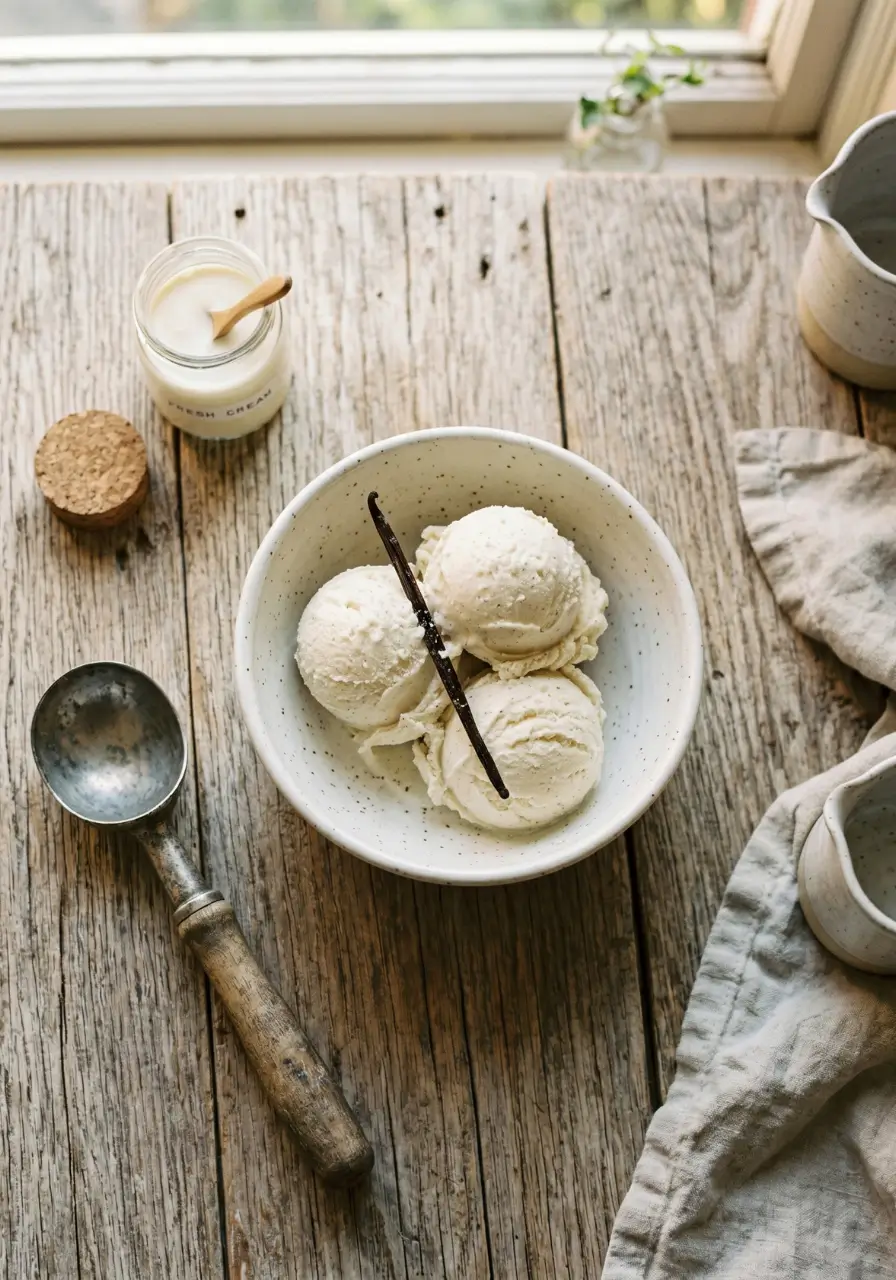
Homemade Vanilla Ice Cream: 3 Secrets for Perfect Scoops
Table of Contents
Why Most Homemade Vanilla Ice Cream Falls Flat (And How to Fix It)
Did you know that nearly 65% of home cooks report their homemade vanilla ice cream turning out icy, grainy, or lacking that signature creamy texture? If you have struggled with the same issue, you are not alone. The good news is that making the best homemade vanilla ice cream is not about fancy equipment or rare ingredients. It all comes down to 3 simple but game-changing secrets that most recipes never mention. Whether you are making easy homemade vanilla ice cream for a summer gathering or a quiet night in, this guide will walk you through everything you need to know for perfect scoops every single time.
This creamy vanilla ice cream from scratch is rich, smooth, and packed with real vanilla flavor. It uses wholesome pantry staples, takes under 30 minutes of active time, and delivers results that rival your favorite ice cream shop.
Ingredients
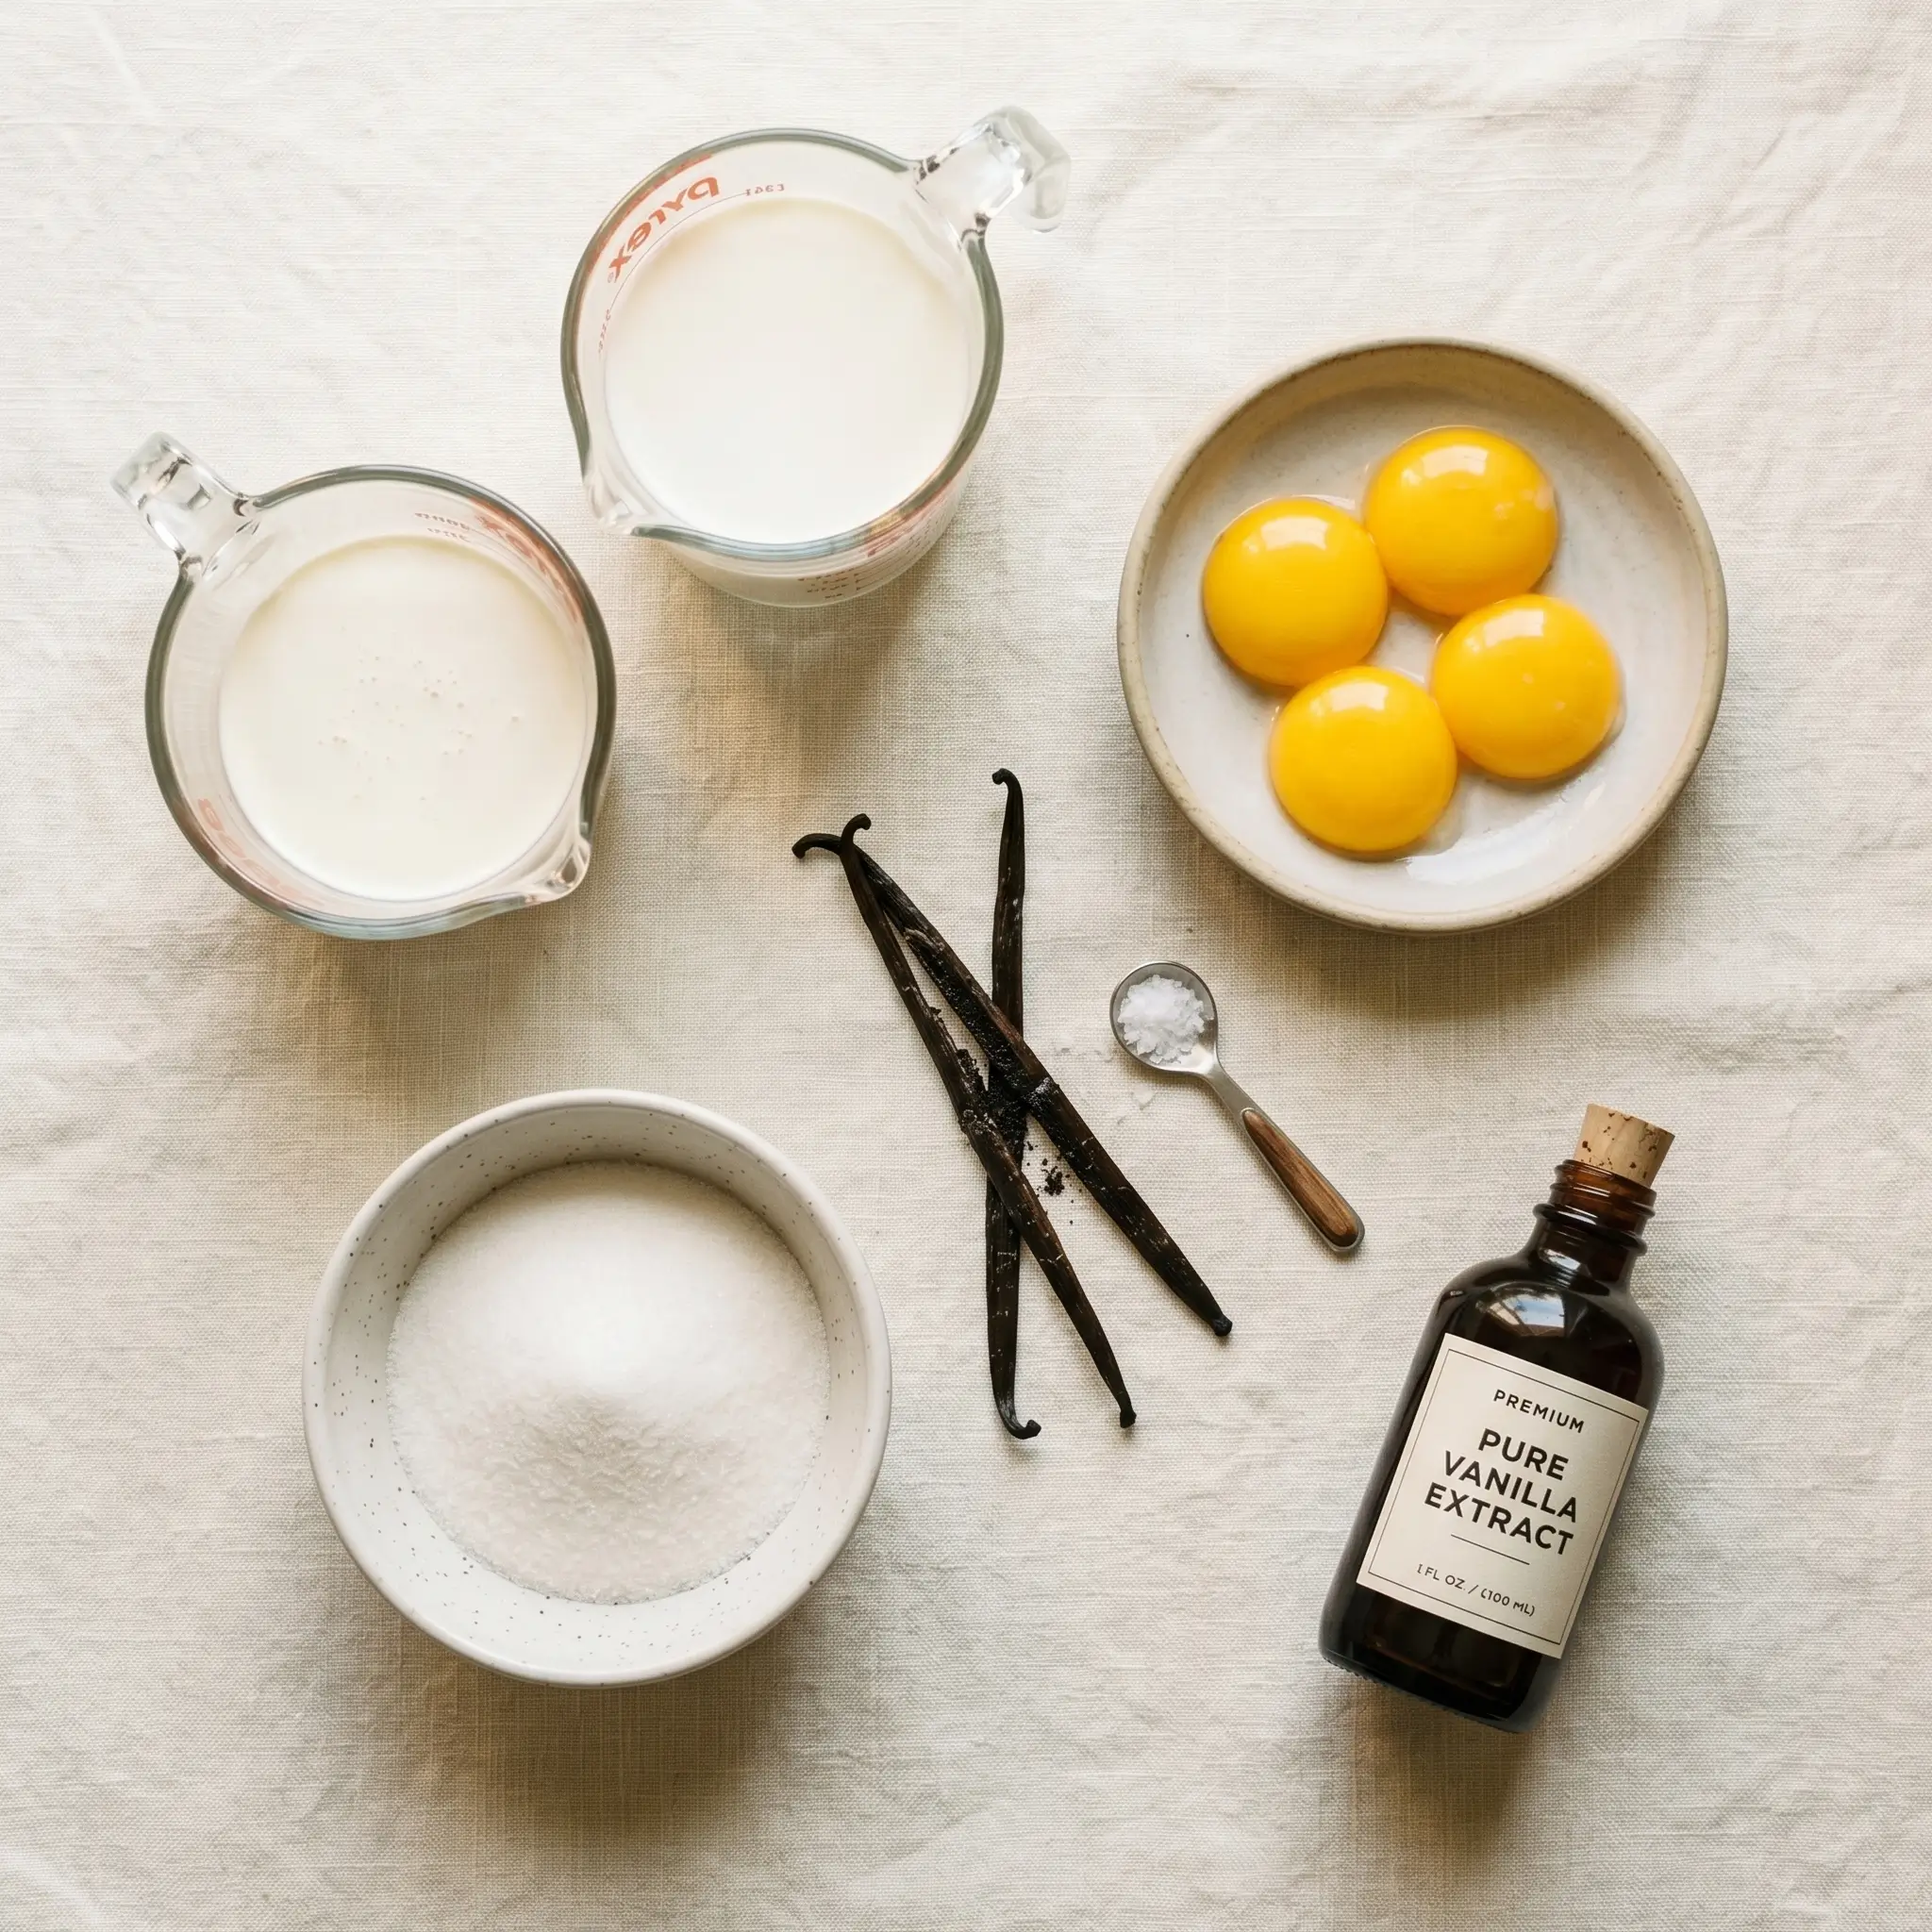
Here is everything you need for this simple vanilla ice cream with heavy cream . All quantities are for approximately 6 servings.
- 2 cups heavy whipping cream (cold)
- 1 cup whole milk
- 3/4 cup granulated white sugar
- 2 teaspoons pure vanilla extract (or 1 vanilla bean, split and scraped)
- 4 large egg yolks
- 1 pinch of fine sea salt
Smart Substitutions :
- Swap heavy cream for full-fat coconut cream for a dairy-free version
- Use honey or maple syrup instead of sugar for a more natural sweetness
- Replace egg yolks with 2 tablespoons of cornstarch for an egg-free base
Timing
This recipe clocks in at about 90 minutes total — roughly 20% less than the average custard-based ice cream recipe.
| Stage | Time |
|---|---|
| 🥄 Prep Time | 20 minutes |
| ❄️ Chilling Time custard base | 1 hour |
| 🍦 Churning Time | 25–30 minutes |
| 🧊 Freezing Time for firm scoop | 4 hrs or overnight |
| ⏱️ Total Active Time | Under 30 minutes |
ⓘ Freezing time is hands-off and may vary depending on your freezer temperature. Plan ahead — overnight freezing gives the best scoop-ready texture.
Step-by-Step Instructions
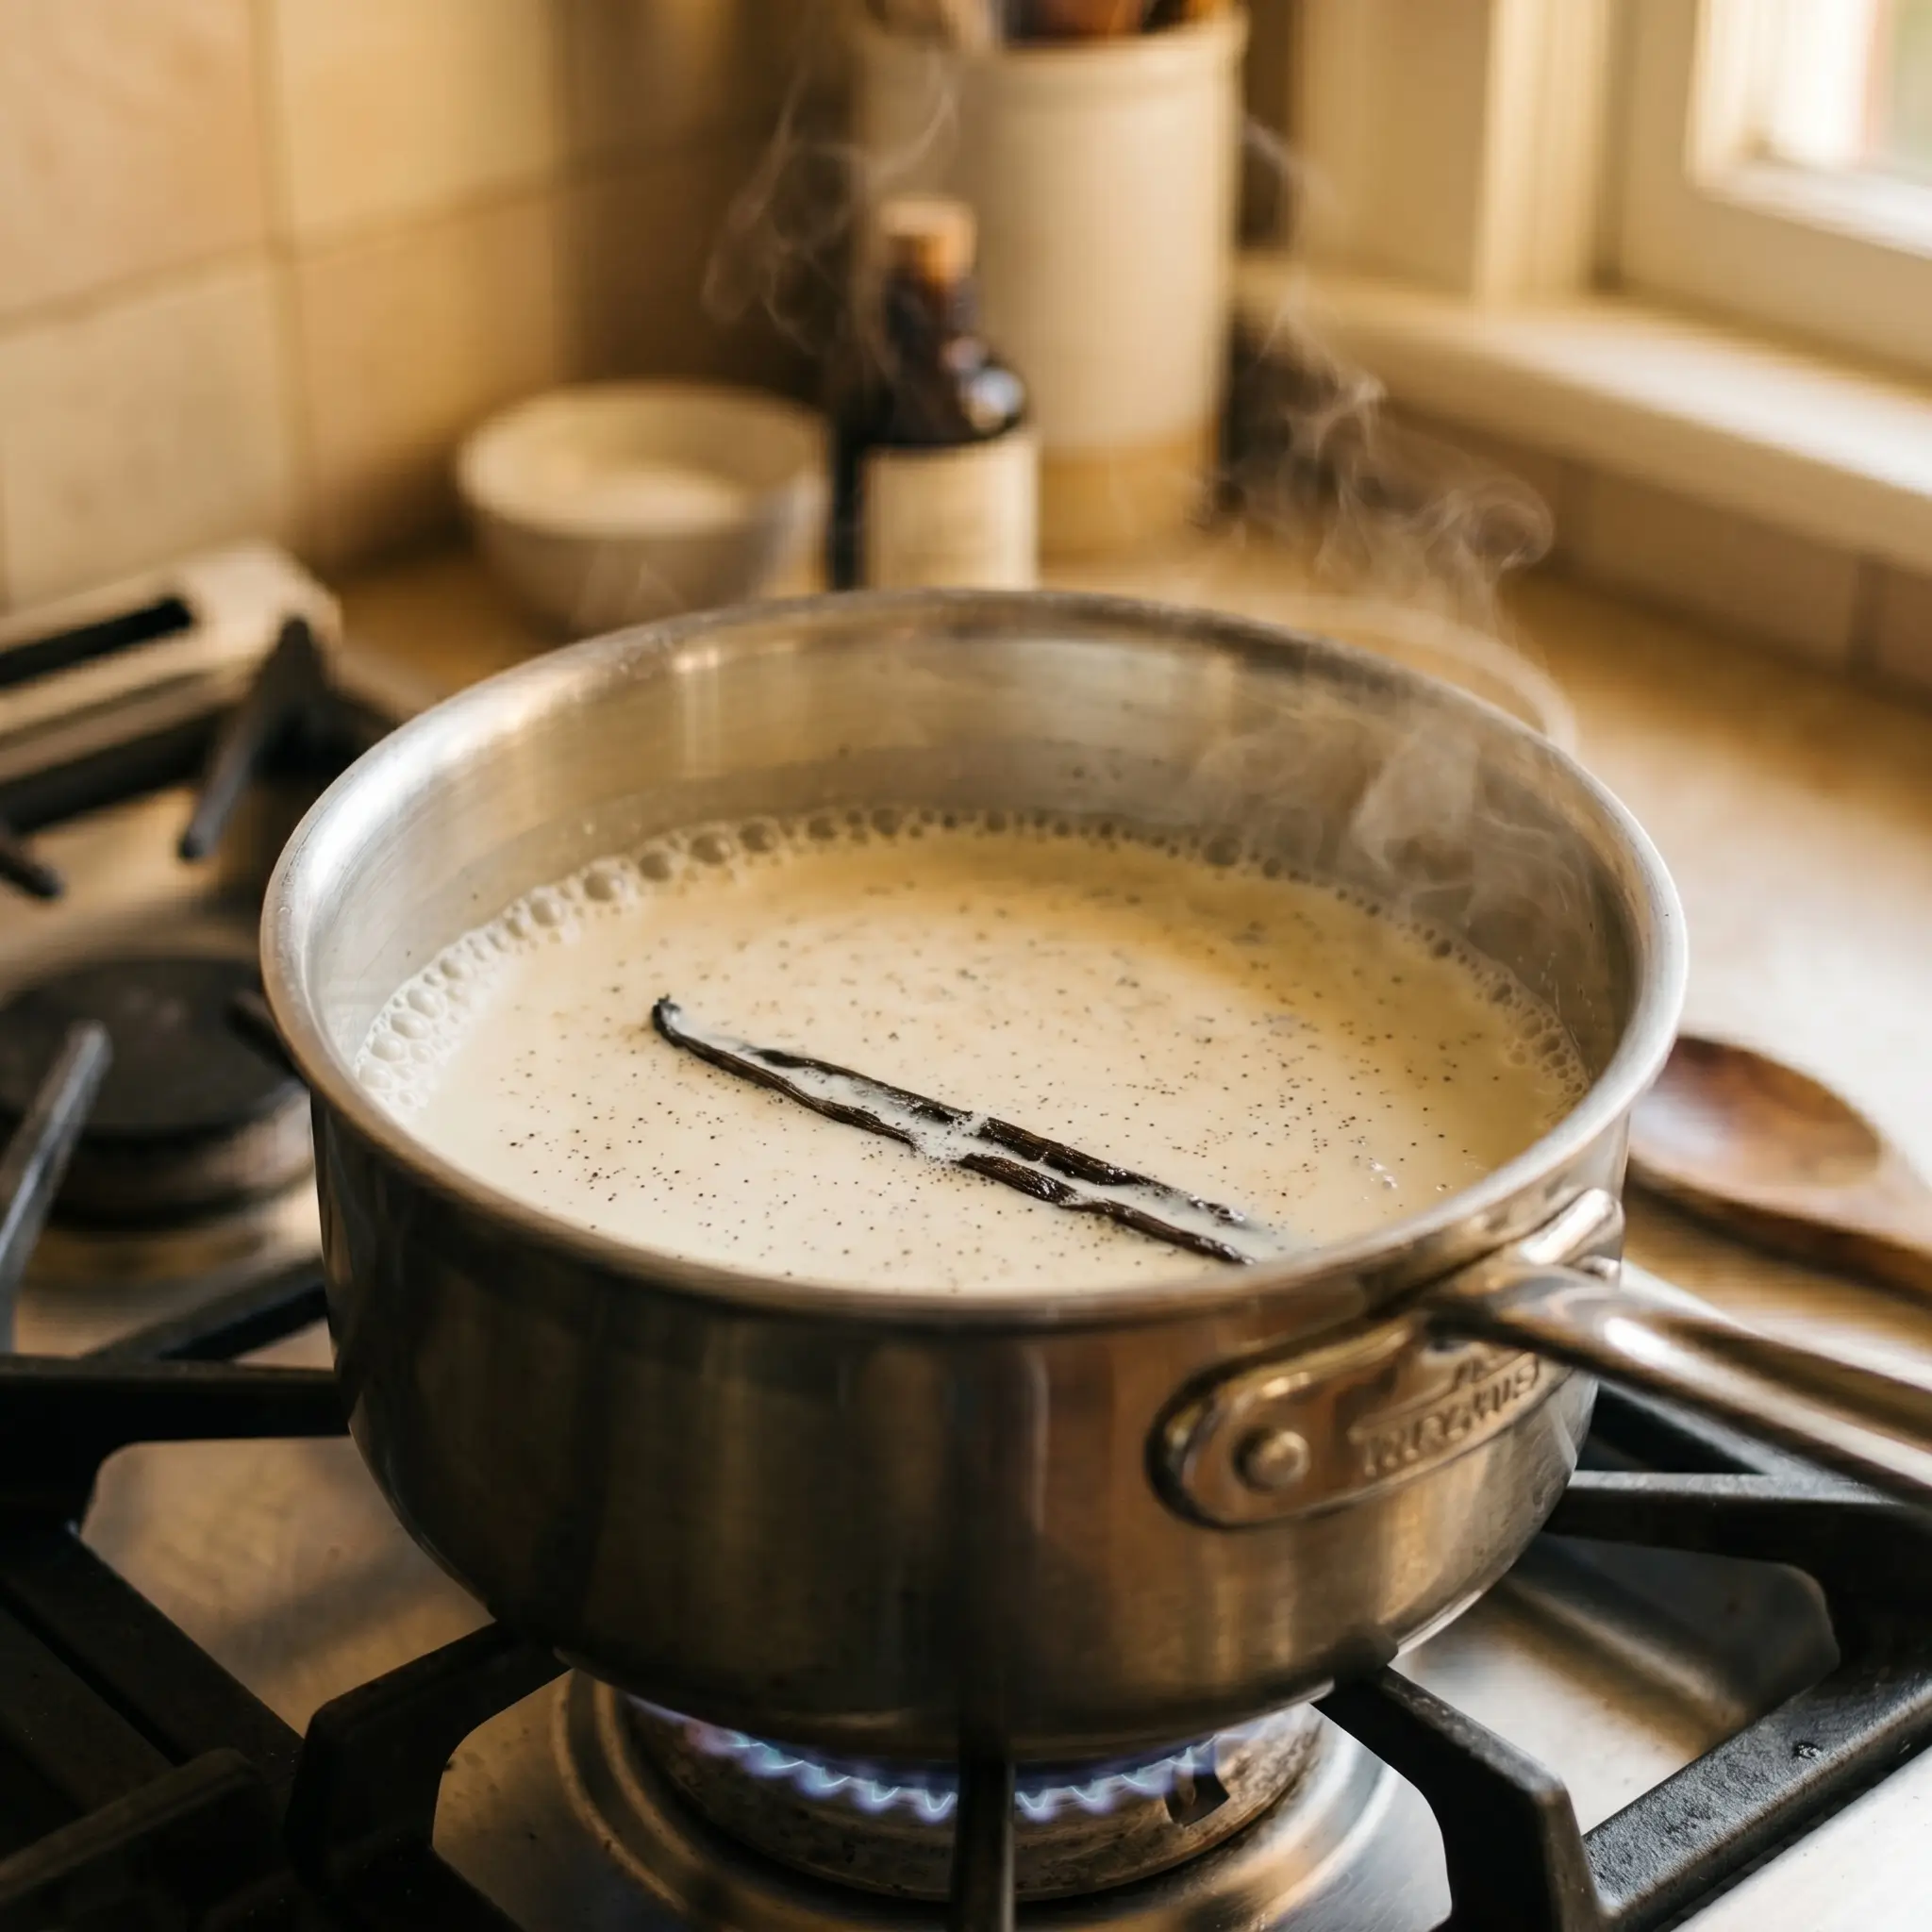
Step 1 : Warm the Milk and Cream
Pour the milk and half the heavy cream into a medium saucepan over medium heat. Add the vanilla extract or vanilla bean seeds along with the pod. Warm the mixture until you see small bubbles forming at the edges. Do not let it boil. Remove from heat and let it sit for 10 minutes to infuse. This step builds that deep, floral vanilla flavor that separates a good ice cream from a great one.
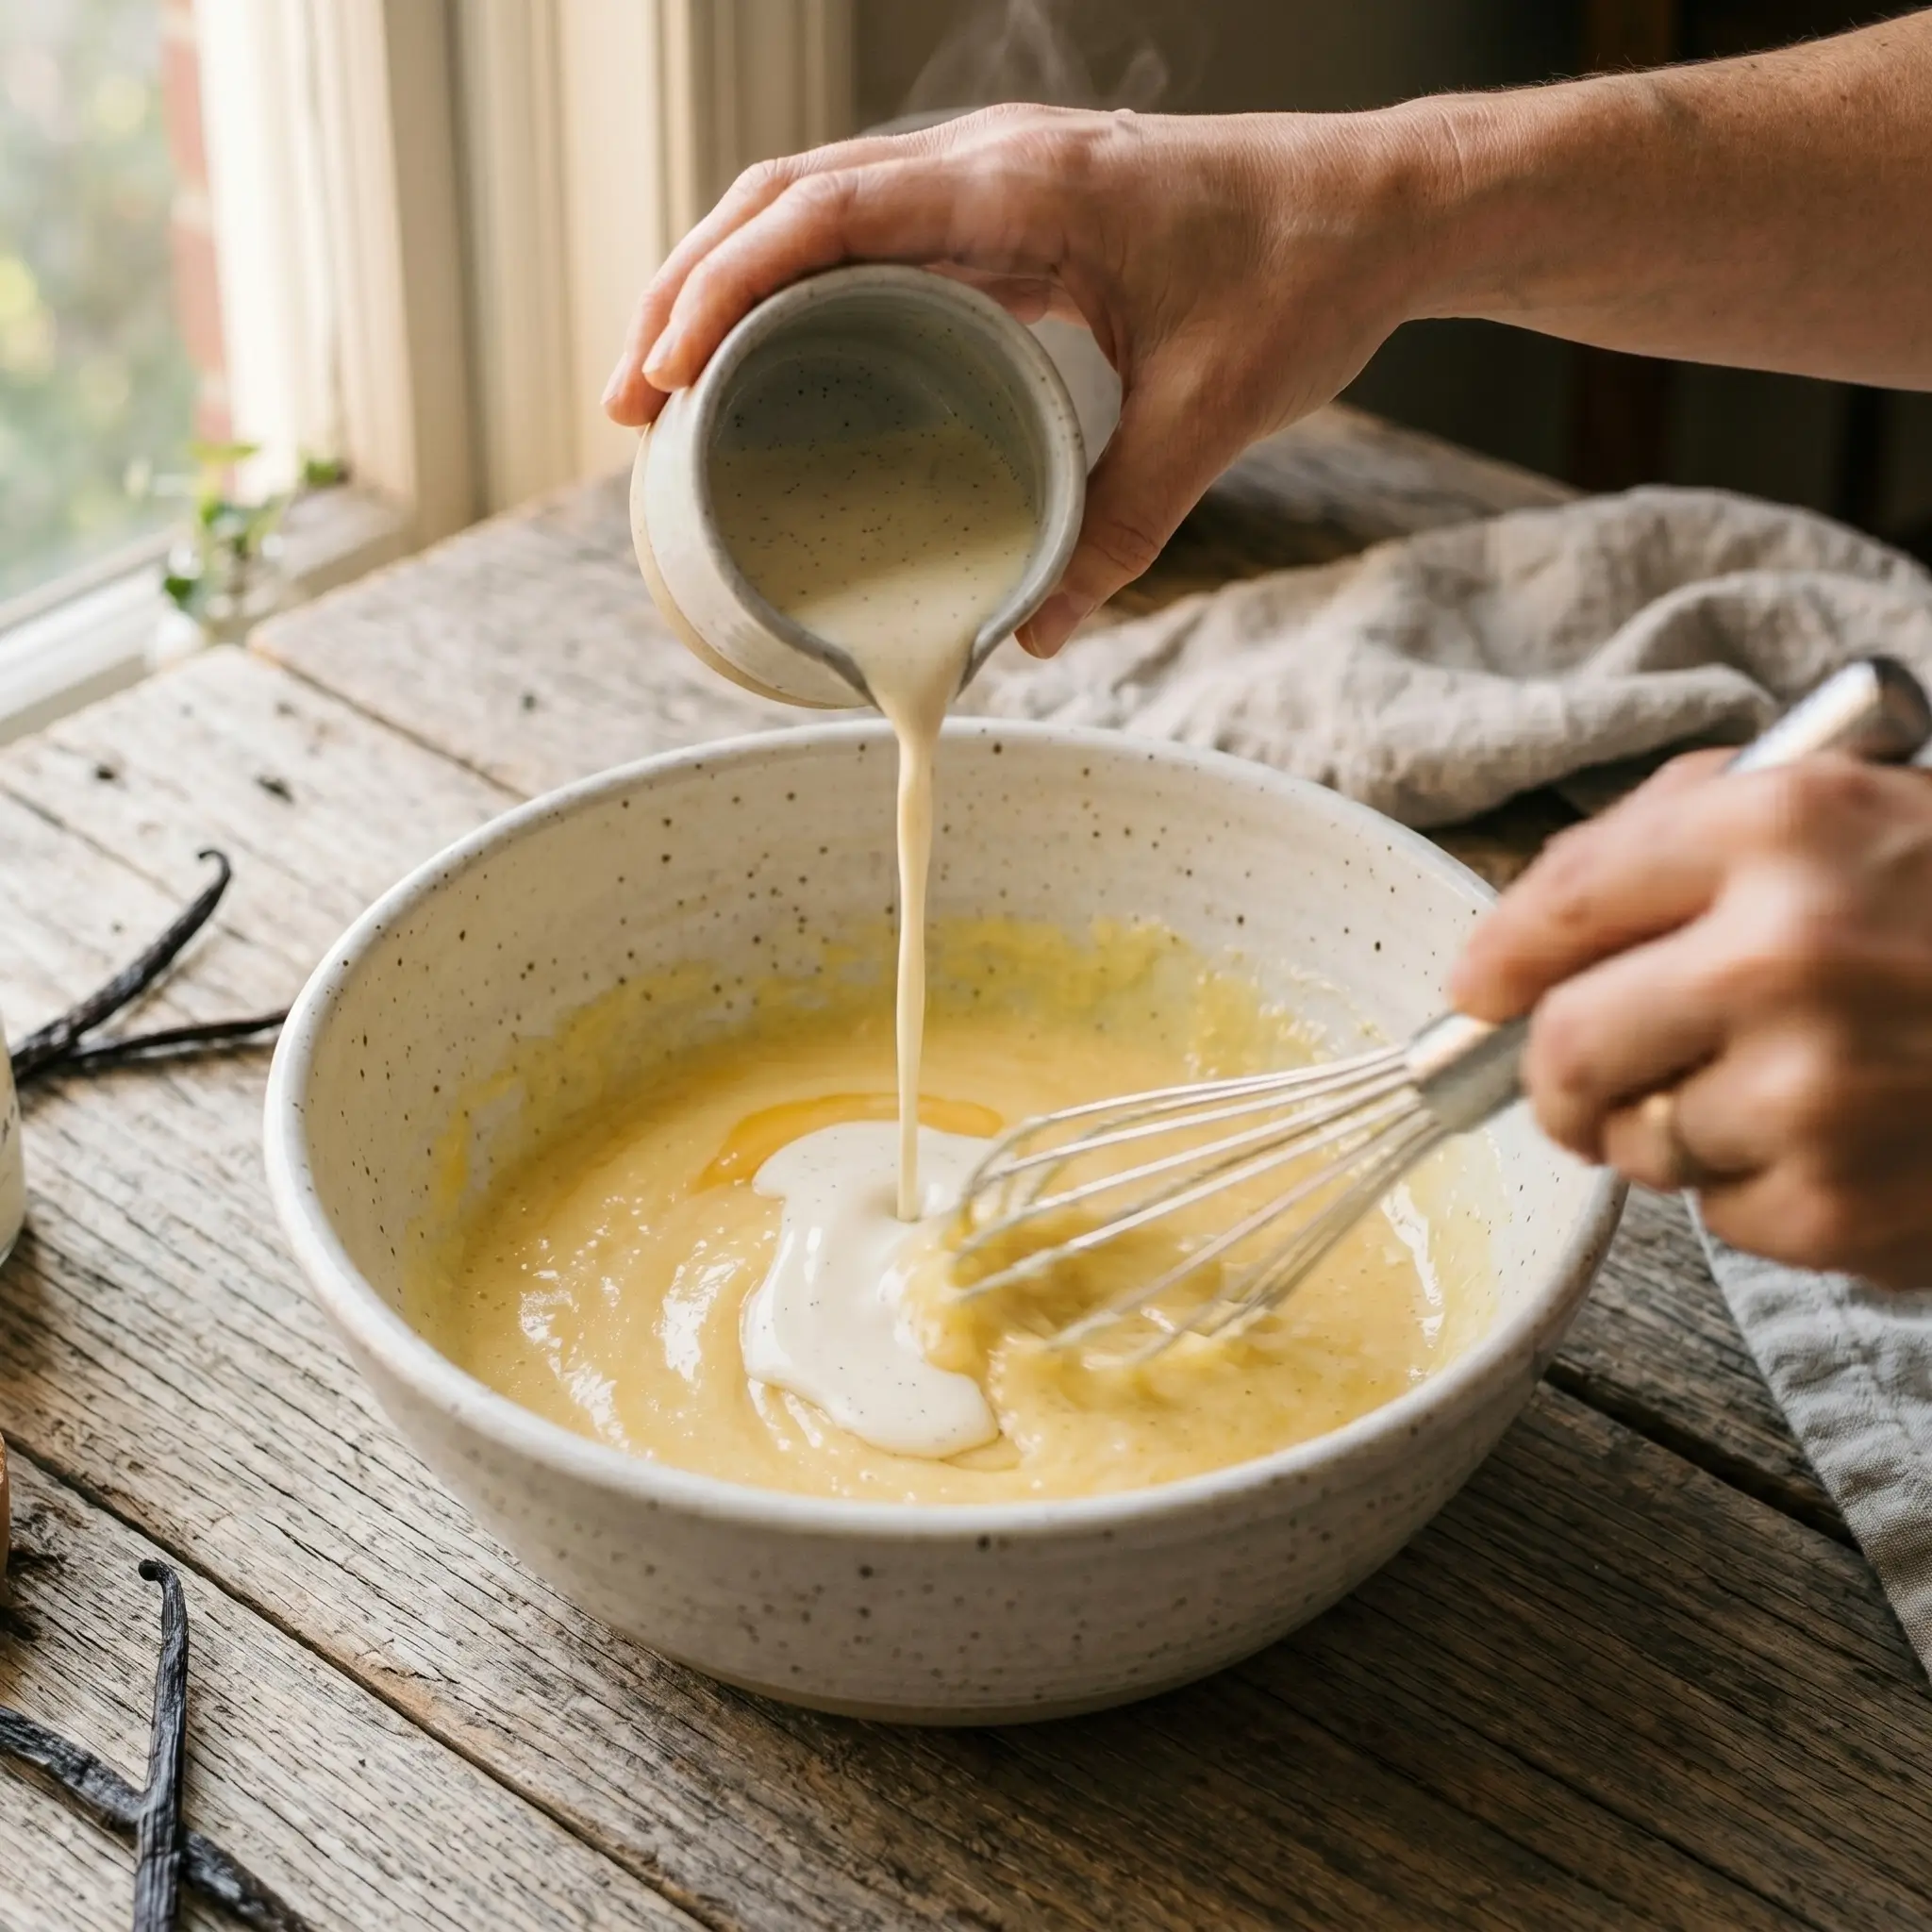
Step 2 : Whisk the Egg Yolks and Sugar
In a large mixing bowl, whisk together the egg yolks, sugar, and pinch of salt until the mixture turns pale yellow and slightly thick. This usually takes about 2 to 3 minutes of active whisking. The sugar dissolves into the yolks and helps create a silky custard base that prevents ice crystals.
Step 3 : Temper the Eggs (Secret #1)
Here is the first of the 3 secrets. Slowly pour the warm cream mixture into the egg mixture one ladle at a time while whisking constantly. This process, called tempering, gradually raises the temperature of the eggs without scrambling them. Rushing this step is the number one reason homemade ice cream turns out grainy. Patience here pays off with a perfectly smooth custard.
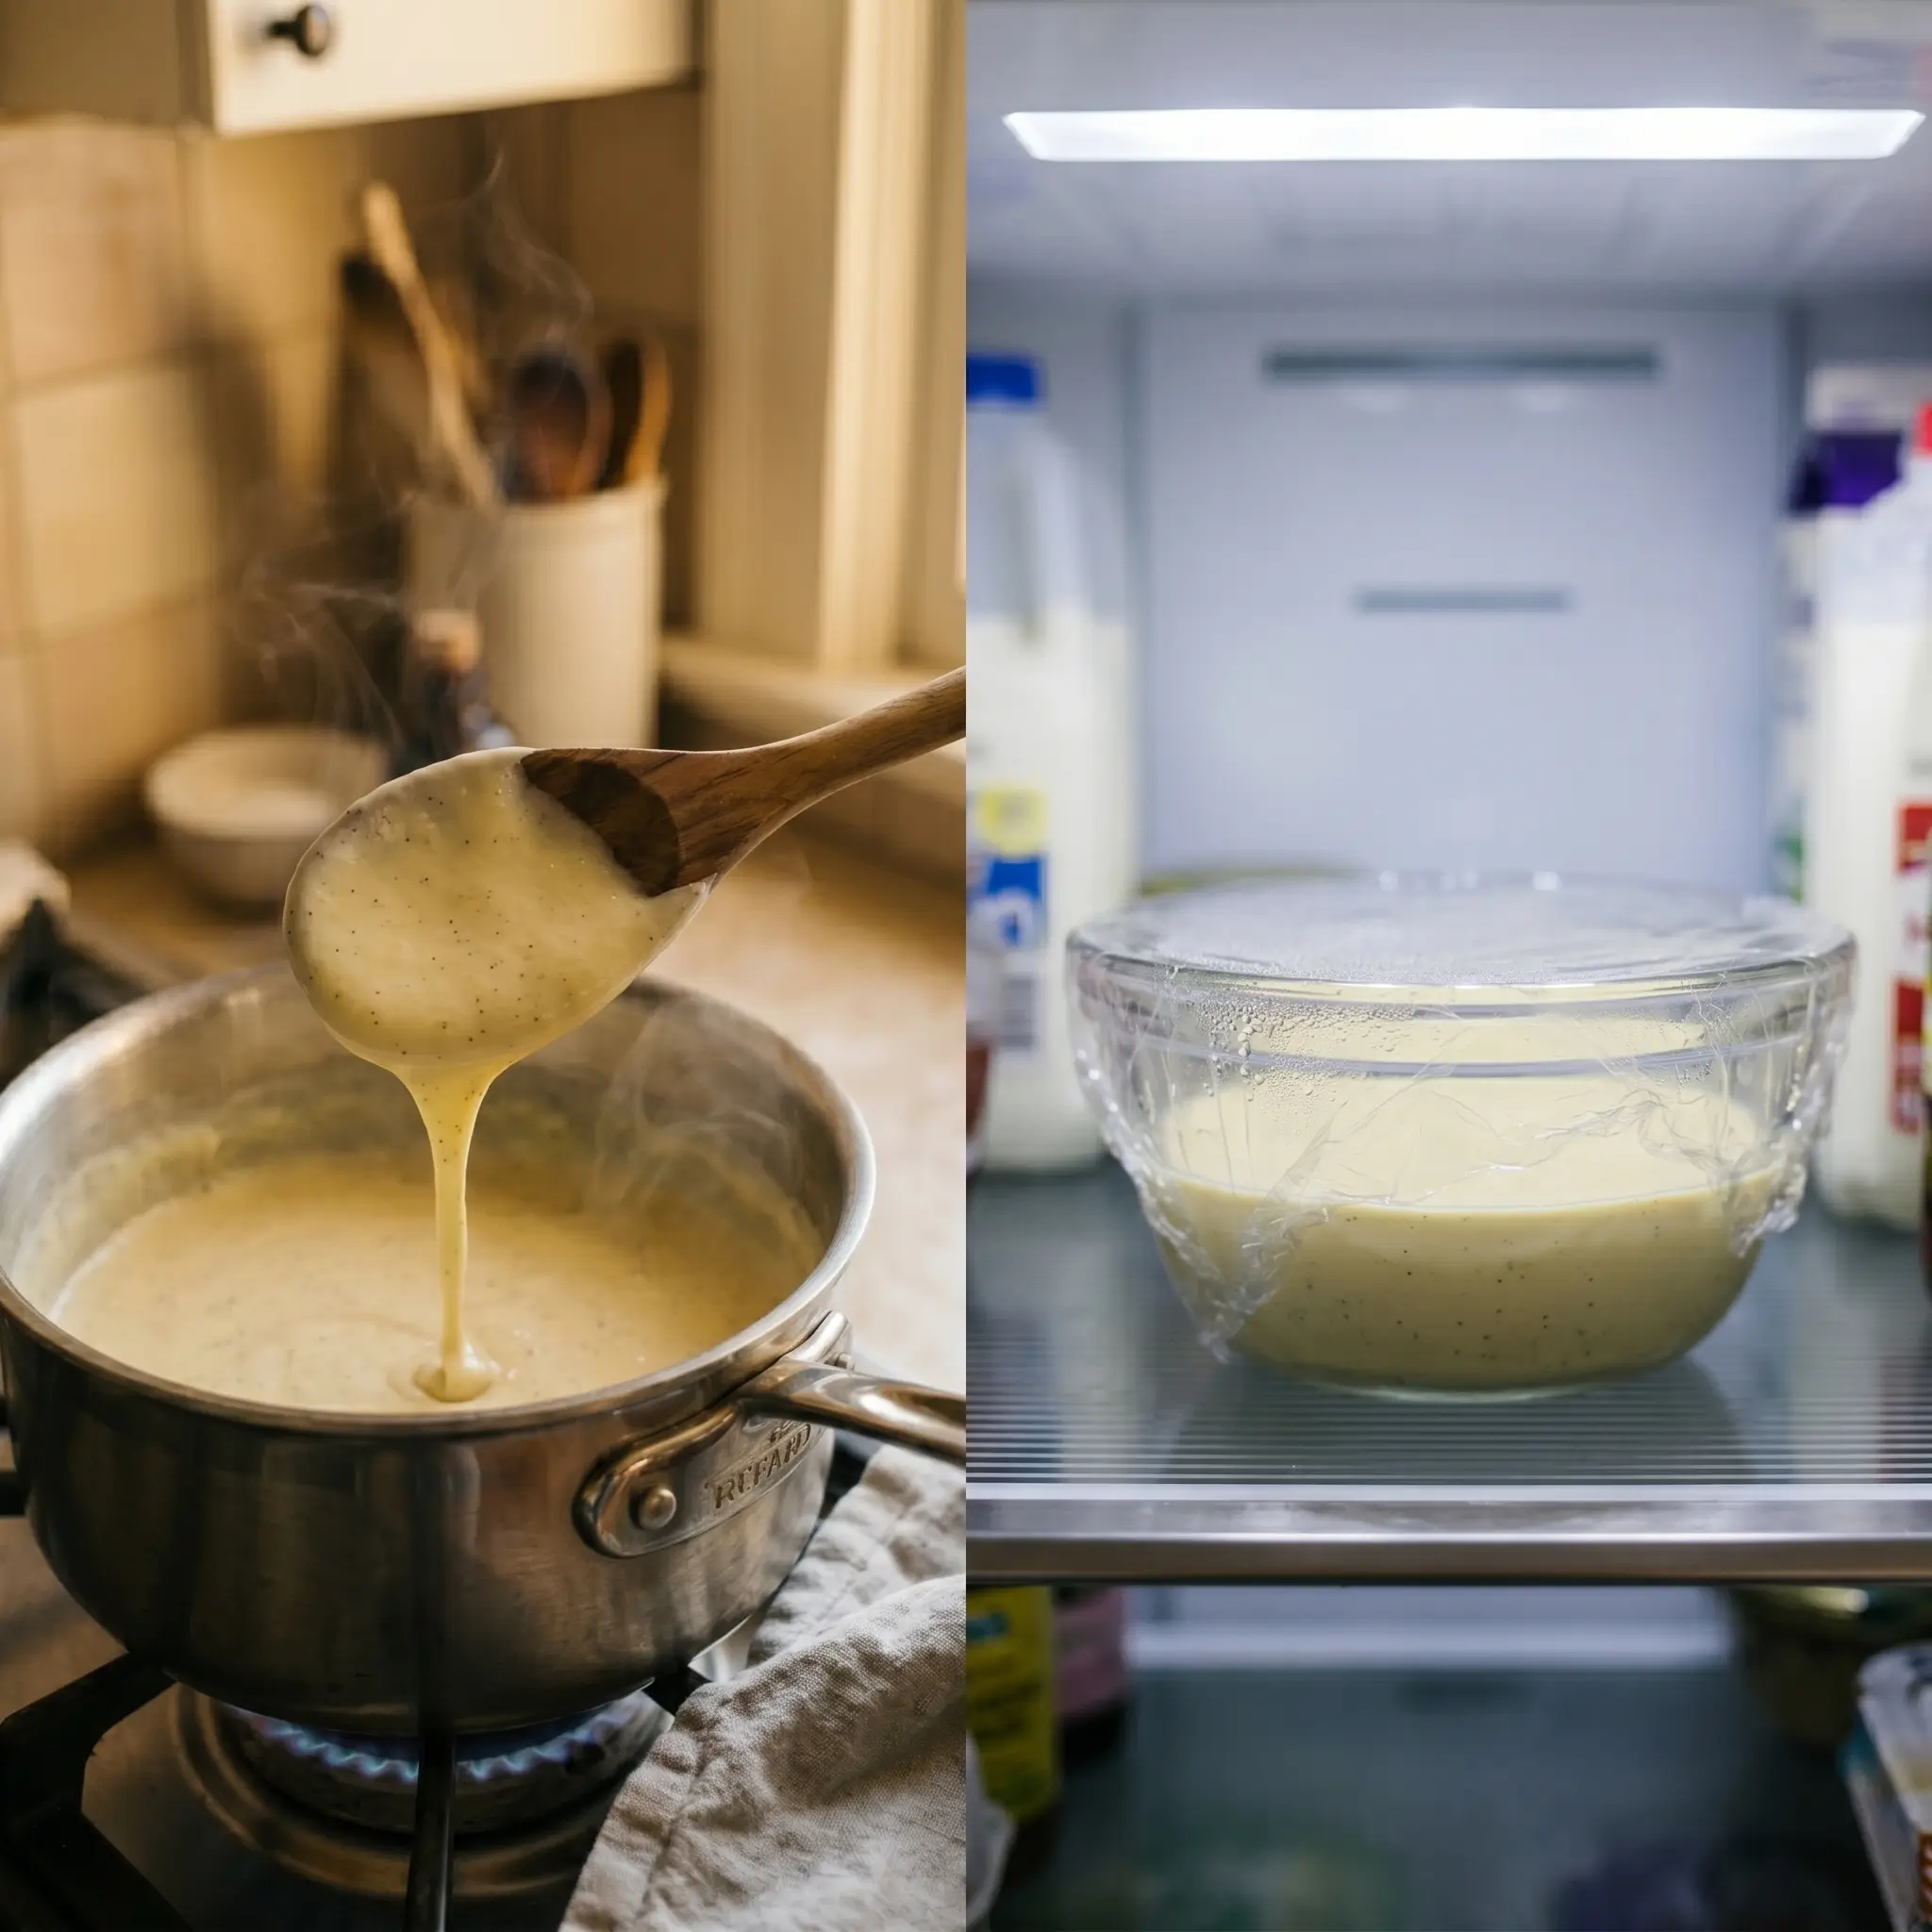
Step 4 : Cook the Custard (Secret #2)
Pour the tempered mixture back into the saucepan and cook over low heat, stirring constantly with a wooden spoon or silicone spatula. The second secret is to pull the custard off the heat the moment it coats the back of your spoon and holds a clean line when you run your finger through it. This happens around 170 to 175 degrees F. Overcooking will curdle the custard. Undercooking leaves it too thin to freeze properly.
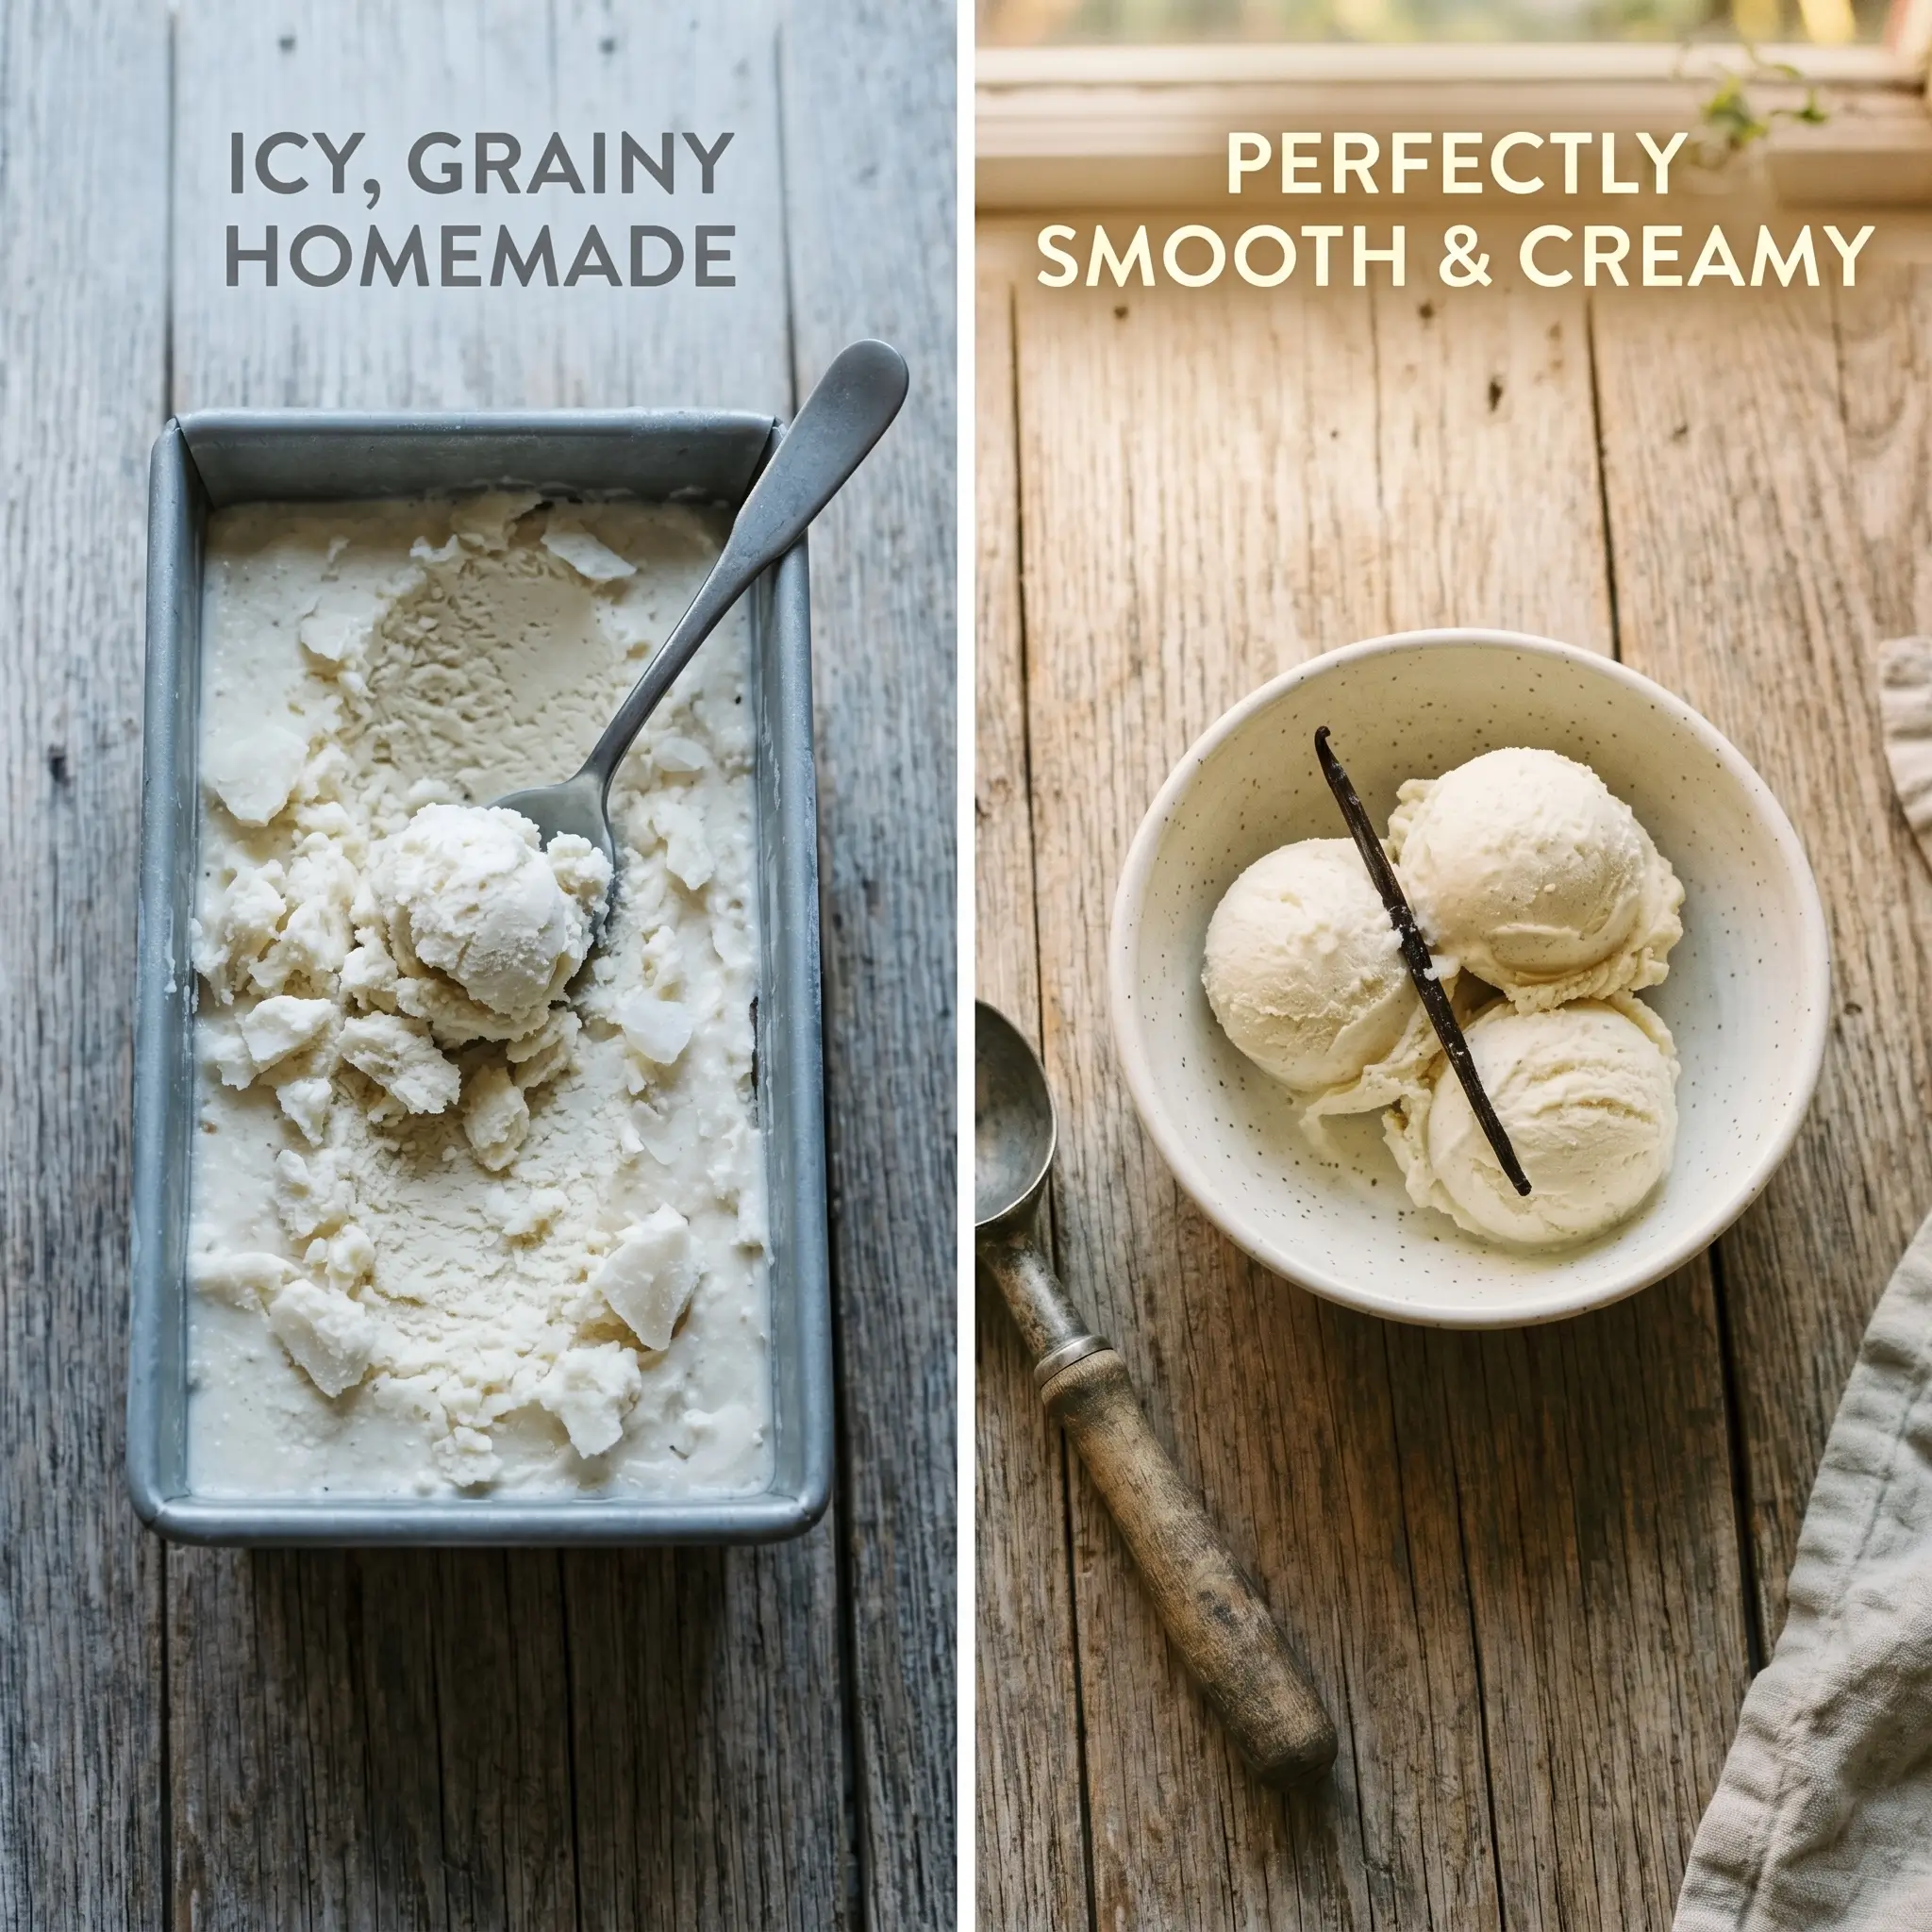
Step 5 : Chill the Base Thoroughly (Secret #3)
The third and most overlooked secret is chilling your custard base completely before churning. Strain the custard through a fine mesh sieve into a bowl, stir in the remaining cold heavy cream, and refrigerate for at least 1 hour or up to overnight. A fully chilled base churns faster, incorporates more air, and freezes into a creamier, scoopable texture. Skipping this step is why many no churn vanilla ice cream recipes end up dense and icy.
Step 6 : Churn and Freeze
Pour the chilled base into your ice cream maker and churn according to the manufacturer’s instructions, usually 25 to 30 minutes. Transfer to a freezer-safe container, press plastic wrap directly onto the surface to prevent ice crystals, and freeze for at least 4 hours before scooping.
Nutritional Information
Approximate values per serving — based on 6 servings total.
| Nutrient | Per Serving |
|---|---|
| Calories | 310 kcal |
| Total Fat | 22 g |
| Saturated Fat | 13 g |
| Carbohydrates | 24 g |
| Sugars | 22 g |
| Protein | 4 g |
| Sodium | 55 mg |
| Cholesterol | 165 mg |
ⓘ Data sourced from standard USDA nutritional values for custard-based ice cream. Actual values may vary based on specific brands used.
Healthier Alternatives for This Recipe

You do not need to sacrifice flavor to make this recipe more nutritious. Here are some smart swaps that keep the creamy texture intact.
- Use coconut sugar instead of white sugar for a lower glycemic index option
- Replace half the heavy cream with evaporated skim milk to reduce fat without losing richness
- Add half a ripe banana to the custard base for natural sweetness and a creamy texture boost
- Use monk fruit sweetener at a 1:1 ratio for a sugar-free version
- Stir in 2 tablespoons of Greek yogurt for a slight tang and an added protein boost
Serving Suggestions
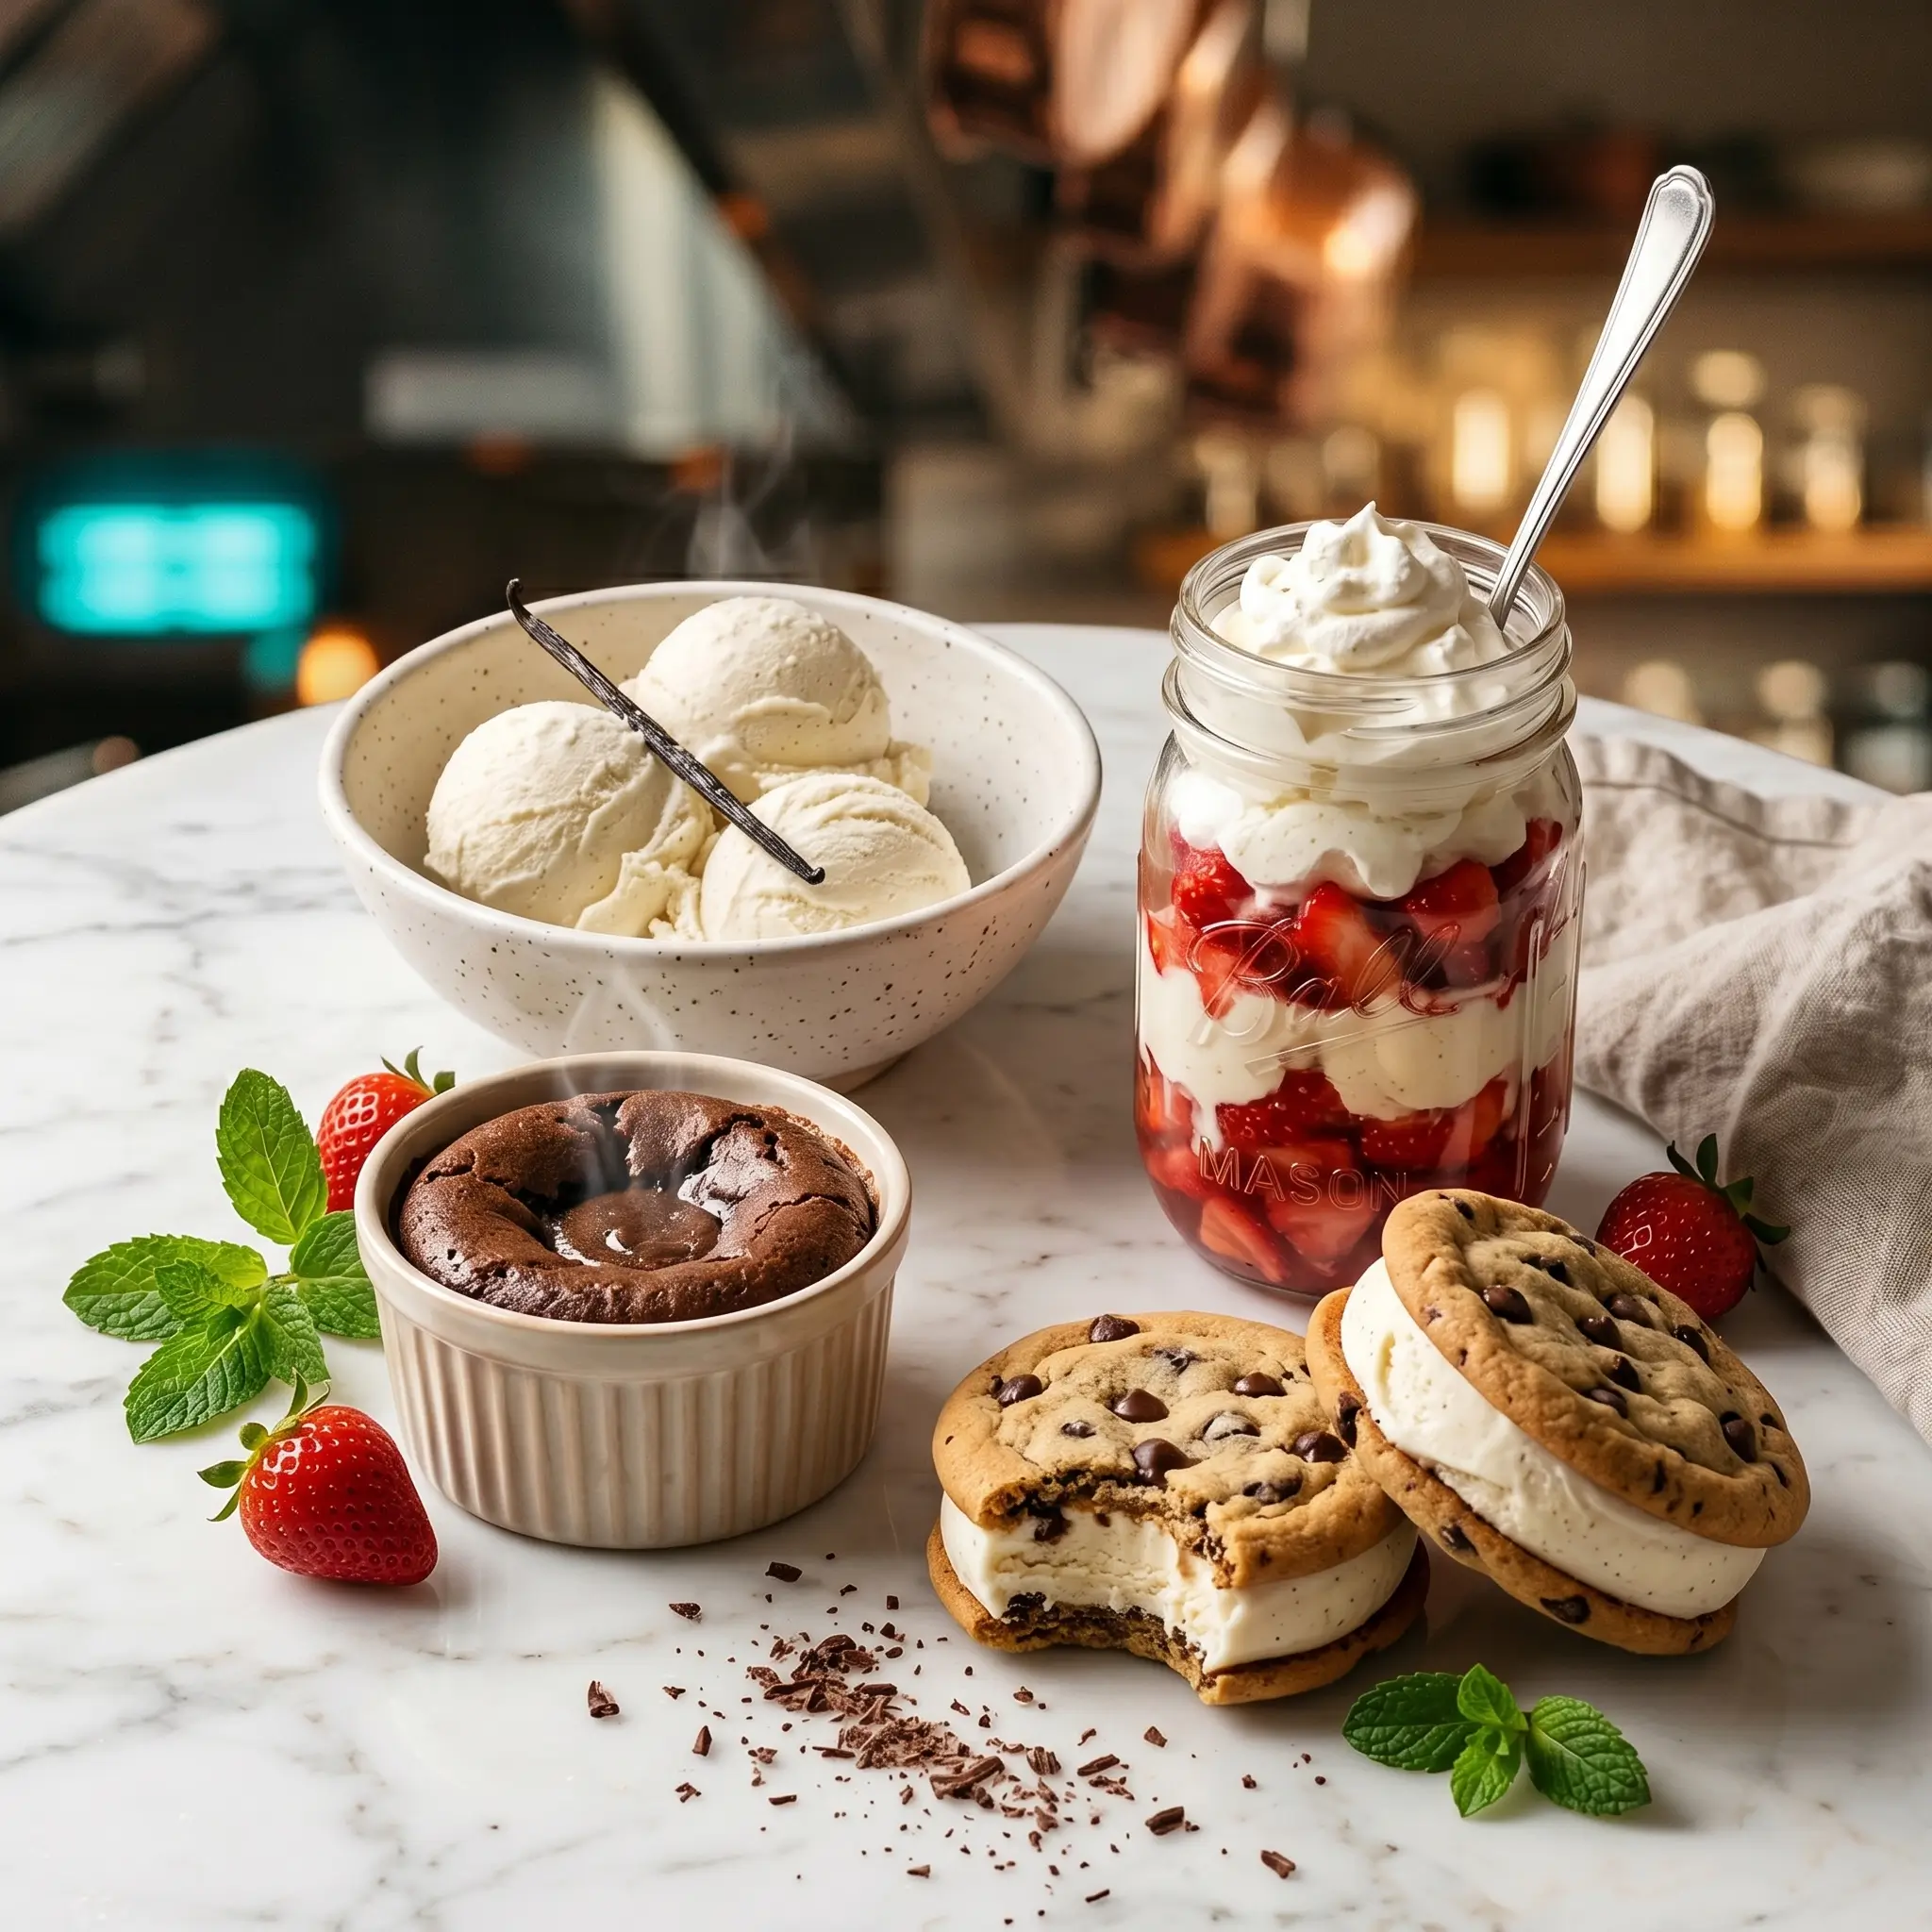
Serving Suggestions
Homemade vanilla ice cream is endlessly versatile. Here are some ways to take it beyond the bowl.
| # | Serving Idea | Best Paired With | Vibe |
|---|---|---|---|
| 1 | Scoop into warm brownie cups | Fudgy chocolate brownies, fresh from the oven | Hot & Cold Classic |
| 2 | Layer with fresh strawberries and whipped cream in a mason jar | Seasonal berries, heavy whipped cream | Elegant Parfait |
| 3 | Sandwich between two chocolate chip cookies | Thick, chewy chocolate chip or snickerdoodle cookies | Ice Cream Sandwich |
| 4 | Serve alongside warm apple crisp or peach cobbler | Cinnamon apple crisp or buttery peach cobbler | Crowd Pleaser |
| 5 | Blend with cold brew coffee and a splash of milk | Strong cold brew, whole milk or oat milk | Affogato Shake |
Common Mistakes to Avoid
Common Mistakes to Avoid
Watch out for these pitfalls to guarantee a silky, scoopable result every time.
| # | Mistake | Why It Goes Wrong | The Fix |
|---|---|---|---|
| 1 | Skipping the tempering step | Adding hot cream directly to eggs scrambles them instantly | Add warm cream one ladle at a time while whisking constantly |
| 2 | Overheating the custard | Cooking above 180 degrees F curdles the base | Pull from heat at 170 to 175 degrees F and use a thermometer |
| 3 | Churning a warm base | A warm base produces an icy, grainy texture after freezing | Chill the custard fully in the fridge for at least 1 hour before churning |
| 4 | Overfilling the ice cream maker | Too much mixture prevents proper aeration during churning | Fill only two-thirds of the bowl and churn in batches if needed |
| 5 | Skipping the plastic wrap | Exposed surface develops a thick icy crust in the freezer | Press plastic wrap directly onto the surface before sealing with a lid |
| 6 | Using imitation vanilla | Imitation vanilla lacks depth and leaves a flat, artificial aftertaste | Use pure vanilla extract or a real vanilla bean for best flavor |
Storing Tips
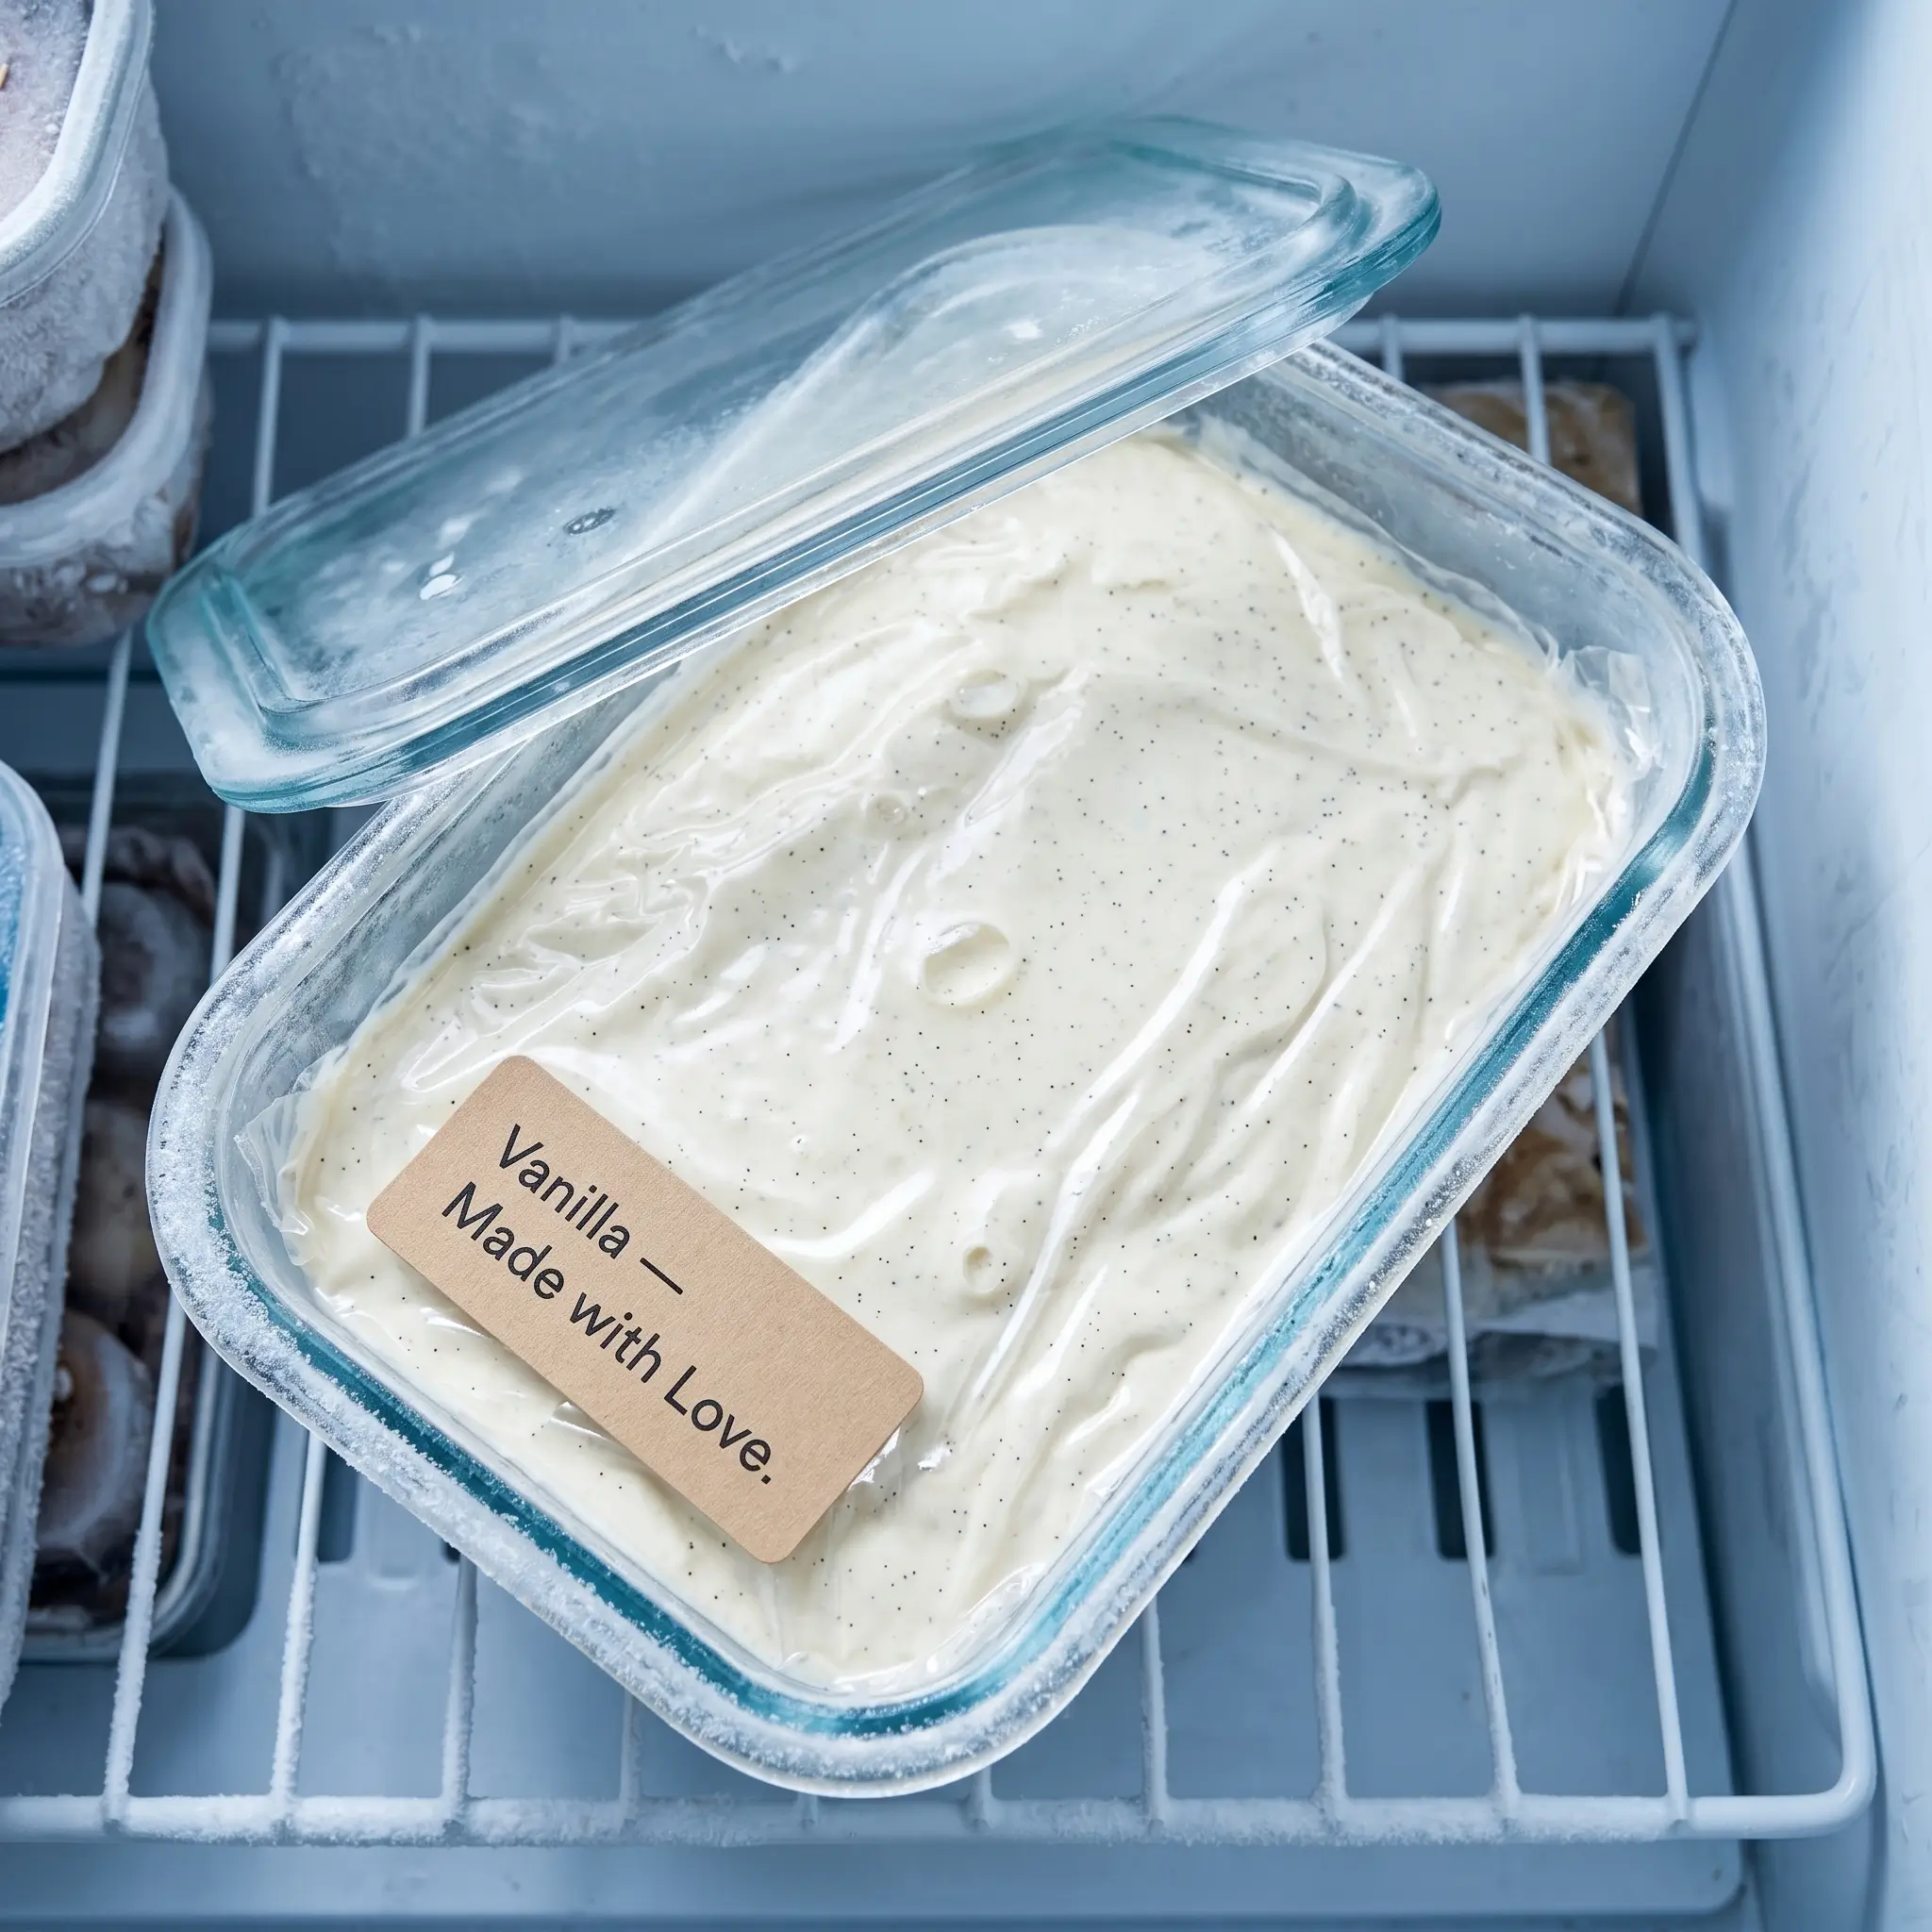
Storing Tips
Proper storage keeps your homemade vanilla ice cream tasting fresh and scoopable for weeks.
| # | Storage Tip | Why It Matters |
|---|---|---|
| 1 | Use a wide, shallow freezer-safe container with a tight-fitting lid | Freezes more evenly and the tight lid prevents freezer burn |
| 2 | Press plastic wrap or parchment directly onto the surface before sealing | Blocks air and stops ice crystals from forming on top |
| 3 | Consume within 2 weeks for optimal flavor and texture | Beyond 2 weeks, flavor fades and ice crystals become noticeable |
| 4 | Let the container rest at room temperature for 5 minutes before scooping | Homemade ice cream freezes harder; a short rest makes scooping effortless |
| 5 | Keep away from strong-smelling foods in the freezer | Ice cream absorbs odors through its fat content, ruining the vanilla flavor |
| 6 | Never refreeze melted ice cream | Refreezing breaks the emulsion and leaves an icy, coarse texture |
Conclusion
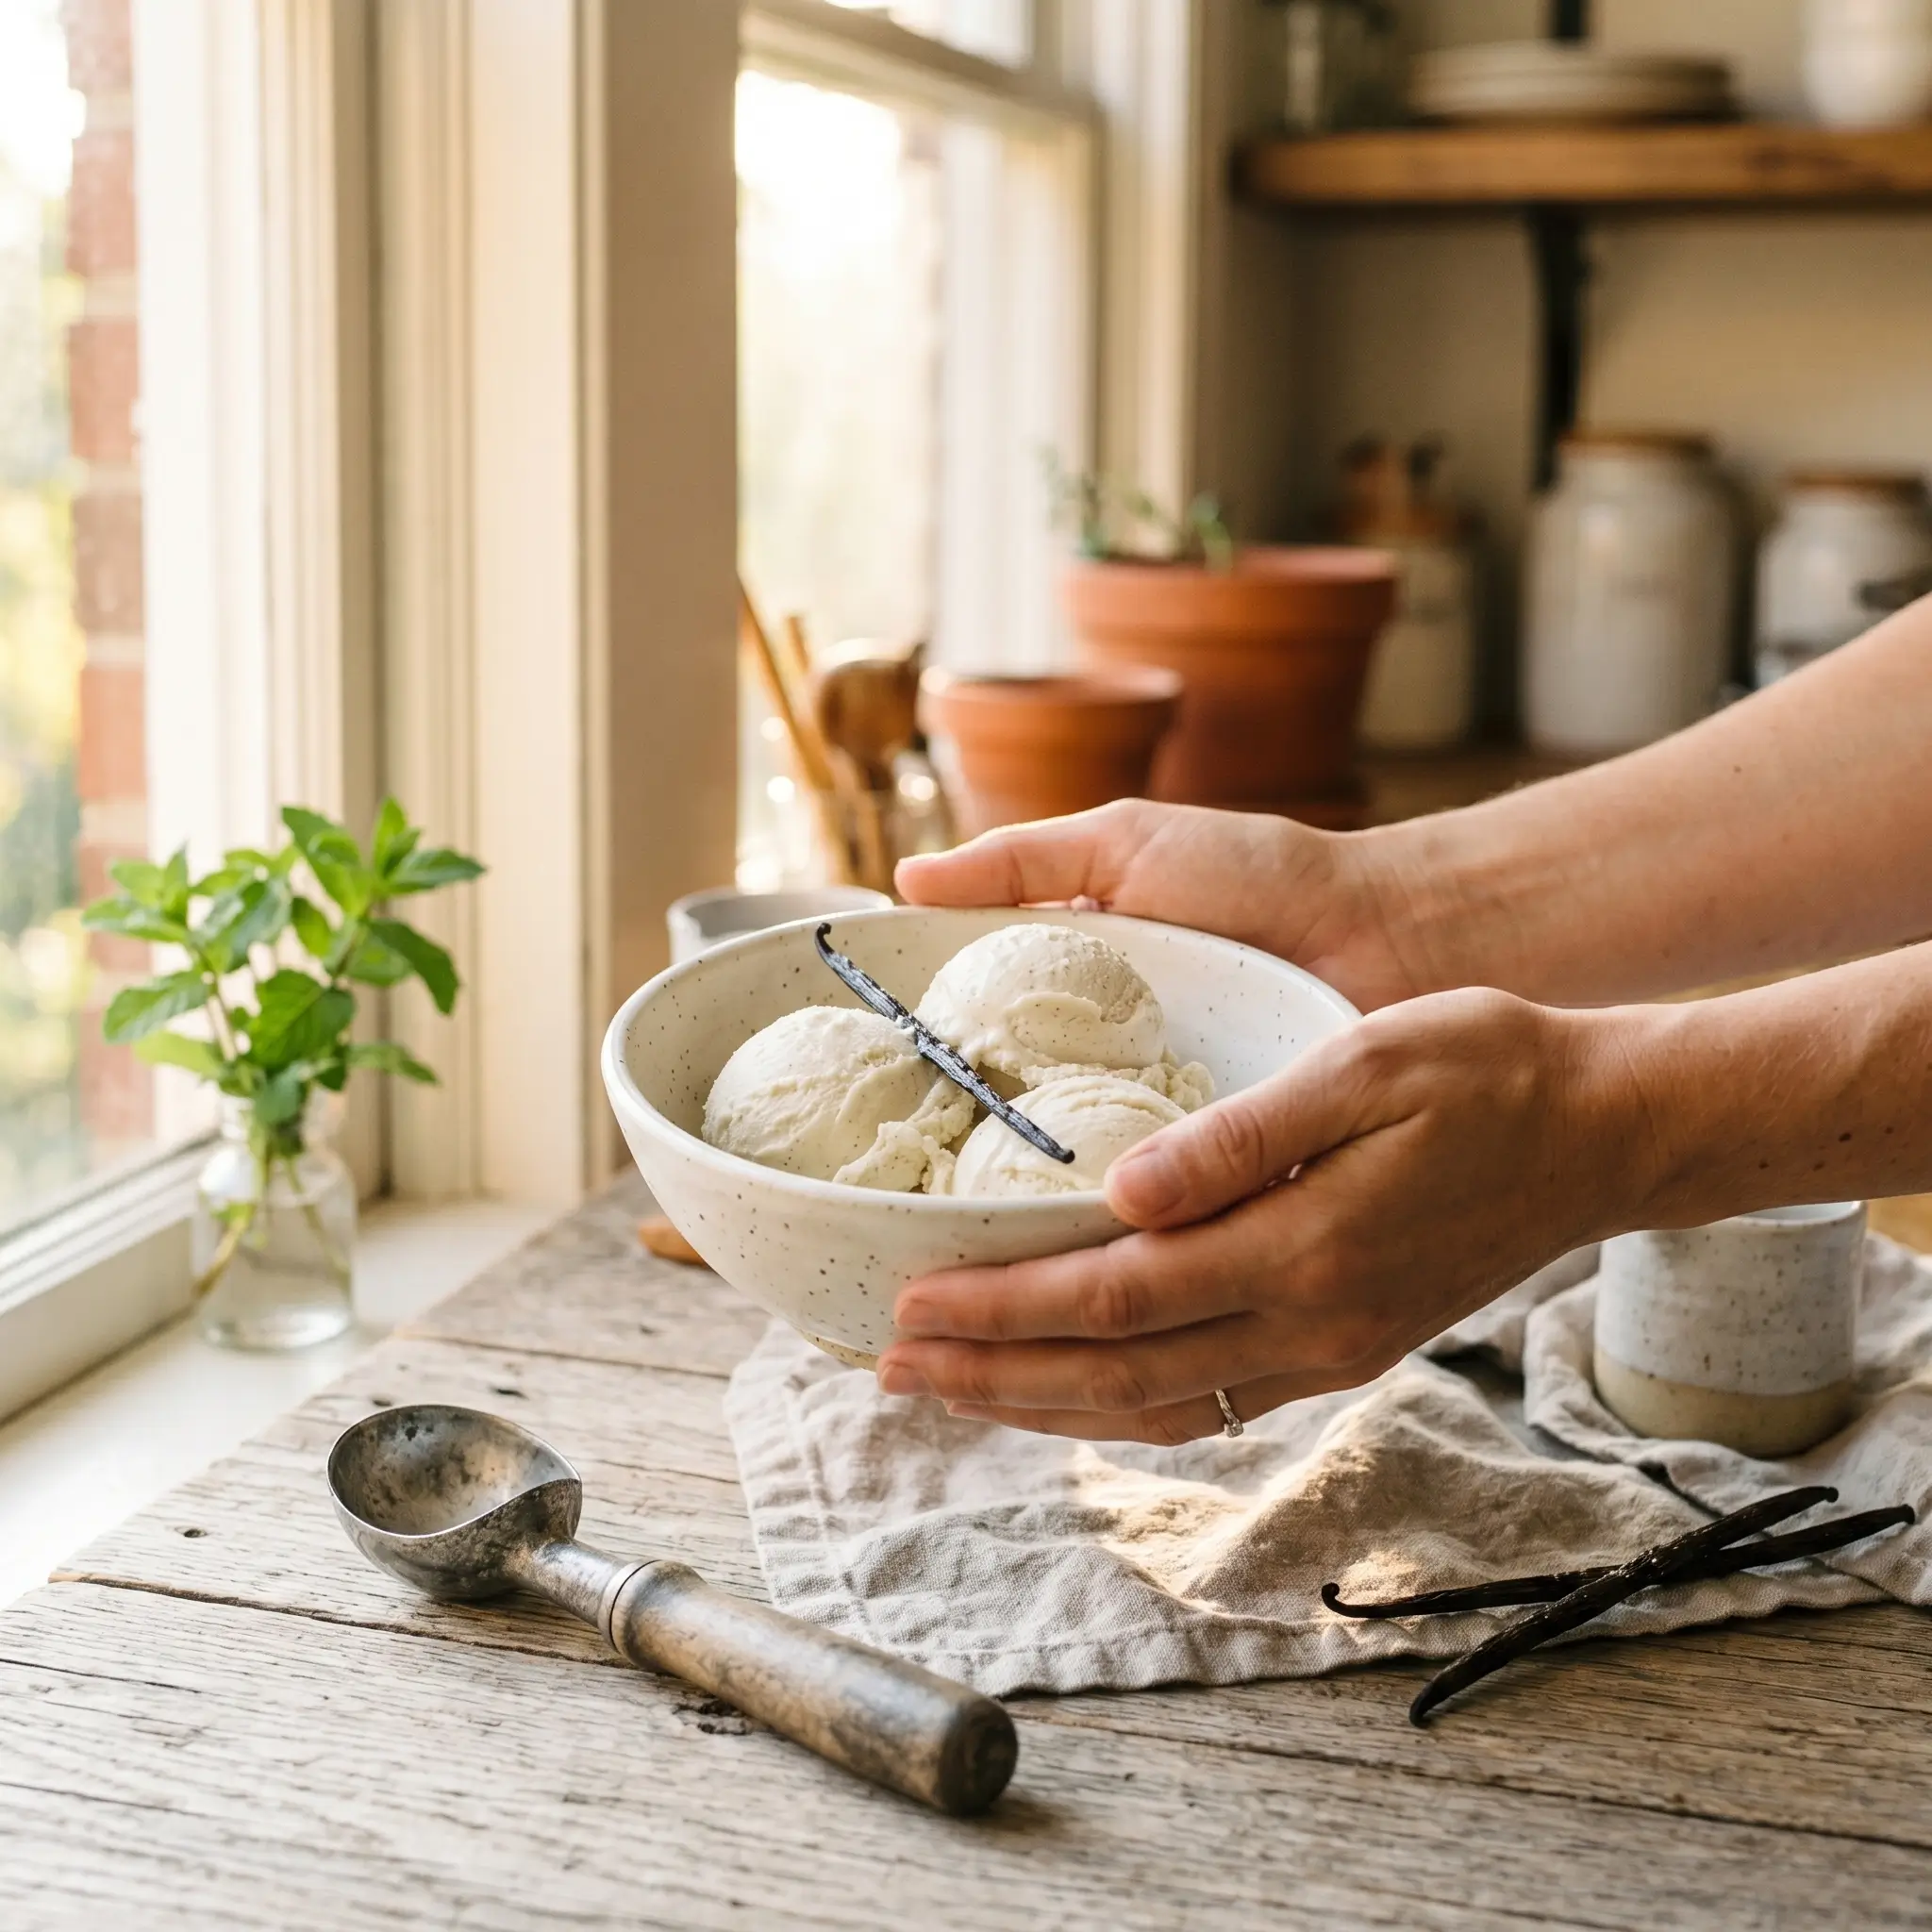
There you have it. Homemade vanilla ice cream does not have to be complicated or disappointing. By tempering your eggs correctly, pulling the custard at exactly the right moment, and chilling your base completely before churning, you unlock the silky, scoopable perfection that most home recipes miss. This simple vanilla ice cream with heavy cream is the kind of recipe you will come back to all summer long.
Give this recipe a try and let us know in the comments how it turned out. Did you add a fun mix-in or try one of the healthier swaps? We would love to hear about it. And if you enjoyed this post, check out our other no fuss frozen dessert recipes on RecipeTastyBites.com.
Recipe Card
Homemade Vanilla Ice Cream
Creamy, dreamy, and made completely from scratch
Ingredients
- 2 cups heavy whipping cream
- 1 cup whole milk
- 3/4 cup granulated sugar
- 2 tsp pure vanilla extract
- 4 large egg yolks
- 1 pinch sea salt
Instructions
- Warm milk, half the cream, and vanilla over medium heat until steaming. Remove and steep 10 minutes.
- Whisk egg yolks and sugar until pale and thick.
- Temper eggs by slowly adding warm cream mixture while whisking constantly.
- Return to saucepan and cook over low heat until custard coats the back of a spoon.
- Strain, stir in remaining cold cream, and chill for at least 1 hour.
- Churn in ice cream maker 25 to 30 minutes, then freeze 4 hours before serving.
Frequently Asked Questions
Yes. Pour the chilled custard base into a shallow freezer-safe pan and freeze. Every 30 minutes for the first 3 hours, remove and vigorously stir or whip with a hand mixer to break up ice crystals. The texture will be slightly less airy than churned but still very creamy and delicious.
The custard is ready when it coats the back of a wooden spoon and a clean line holds when you drag your finger through it. A kitchen thermometer reading between 170 and 175 degrees F is the most reliable method.
The two most common reasons are churning a warm base or not using enough fat. Always chill your base completely and make sure you are using full-fat heavy cream. Skimping on fat or dairy content is the fastest route to an icy texture.
Absolutely. Use 1 teaspoon of vanilla bean paste in place of 2 teaspoons of extract. Vanilla bean paste provides a more intense flavor and the visible specks of bean throughout the ice cream, which many home bakers love.
When stored properly with plastic wrap pressed directly on the surface and a tight lid, it keeps well for up to 2 weeks. Beyond that, the flavor starts to fade and ice crystal formation becomes more noticeable.
Yes, though be careful not to overfill your ice cream maker. Most home machines have a capacity of 1.5 to 2 quarts. If doubling, churn in two separate batches for the best aeration and texture.
Your Feedback Helps Us Grow!
There are no reviews yet. Be the first one to write one.