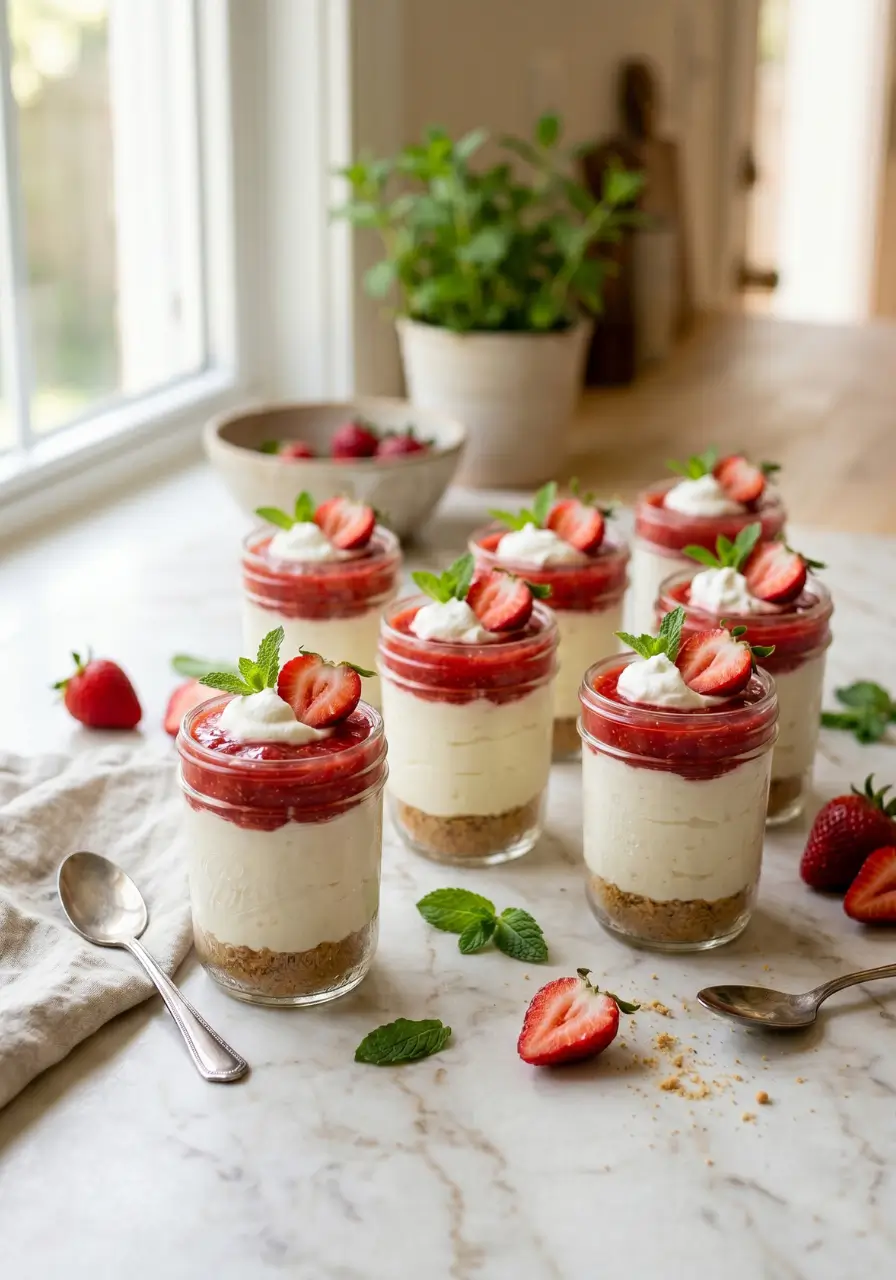
Mini Mason Jar Strawberry Cheesecakes: 5 Steps to Pure Bliss
Table of Contents
Introduction
What if you could whip up a show-stopping dessert in under 30 minutes, with zero oven time, and serve it in the most adorable little jars imaginable? Mini Mason Jar Strawberry Cheesecakes are the answer to every dessert dilemma you have ever faced. Whether you are hosting a dinner party, prepping sweet treats for the week, or just craving something creamy and fruity on a Tuesday night, this no-bake mason jar dessert recipe delivers every single time.
These individual strawberry cheesecakes are not just cute. They are perfectly portioned, make-ahead friendly, and absolutely loaded with flavor. The buttery graham cracker crust, the silky cream cheese filling, and the vibrant fresh strawberry topping come together in one little jar that feels like pure magic. No baking. No water bath. No cracks in your cheesecake. Just bliss.
According to food trend data, no-bake desserts have surged in popularity by over 40% in the last three years, and mason jar desserts consistently rank among the top searched individual dessert formats. It is easy to see why. They are portable, portion-controlled, and visually stunning. Once you try this easy mason jar cheesecake with strawberries , you will never go back to a traditional full-size cheesecake again.
Ingredients
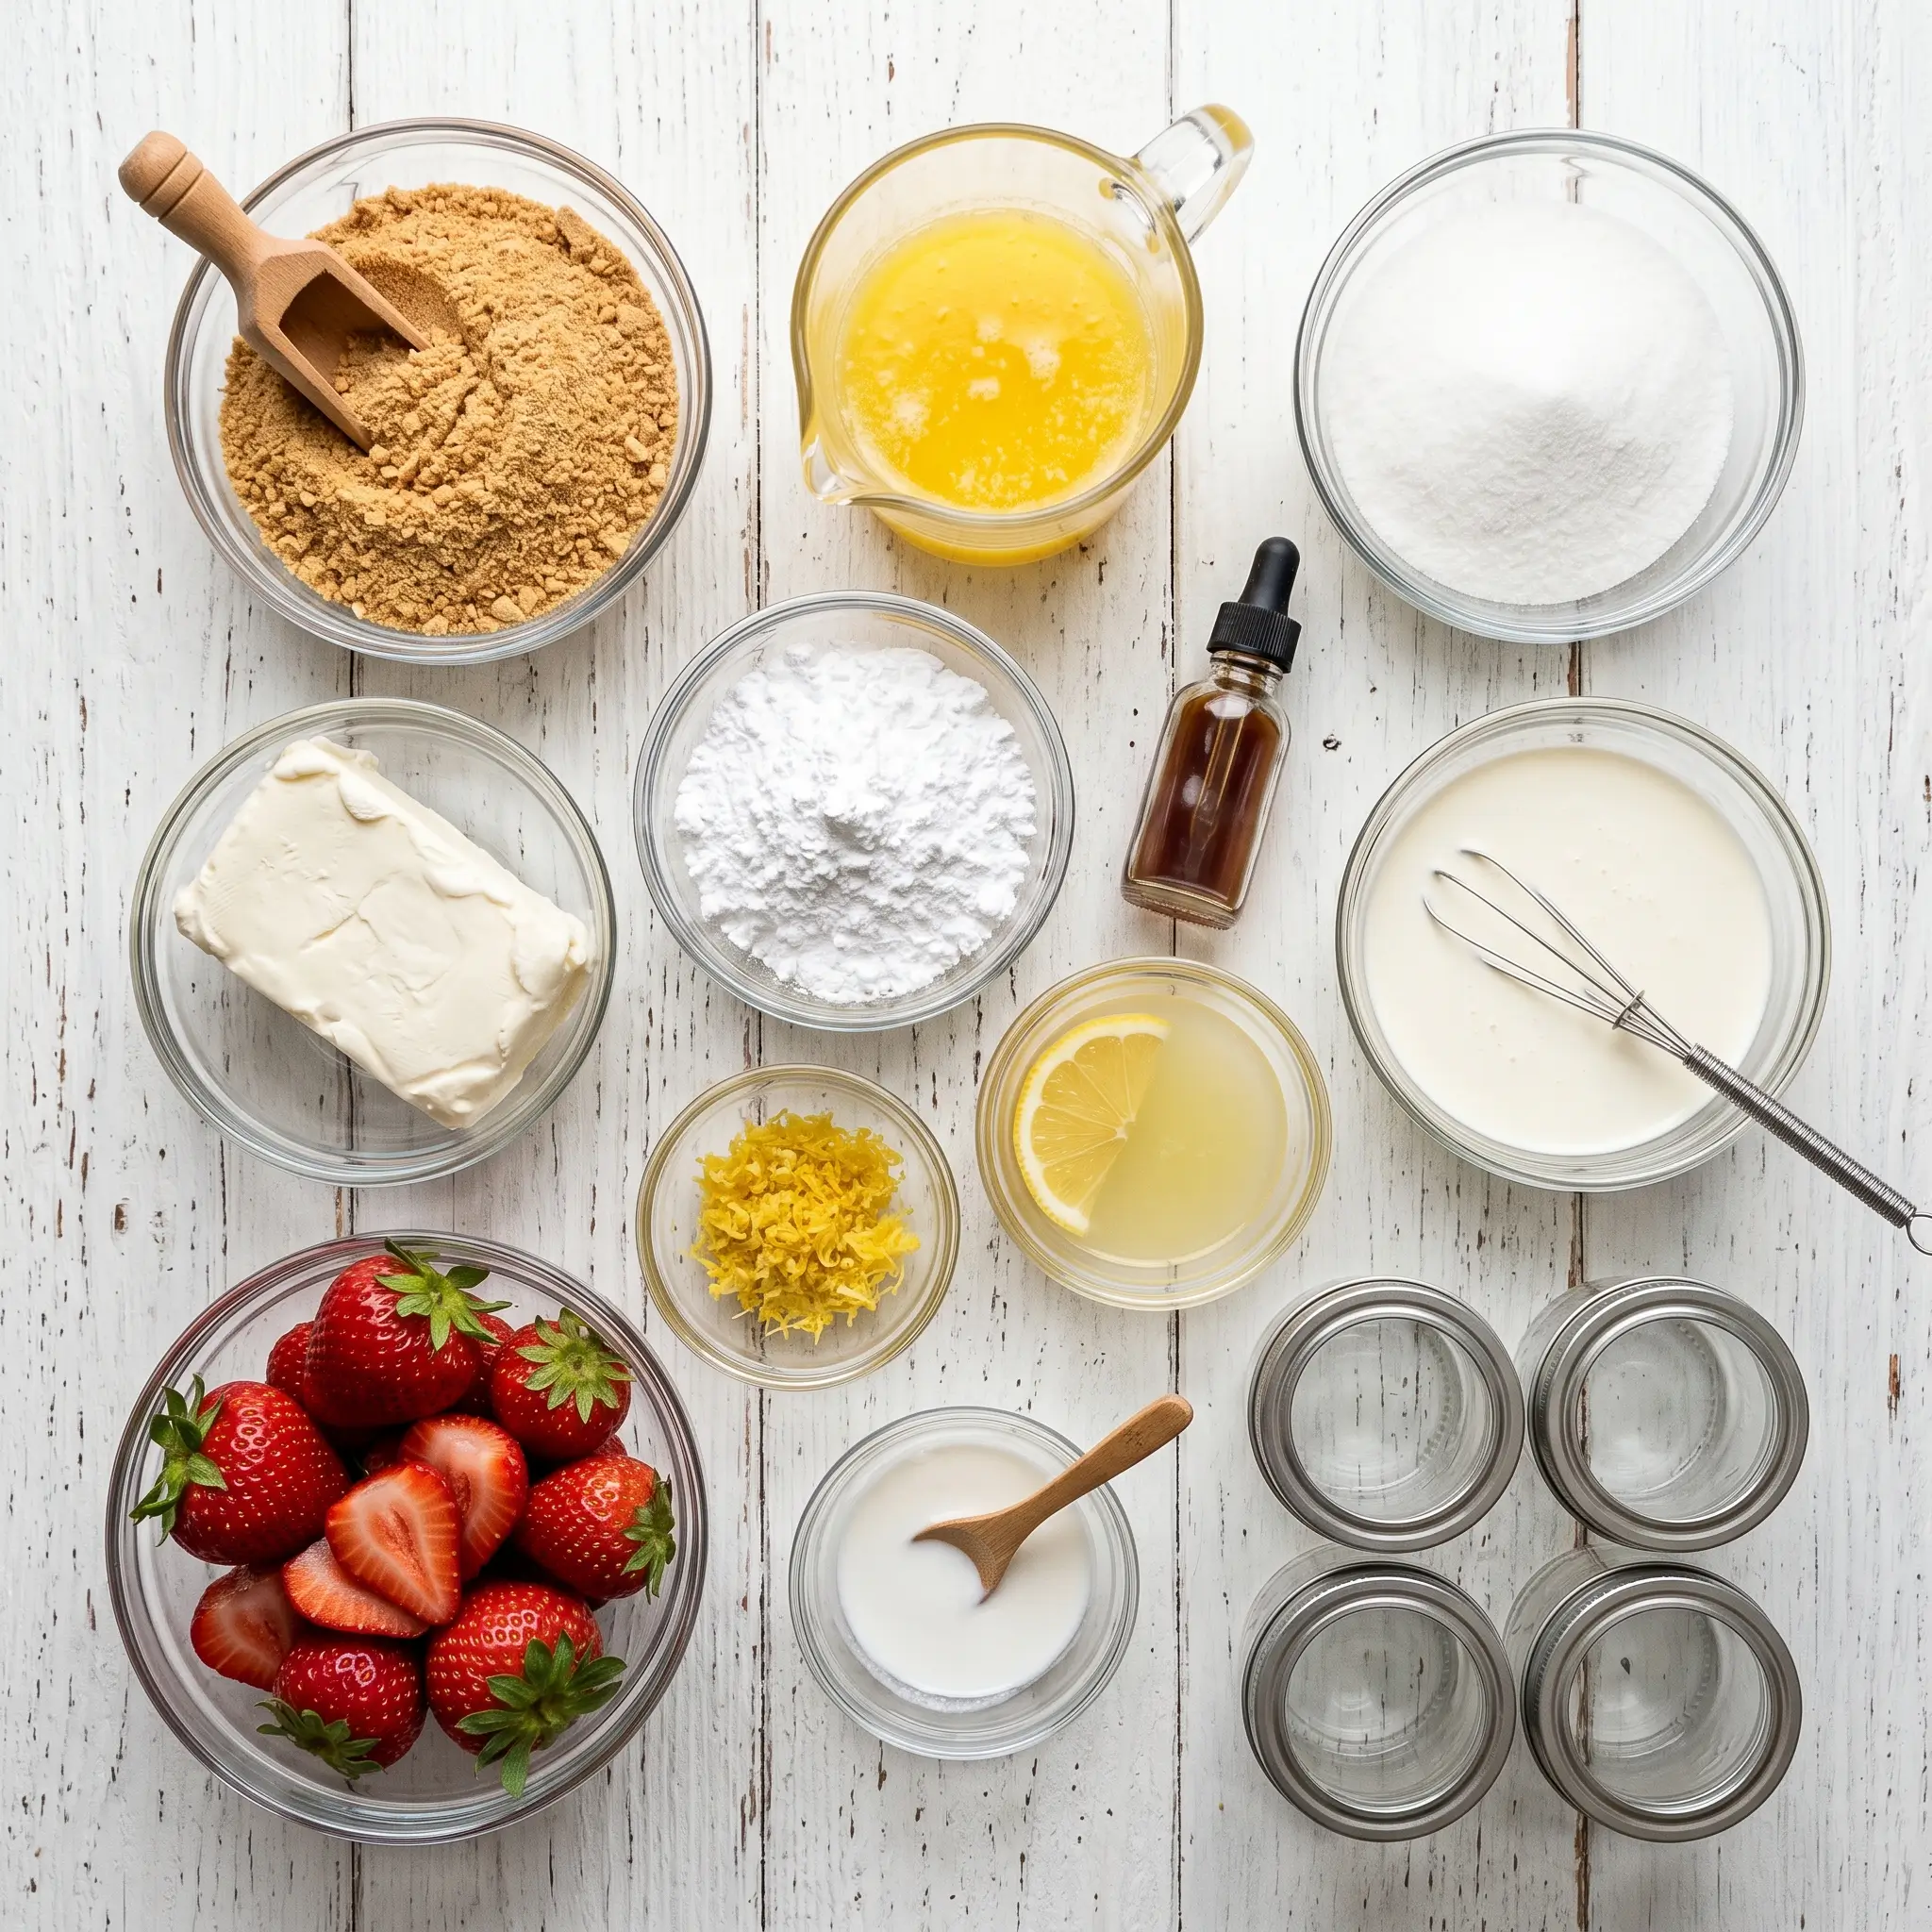
Here is everything you need to make these dreamy mini mason jar strawberry cheesecakes. Each ingredient plays a key role, and most are pantry and fridge staples you already have on hand.
For the Graham Cracker Crust :
- 1.5 cups graham cracker crumbs (about 10 full crackers)
- 3 tablespoons granulated sugar
- 5 tablespoons unsalted butter, melted
For the Cheesecake Filling :
- 16 oz full-fat cream cheese, softened to room temperature
- 1 cup powdered sugar, sifted
- 1 teaspoon pure vanilla extract
- 1 cup heavy whipping cream, cold
- 2 tablespoons fresh lemon juice
For the Strawberry Topping :
- 2 cups fresh strawberries, hulled and diced
- 3 tablespoons granulated sugar
- 1 teaspoon lemon zest
- 1 tablespoon cornstarch mixed with 1 tablespoon cold water (optional, for a thicker compote)
Substitution Tips :
Swap graham crackers for Oreos or digestive biscuits for a fun twist. Use reduced-fat cream cheese if needed, though full-fat gives the creamiest result. Frozen strawberries work beautifully for the topping when fresh are out of season. Coconut cream can replace heavy cream for a dairy-free version.
Timing
One of the best things about this small batch strawberry cheesecake mason jars recipe is how little active time it requires. Here is a full breakdown:
| Prep Time | 20 minutes |
|---|---|
| Cook Time | 0 minutes (No-Bake) |
| Chill Time | 2 hours minimum (overnight is ideal) |
| Total Time | Approximately 2 hours 20 minutes |
| Servings | 6 mini mason jars (half-pint size) |
| Difficulty Level | Easy |
Compared to a traditional baked cheesecake which typically requires 1.5 hours of baking plus 4 hours of cooling, this no-bake mini strawberry cheesecake jars recipe saves you over 3 hours in total time. That is a win on every level.
Step-by-Step Instructions
Step 1 : Make the Graham Cracker Crust
Start by crushing your graham crackers into fine crumbs. You can use a food processor for speed, or place them in a zip-lock bag and crush them with a rolling pin for a satisfying stress-relief session. Combine the crumbs with sugar and melted butter in a bowl and mix until the texture resembles wet sand. Divide the crust mixture evenly among your 6 half-pint mason jars, pressing it down firmly with the back of a spoon or a small glass to create a compact, even layer. Place the jars in the fridge while you make the filling. This keeps the crust firm and helps it hold up under the creamy cheesecake layer.
- Pro Tip : Do not skip pressing the crust firmly. A loose crust will crumble when you dig in.

Step 2 : Whip the Cream
Pour your cold heavy cream into a chilled mixing bowl and beat on medium-high speed with a hand mixer or stand mixer until stiff peaks form. This usually takes about 3 to 4 minutes. Cold cream whips much faster and holds its shape better, so do not skip the chilling step. Set the whipped cream aside in the fridge while you prepare the base.
- Pro Tip : Chill your bowl and beaters in the freezer for 10 minutes before whipping for ultra-stable peaks.
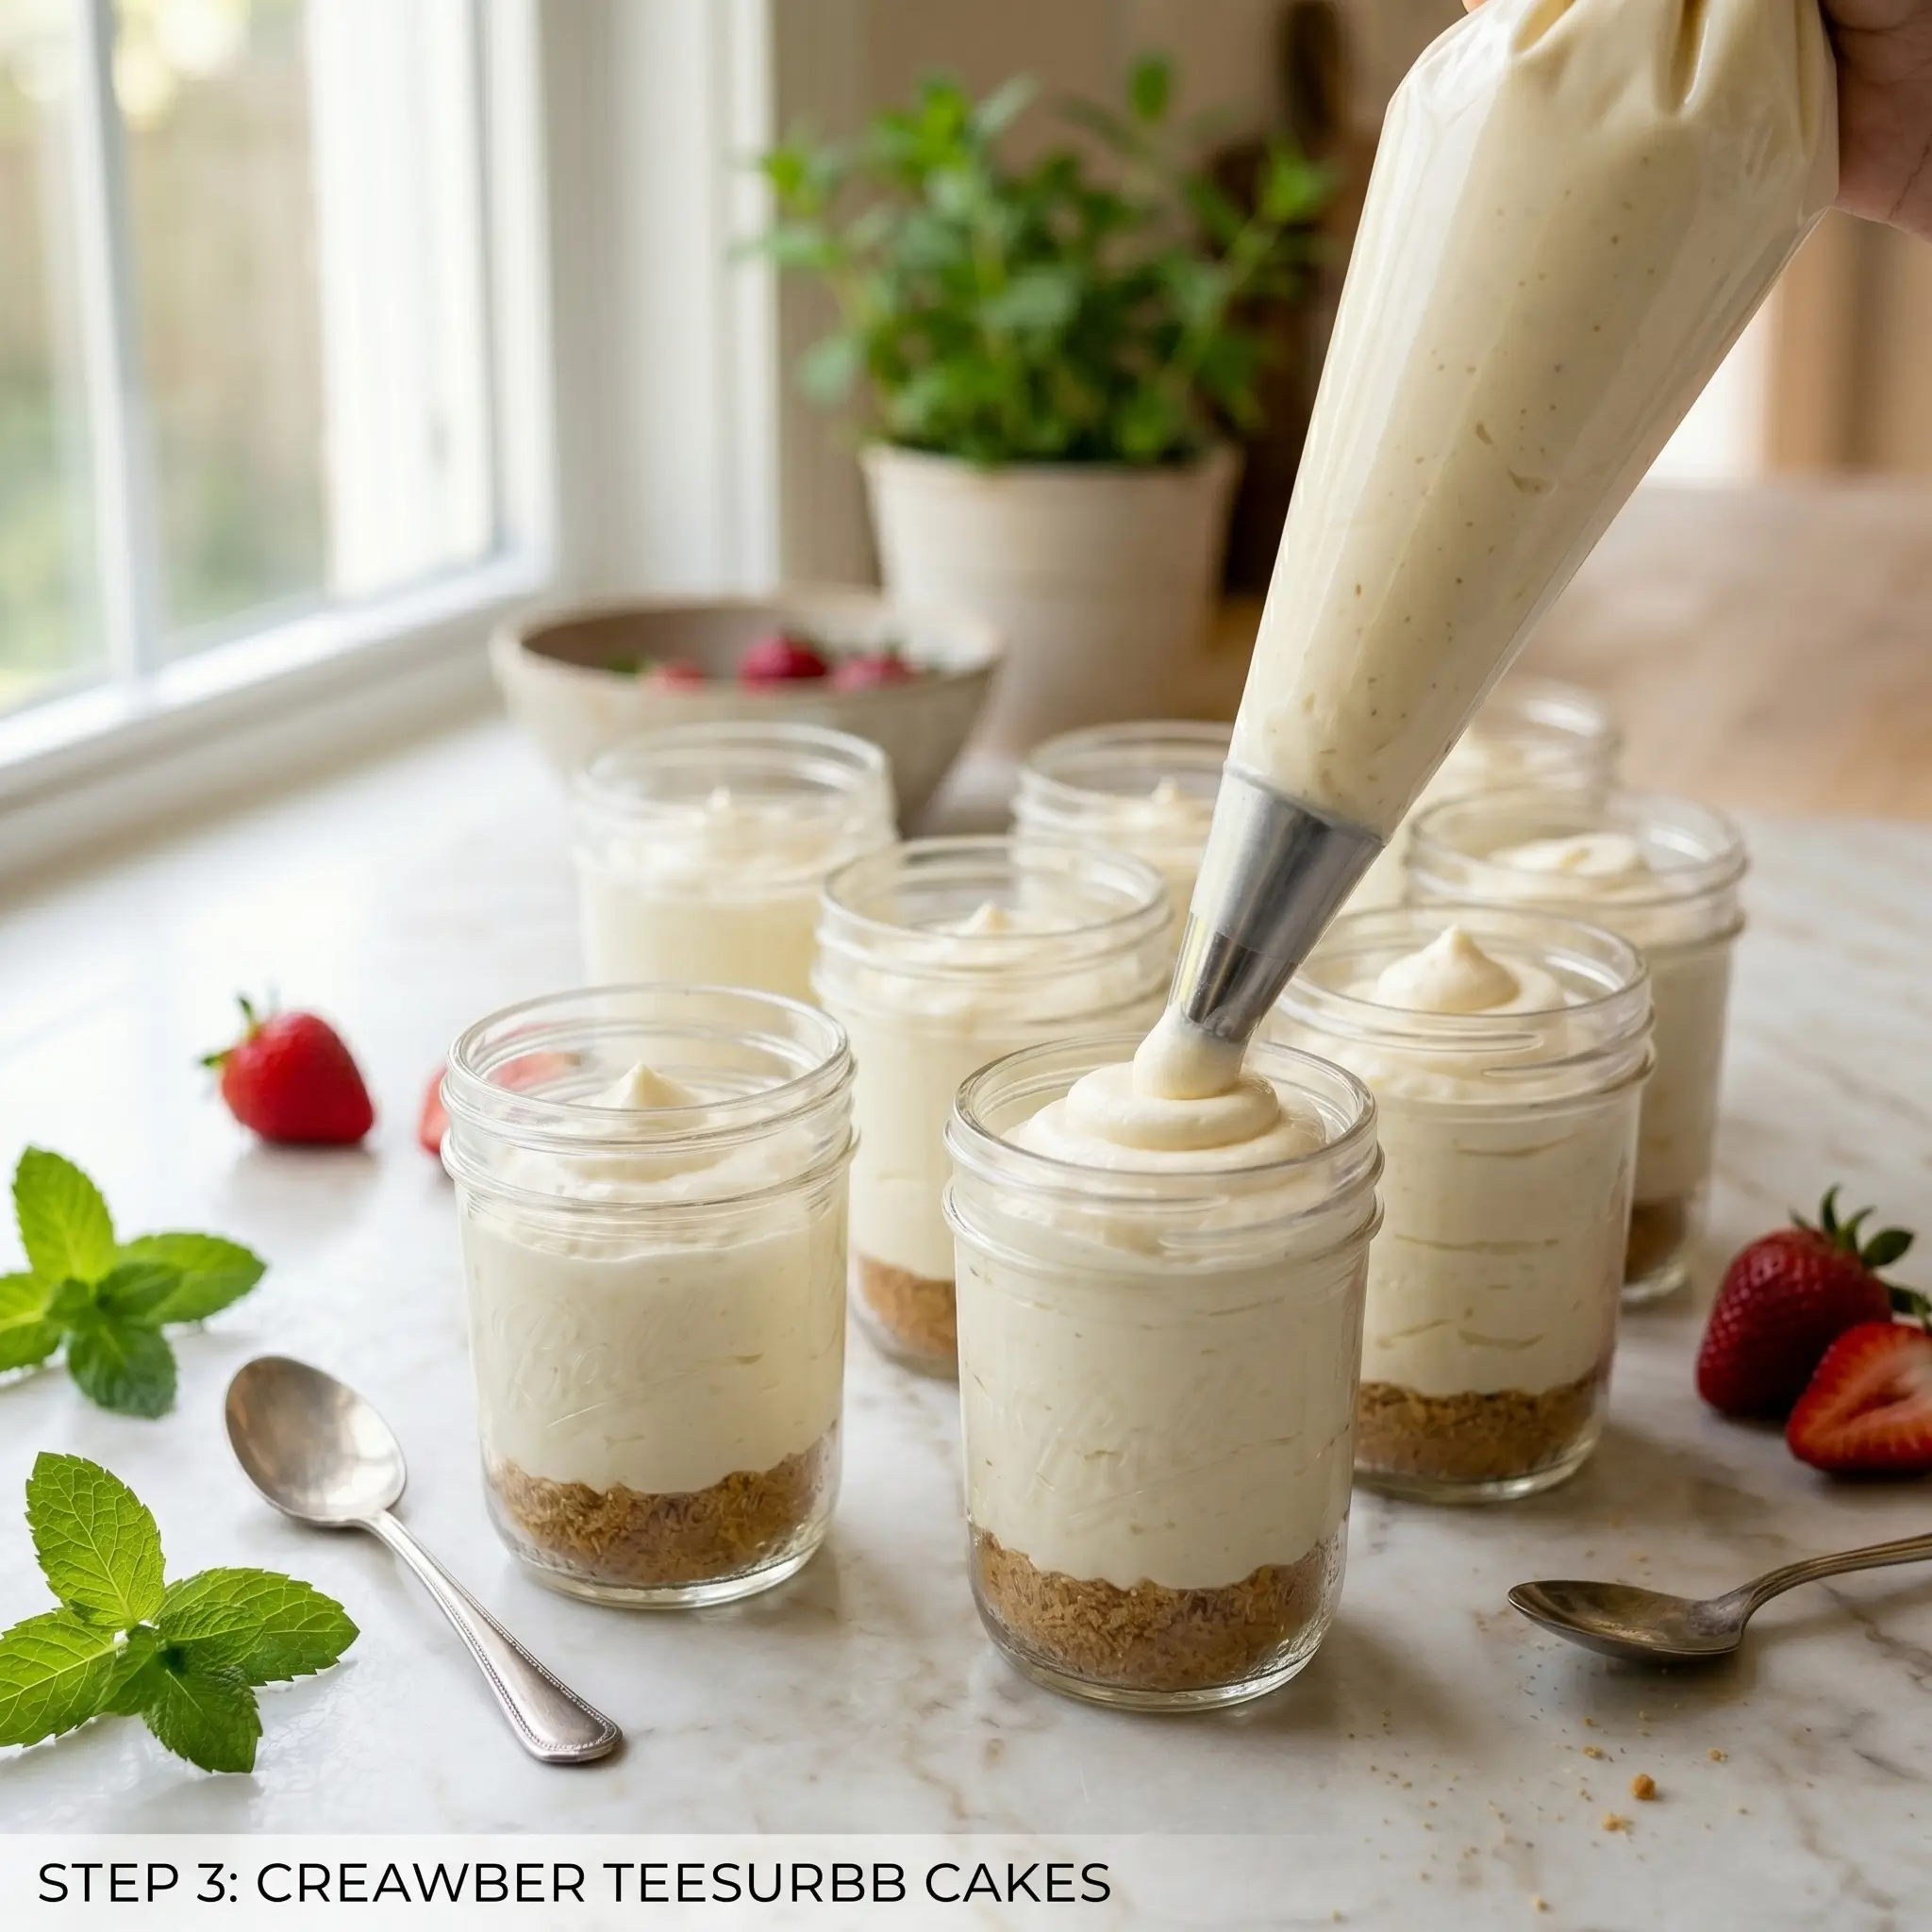
Step 3 : Make the Cream Cheese Filling
In a large bowl, beat the softened cream cheese with an electric mixer until completely smooth and fluffy, about 2 minutes. Scrape down the sides of the bowl as needed. Add the sifted powdered sugar, vanilla extract, and fresh lemon juice. Beat again until everything is silky and well combined. The lemon juice adds a subtle brightness that balances the richness of the cream cheese perfectly. Now gently fold in your whipped cream in two additions using a rubber spatula, being careful not to deflate all that beautiful airiness you just created.
- Pro Tip : Make sure your cream cheese is fully at room temperature or it will leave lumps in your filling no matter how long you mix.

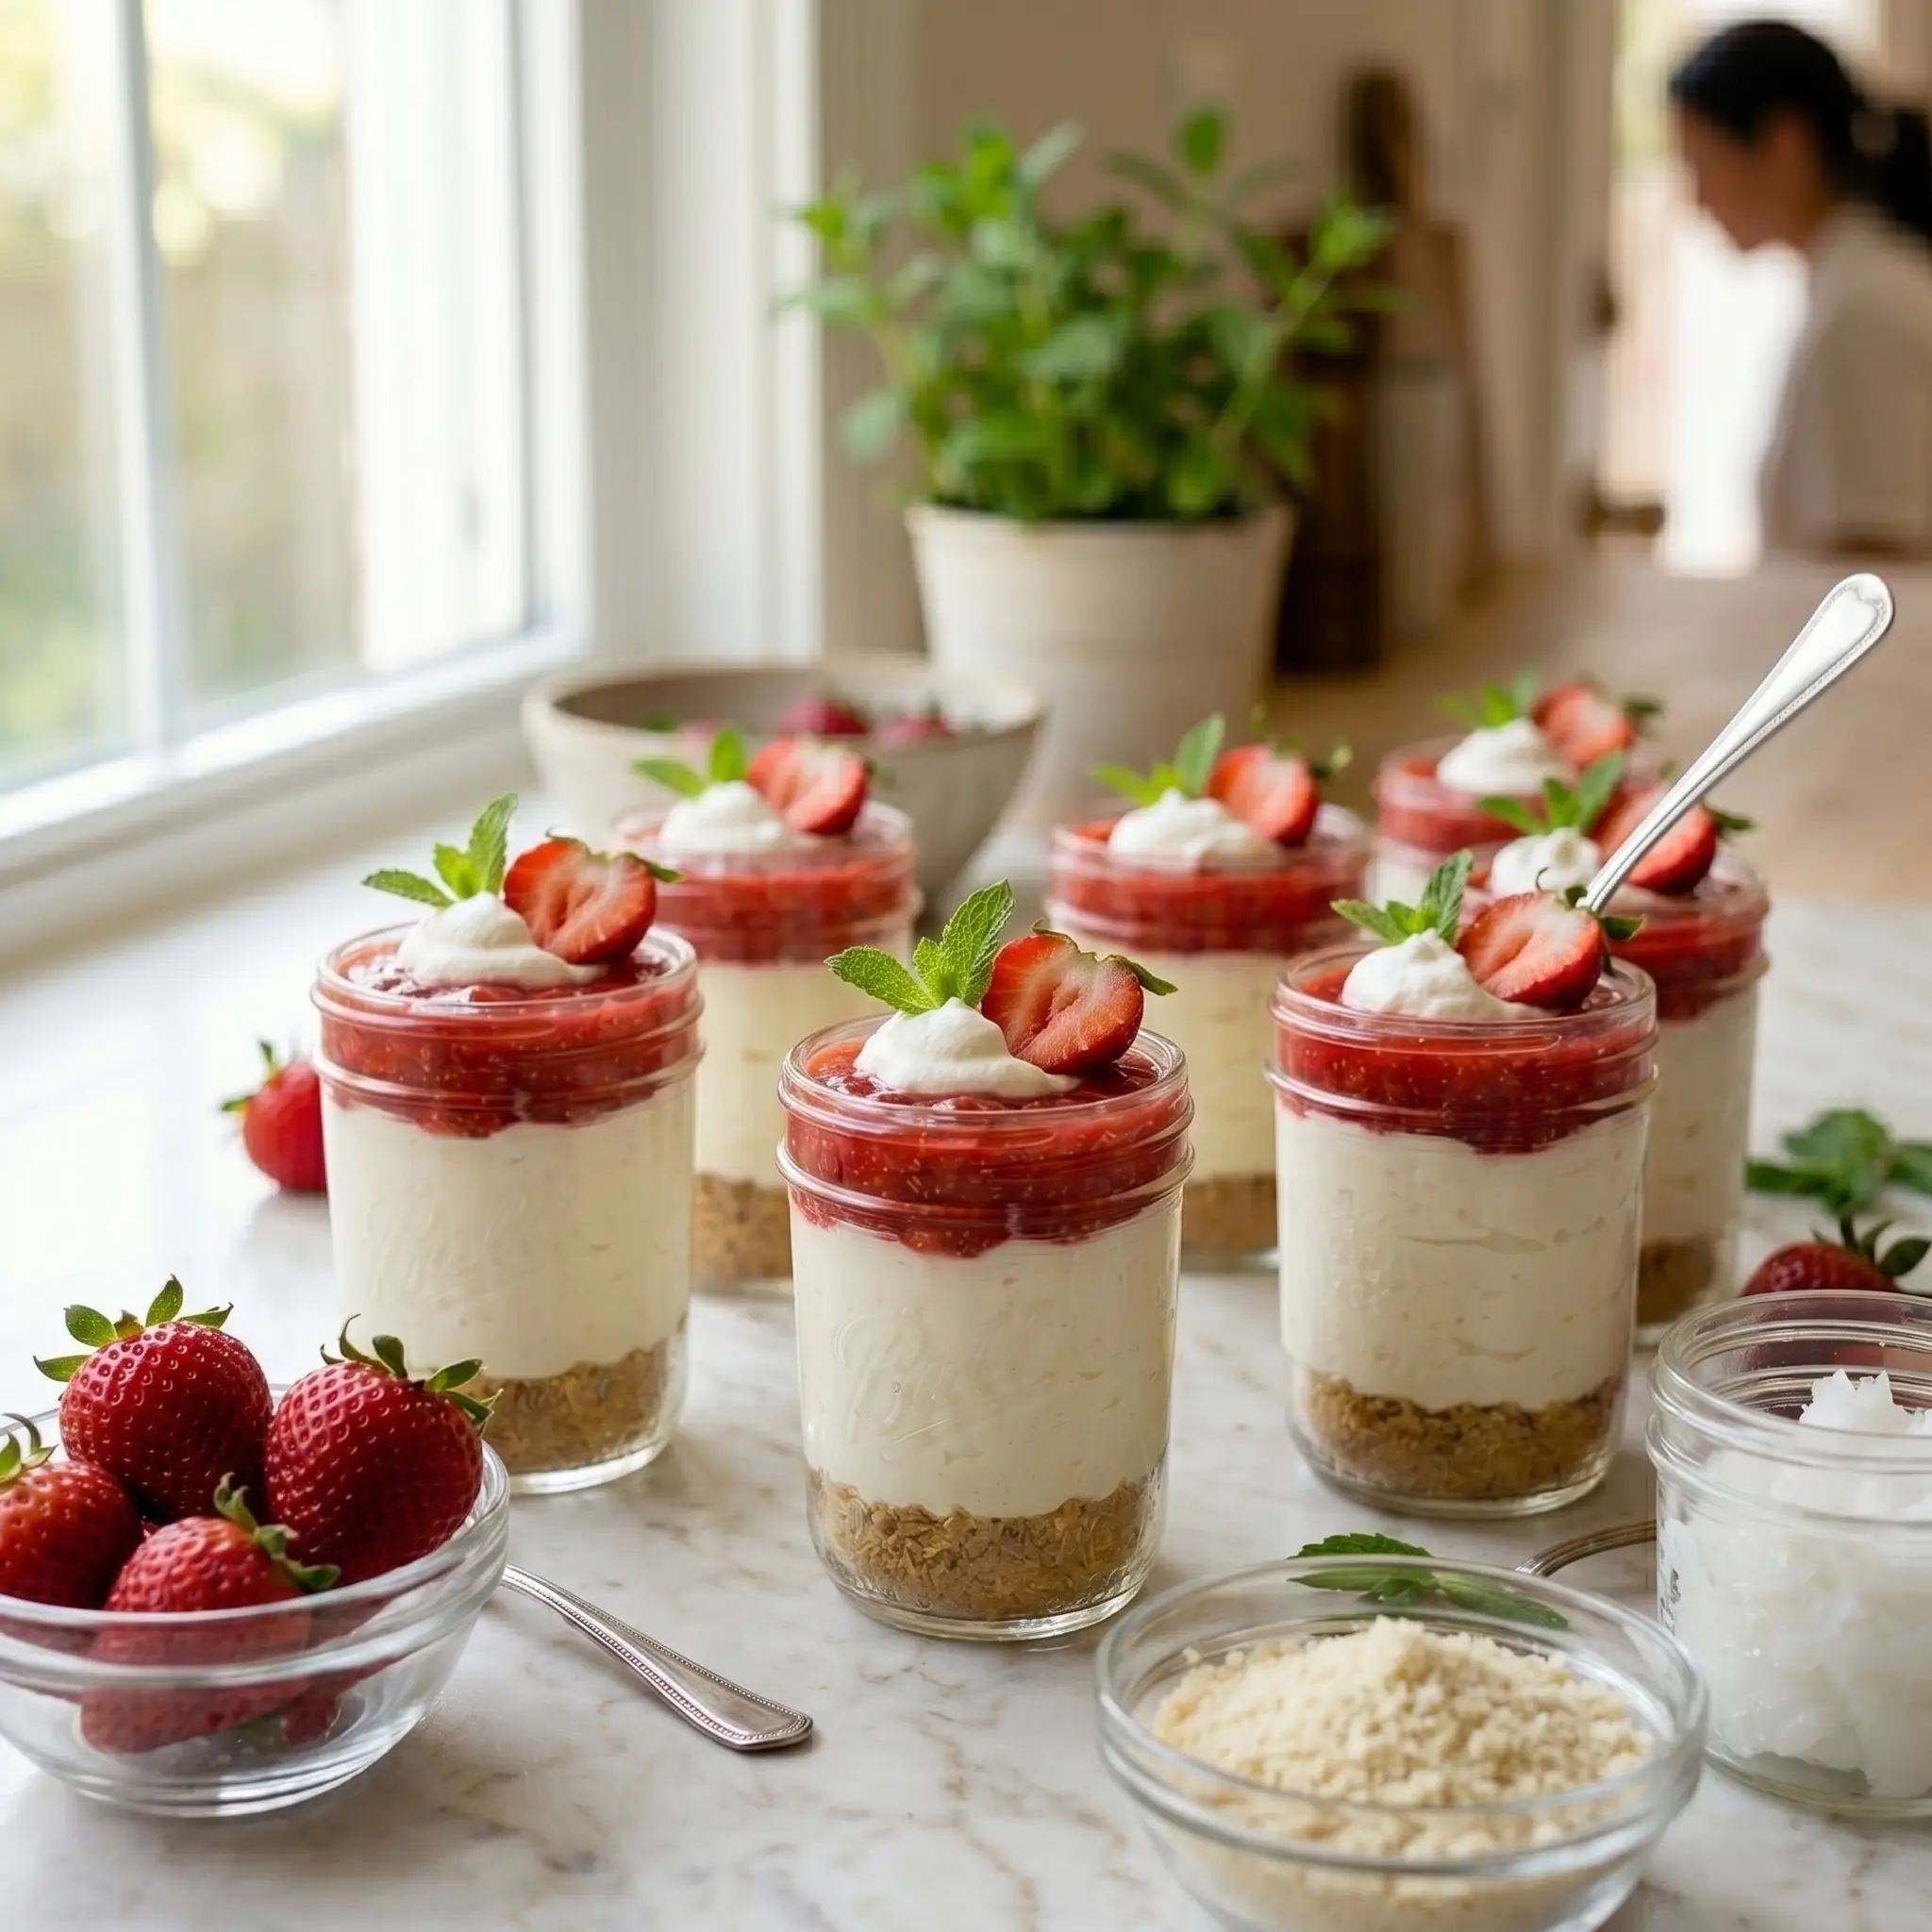
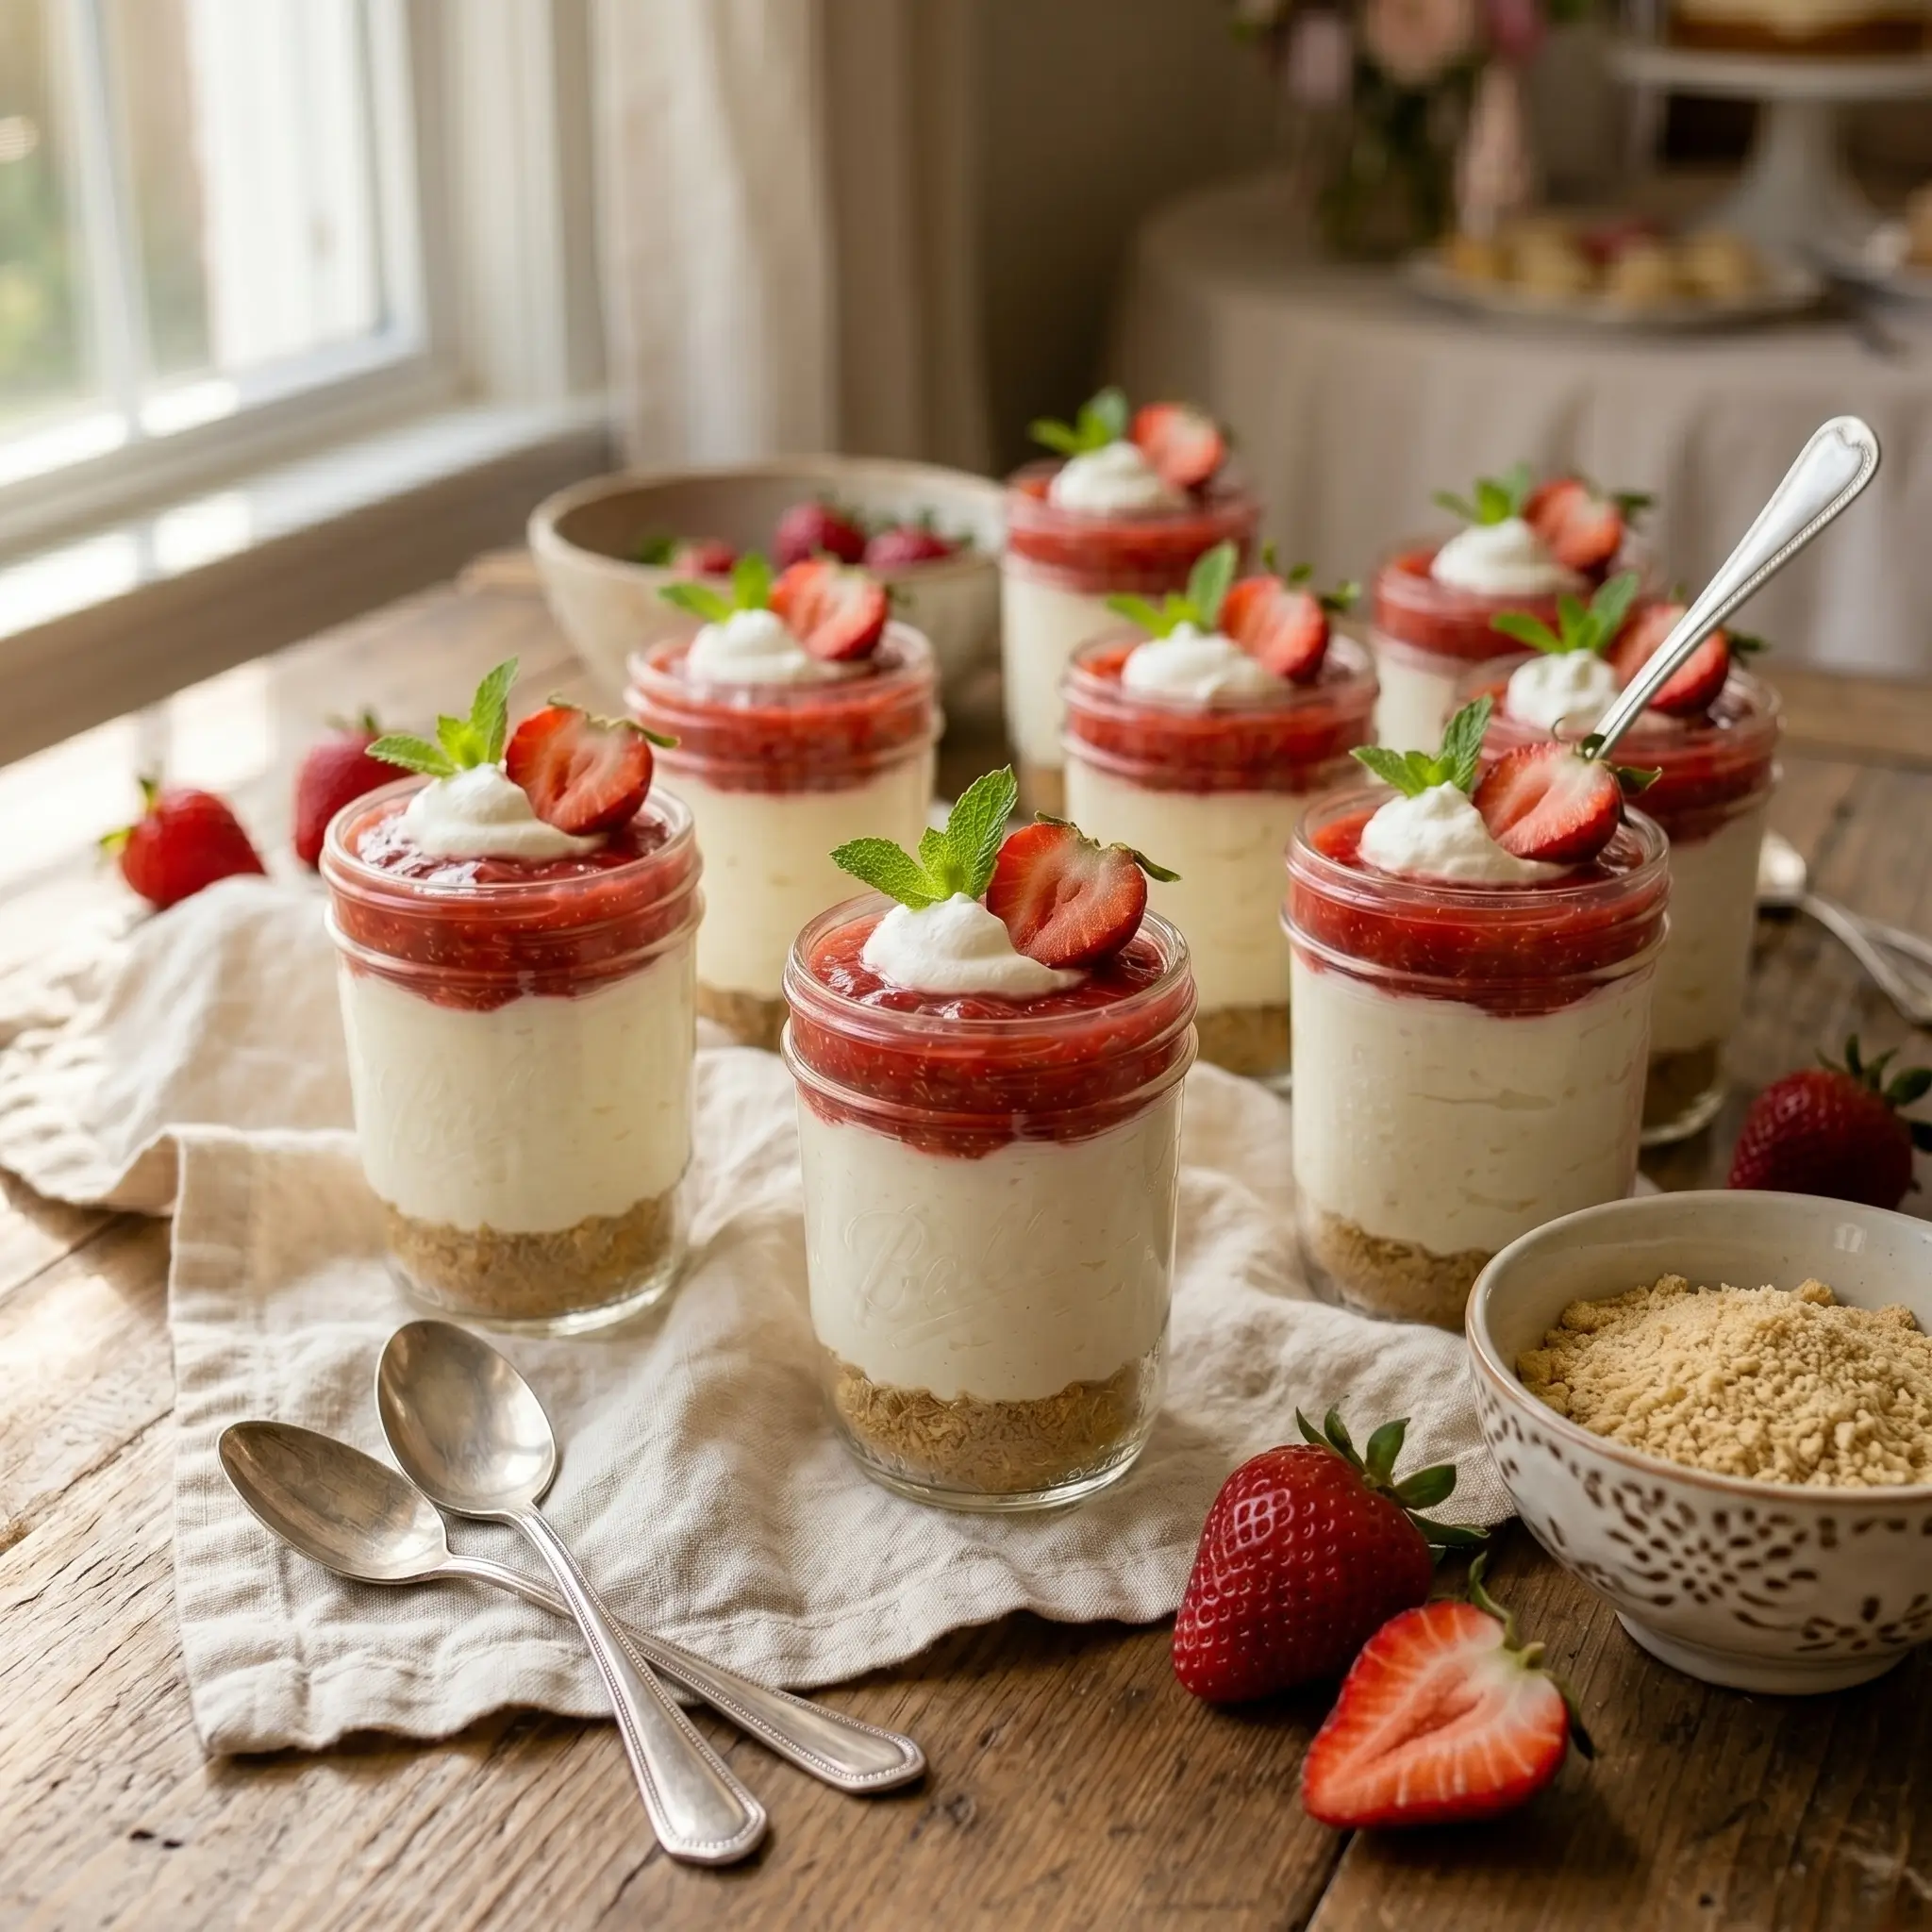
Step 4 : Assemble the Jars
Remove your jars from the fridge. Spoon or pipe the cheesecake filling generously over the prepared crust, filling each jar about three-quarters full. Using a piping bag fitted with a star tip gives a beautiful bakery-style finish, but a simple spoon works just as well. Smooth the tops with a small offset spatula if you want a clean look. Place the filled jars back in the fridge and let them chill for at least 2 hours, or ideally overnight. The longer they chill, the more set and sliceable the filling becomes.
- Pro Tip : These jars can be assembled and refrigerated up to 48 hours ahead without the topping, making them perfect for event prep.
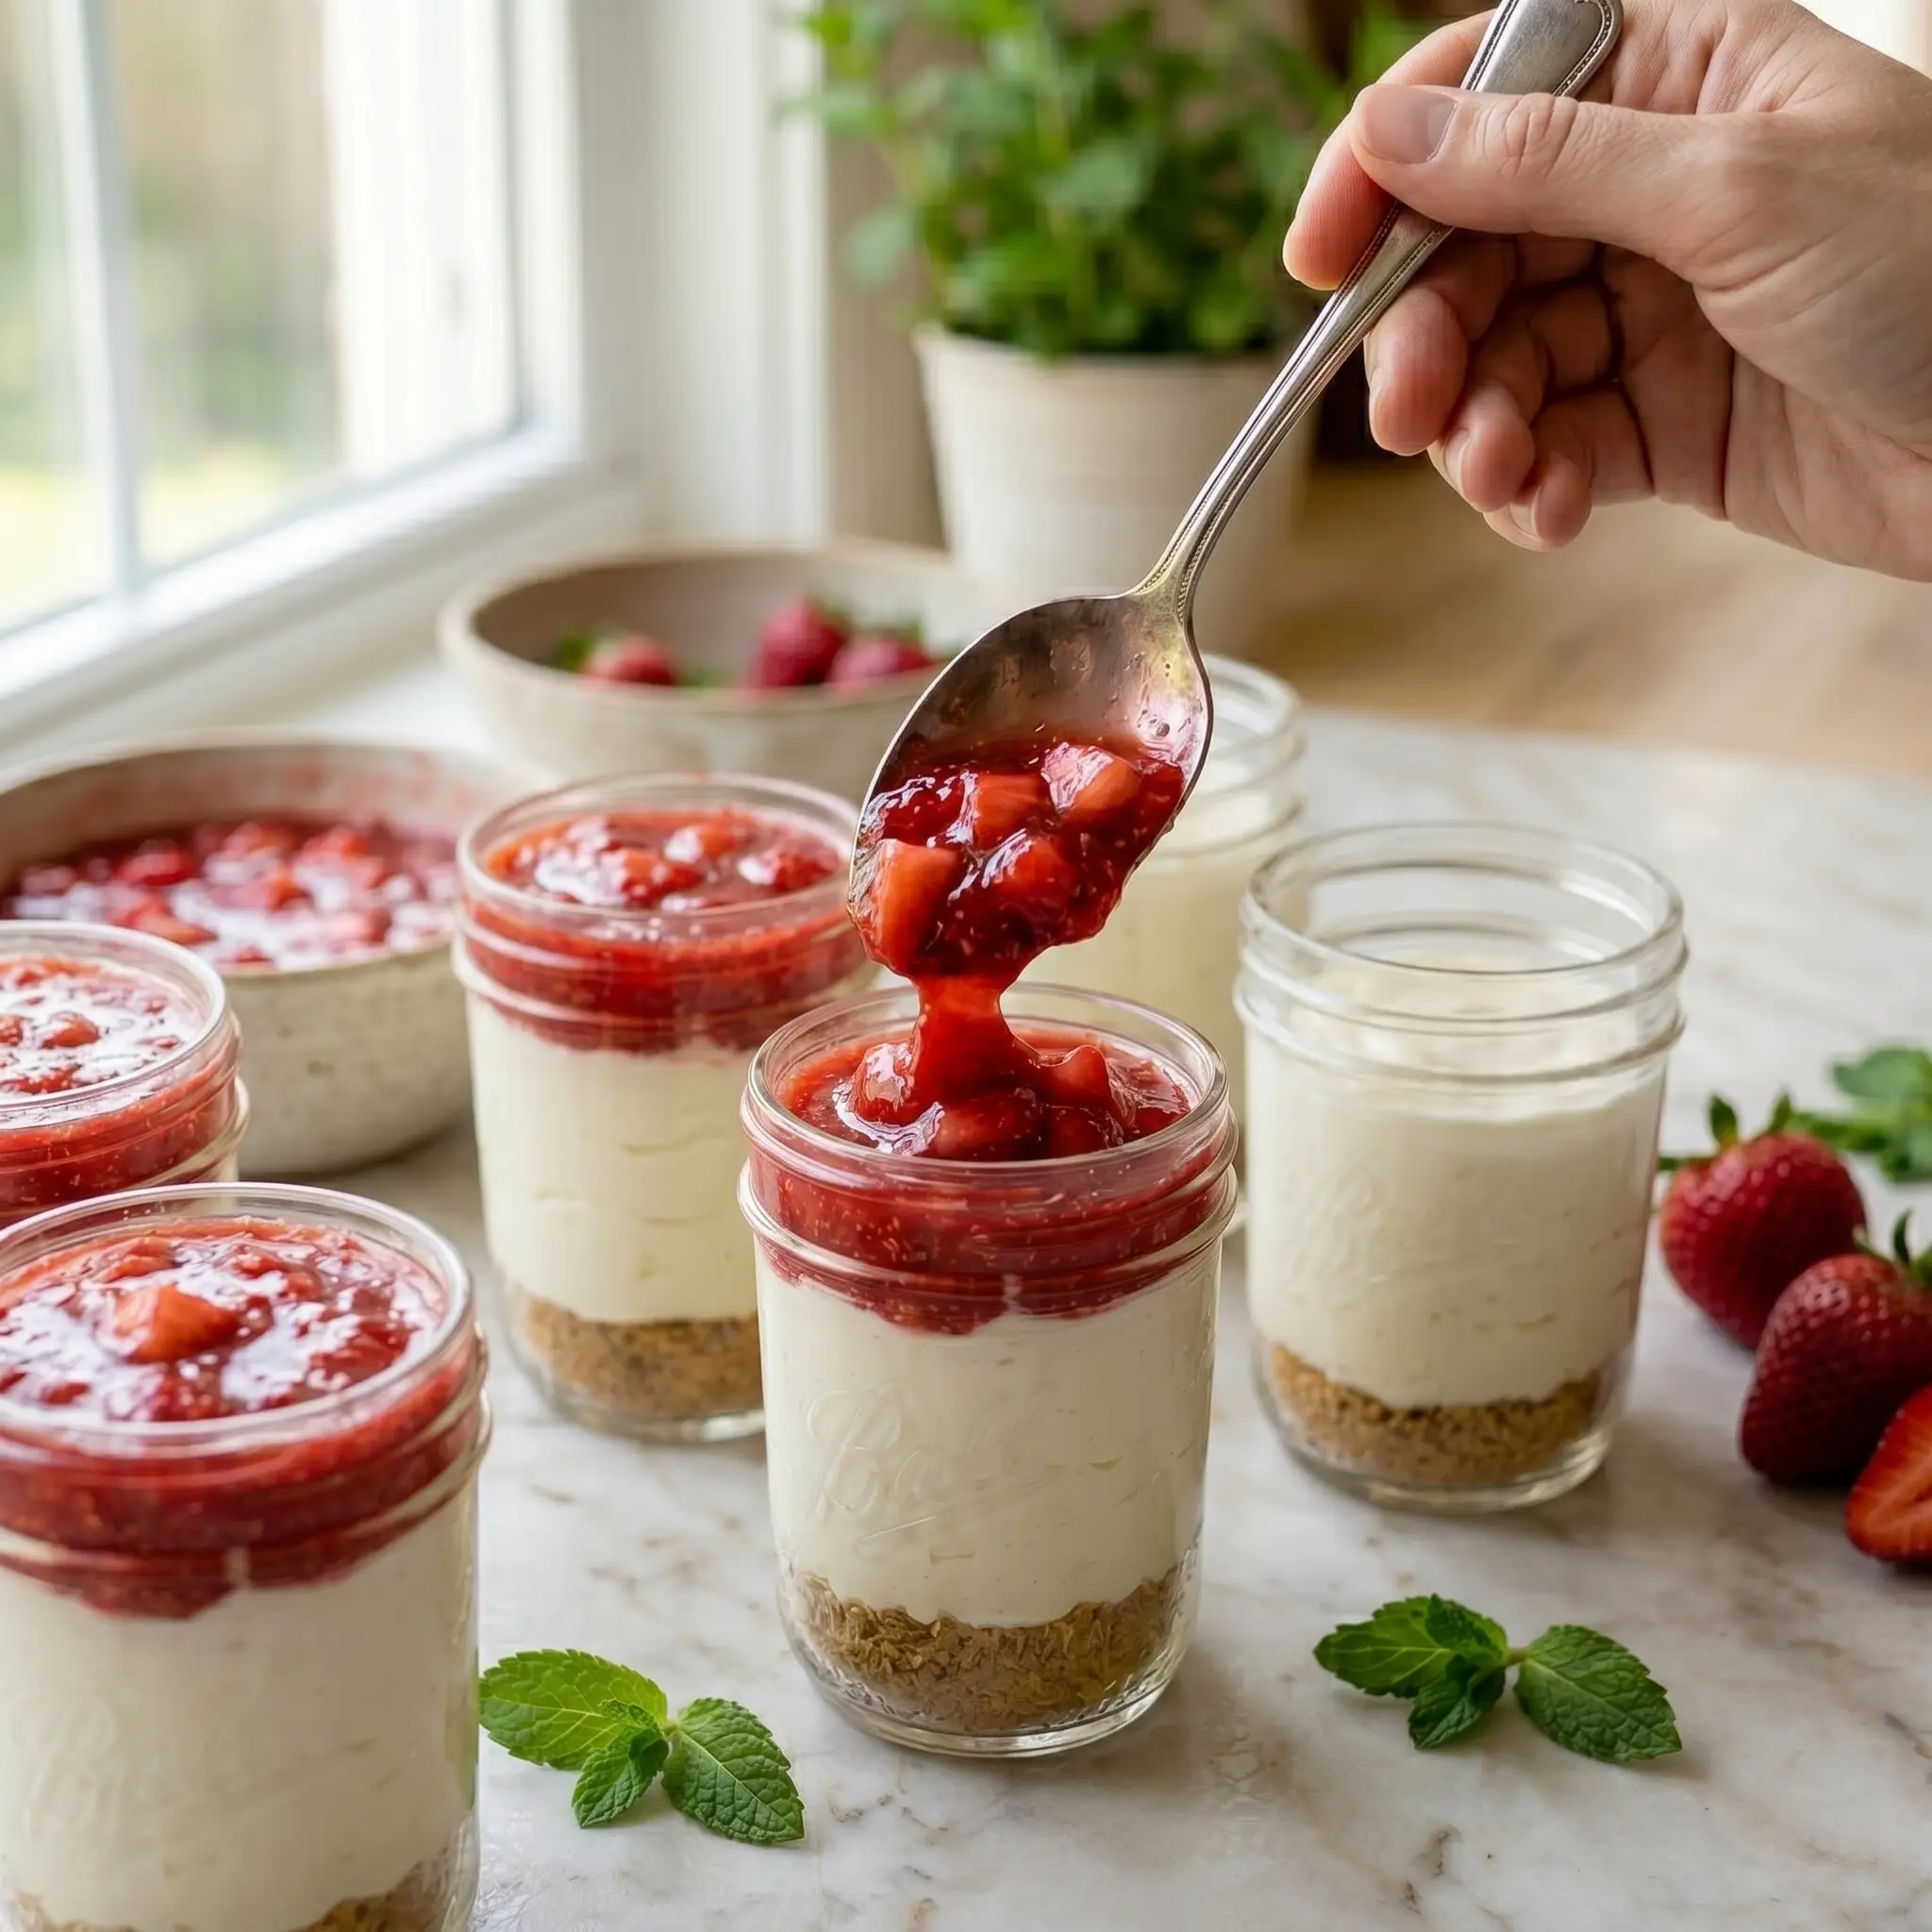
Step 5 : Prepare the Strawberry Topping and Serve
Combine your diced strawberries with sugar and lemon zest in a small saucepan over medium heat. Stir gently and cook for about 5 minutes until the berries soften and release their juices. If you prefer a thicker compote, stir in the cornstarch slurry and cook for another 2 minutes until the sauce coats the back of a spoon. Remove from heat and let the topping cool completely before spooning it over your chilled cheesecake jars. Serve immediately, or seal the jars and refrigerate until ready to enjoy. The fresh strawberry topping transforms these individual strawberry cheesecake in a jar into something truly extraordinary.
- Pro Tip : For a fresh, no-cook topping, simply toss sliced strawberries with a teaspoon of sugar and a squeeze of lemon and let them macerate for 20 minutes.
Nutritional Information
The following values are per serving (one half-pint jar) and are estimated based on standard ingredients. Actual values may vary slightly based on brands and substitutions used.
Strawberry Bonus: Strawberries bring a notable nutritional boost to this dessert — providing Vitamin C, antioxidants, and natural fiber. A half-cup serving contains only 27 calories while delivering over 85 mg of Vitamin C, making them one of the smartest fruit choices for topping any dessert.
* Nutritional values are estimates only. Always consult a registered dietitian or use a certified nutrition calculator for precise dietary guidance.
Healthier Alternatives for the Recipe
Want to lighten things up without sacrificing the creamy, dreamy quality of these mini mason jar strawberry cheesecakes? Here are some smart swaps.
Lower Sugar Filling
Replace powdered sugar with a monk fruit sweetener blend at a 1:1 ratio for a lower-glycemic option that tastes just as indulgent.
Sugar-FriendlyReduced Fat Option
Use Neufchatel cheese instead of full-fat cream cheese to cut the fat content by about 30% while keeping the texture close to the original.
Lower FatDairy-Free Version
Sub coconut cream for heavy cream and use a vegan cream cheese alternative. The result is slightly lighter in texture but still absolutely delicious.
Dairy-FreeGluten-Free Crust
Use certified gluten-free graham crackers or substitute almond flour mixed with coconut oil and a touch of maple syrup for a naturally gluten-free base.
Gluten-FreeHigher Protein Boost
Blend 2 tablespoons of plain Greek yogurt into the cream cheese filling for extra protein and a subtle tang that complements the strawberry topping perfectly.
High ProteinNo Added Sugar Topping
Let fresh, naturally sweet strawberries shine by skipping the sugar in the topping entirely — especially during peak strawberry season when the fruit is at its sweetest.
No Added SugarPro Tip: You can combine multiple swaps at once — for example, use Neufchatel cheese, monk fruit sweetener, and a gluten-free crust together for a version that suits a wider range of dietary needs without compromising on flavor.
Serving Suggestions
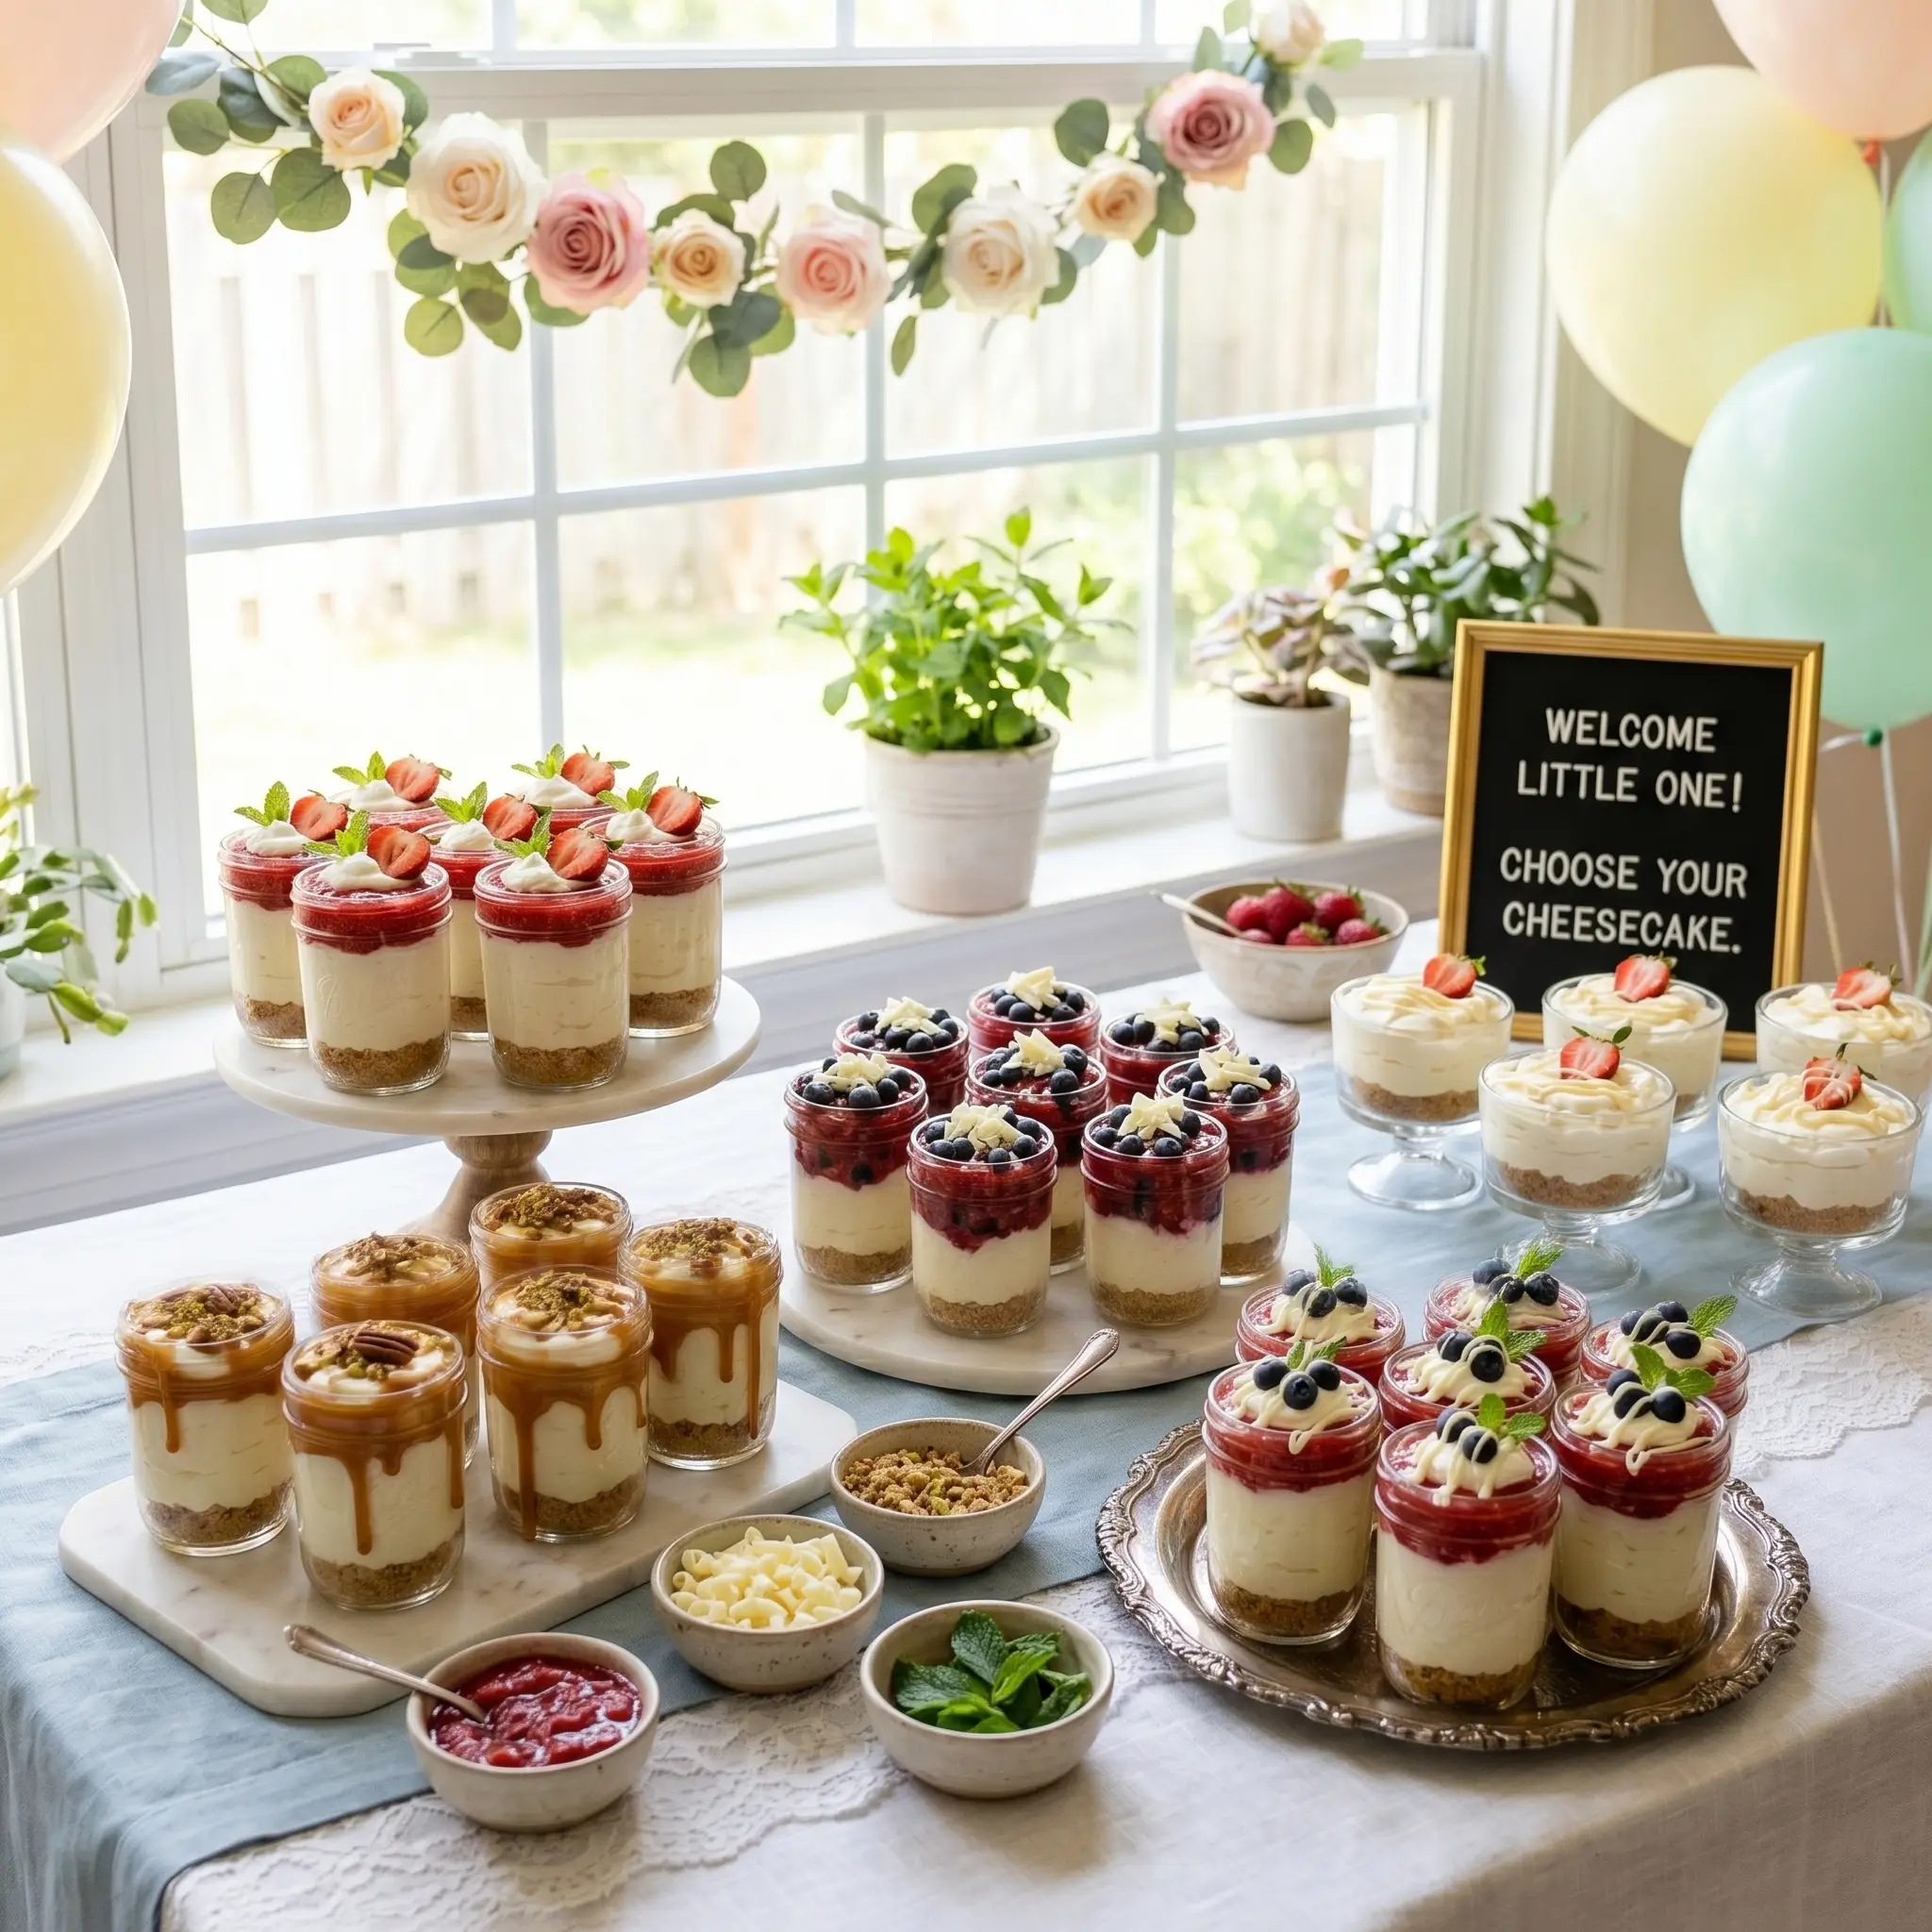
These no-bake mini strawberry cheesecake jars are incredibly versatile. Here are some creative ways to serve and present them.
Layer It Up
Add a thin layer of strawberry jam between the crust and the filling for an extra burst of flavor that surprises with every spoonful.
Flavor BoostGarnish Generously
Top with a sprig of fresh mint, a dusting of powdered sugar, or a few white chocolate shavings for an elegant and eye-catching finish.
PresentationParty-Ready
Set out a toppings bar at your next gathering with strawberry compote, blueberries, caramel drizzle, and crushed nuts so guests can customize their own jars.
EntertainingSeasonal Swaps
Replace strawberries with raspberries in summer, spiced poached pears in fall, or mango coulis for a tropical twist that works year-round.
SeasonalGift It
Seal the jars with lids, tie a ribbon around them, and gift them as homemade treats for birthdays, baby showers, or holidays.
GiftingMake It a Sundae Bar
Serve alongside scoops of vanilla ice cream for a dessert mashup that will have everyone talking long after the party ends.
Dessert MashupPro Tip: For the most impressive presentation, arrange the jars on a tiered cake stand and label each one with a mini chalkboard tag. Your guests will think you hired a professional caterer!
Common Mistakes to Avoid
Even a simple recipe has a few common pitfalls. Here is what to watch out for when making your mini mason jar strawberry cheesecakes.
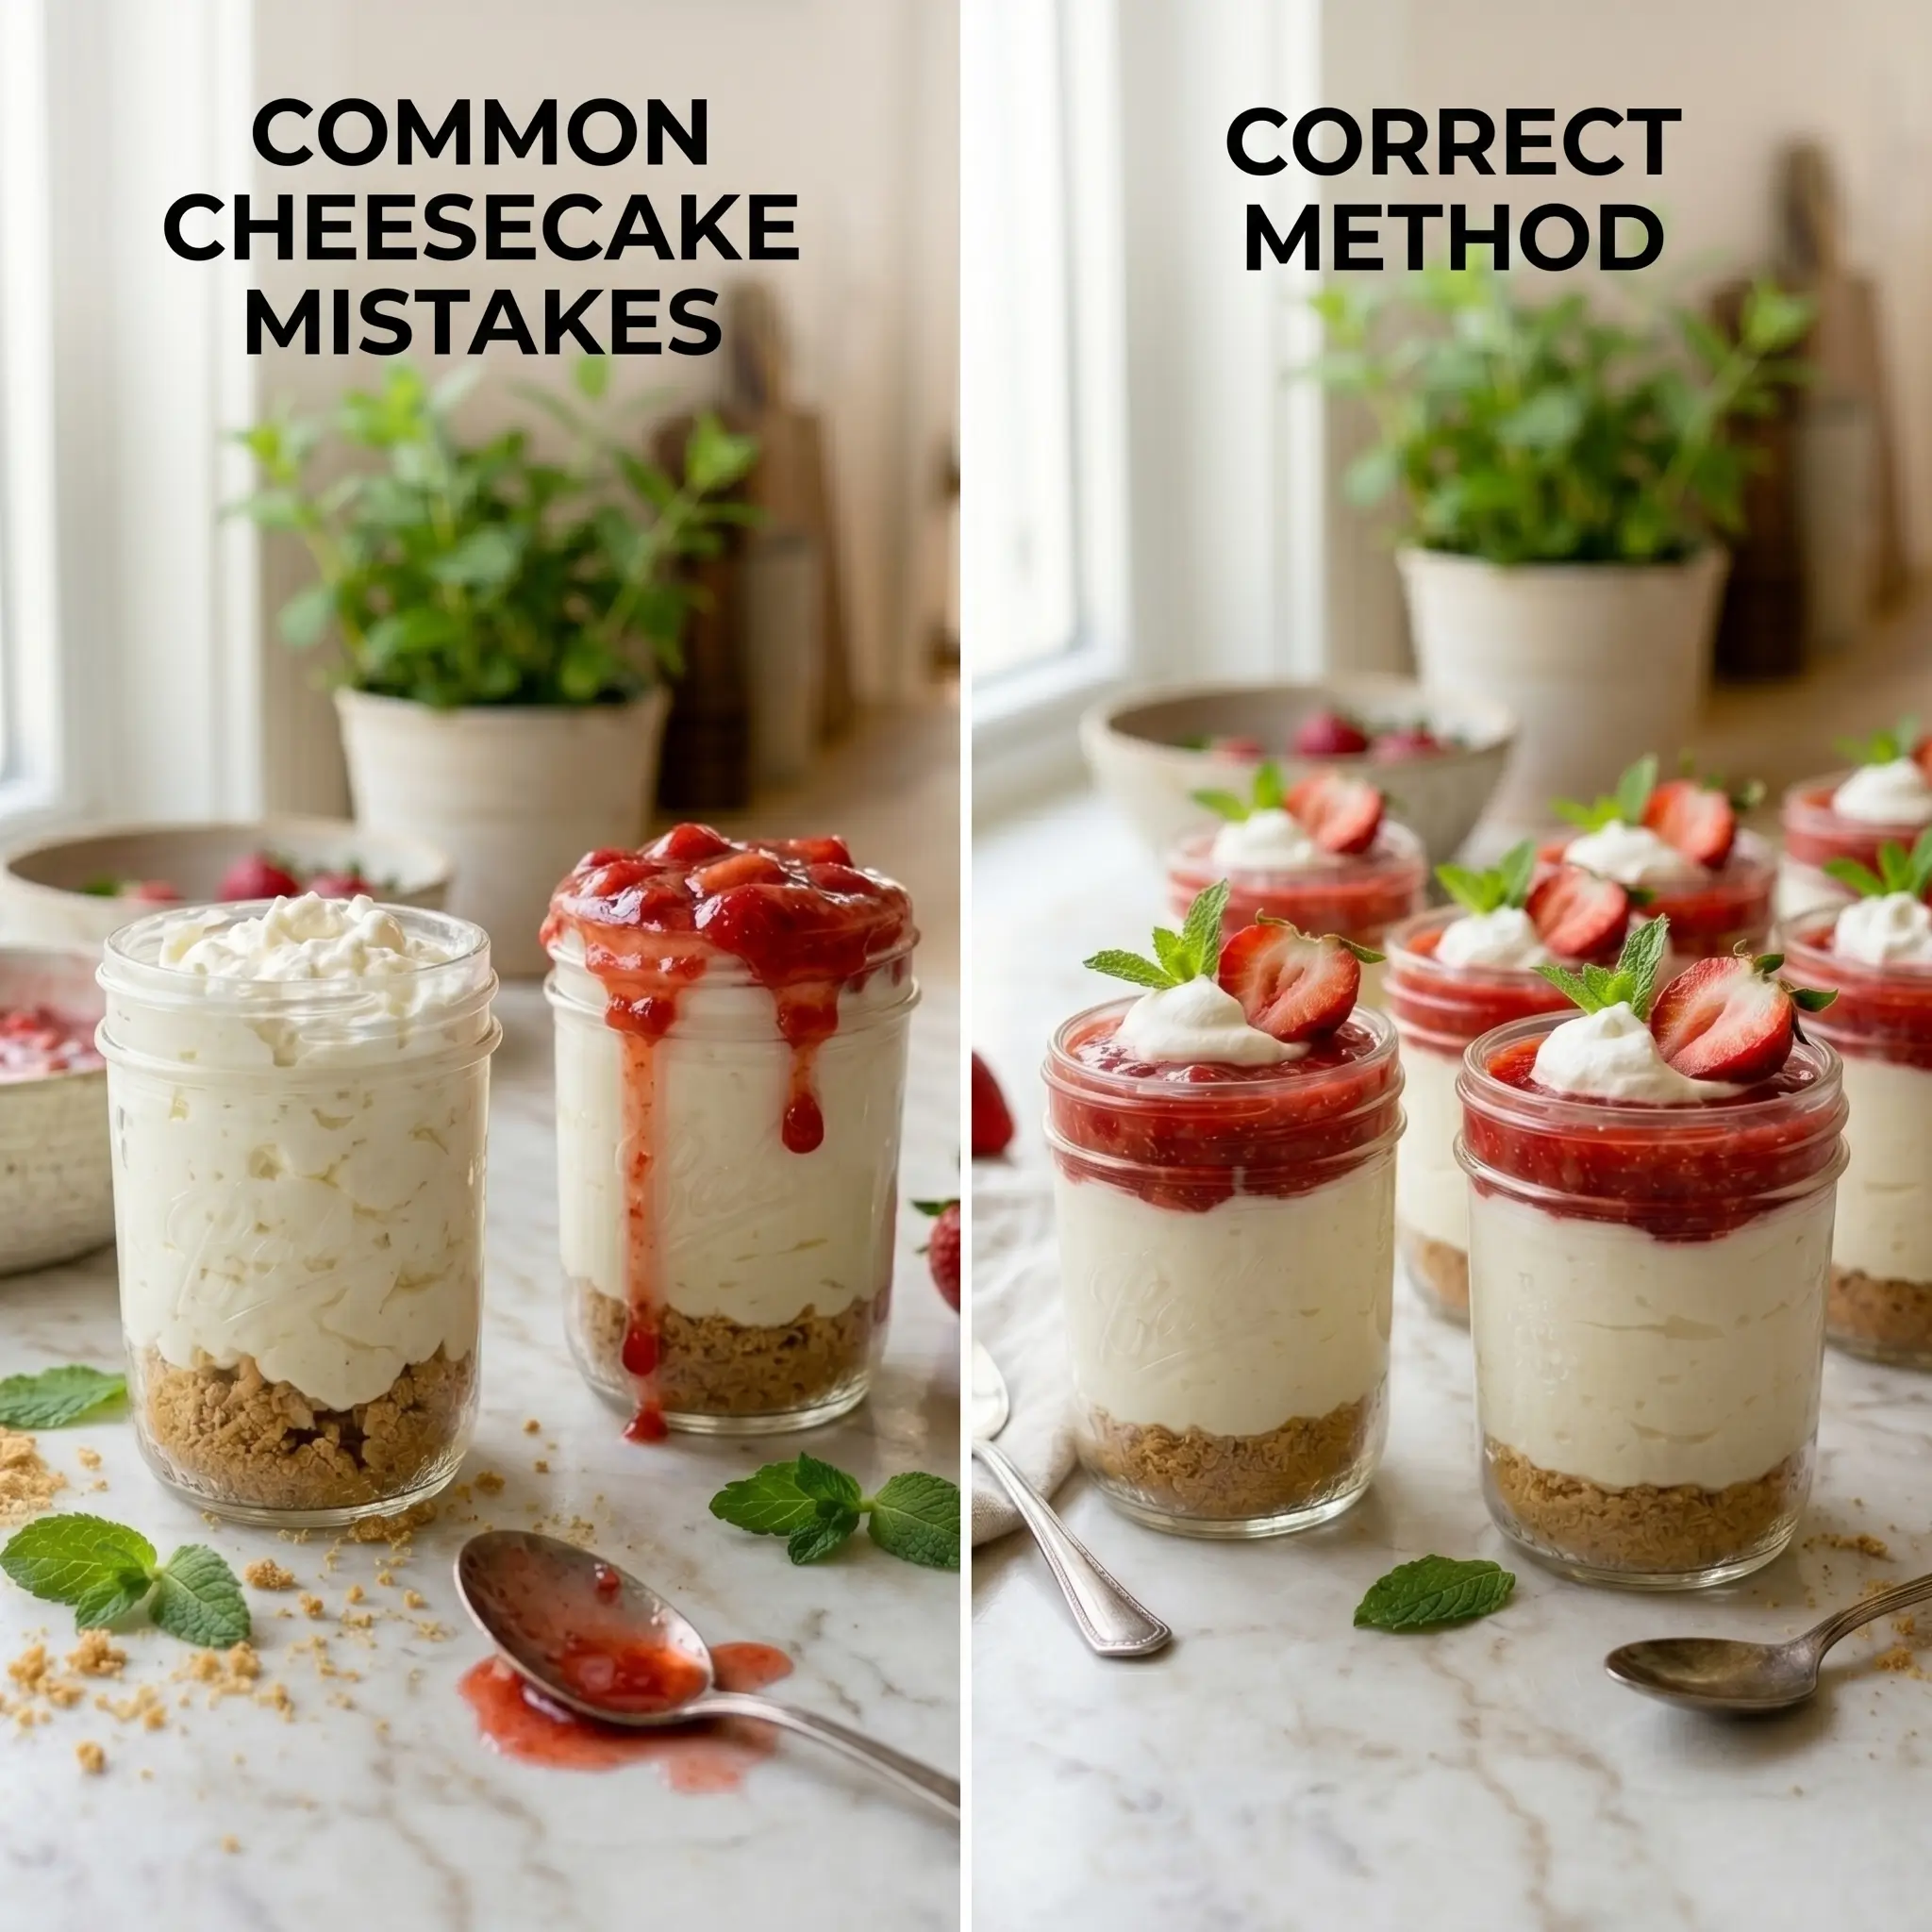
Using Cold Cream Cheese
This is the number one cause of lumpy cheesecake filling. Always bring cream cheese fully to room temperature before mixing — ideally at least one hour out of the fridge.
Texture IssueOver-Whipping the Cream
Heavy cream can go from perfectly whipped to butter very quickly. Stop as soon as you see stiff peaks and do not over-mix once folded into the filling.
TechniqueSkipping the Chill Time
The filling needs time in the fridge to set properly. Rushing results in a soft, runny filling that does not hold its shape. Two hours is the minimum — overnight is ideal.
TimingAdding Warm Topping to Cold Jars
Always cool the strawberry compote completely before spooning it over the cheesecake. Adding hot topping softens the filling underneath and ruins the texture.
TemperatureOverfilling the Jars
Leave about half an inch of space at the top for the strawberry topping so the jars close properly and do not make a mess when sealed or transported.
PortioningNot Pressing the Crust Firmly
A loose, crumbly crust will not hold up when you dig in. Press firmly and consistently into the bottom of each jar for a crust that stays in place.
CrustPro Tip: Set your cream cheese out first thing in the morning if you plan to bake in the afternoon. A fully room-temperature cream cheese is the single biggest factor in a smooth, lump-free filling.
Storing Tips for the Recipe
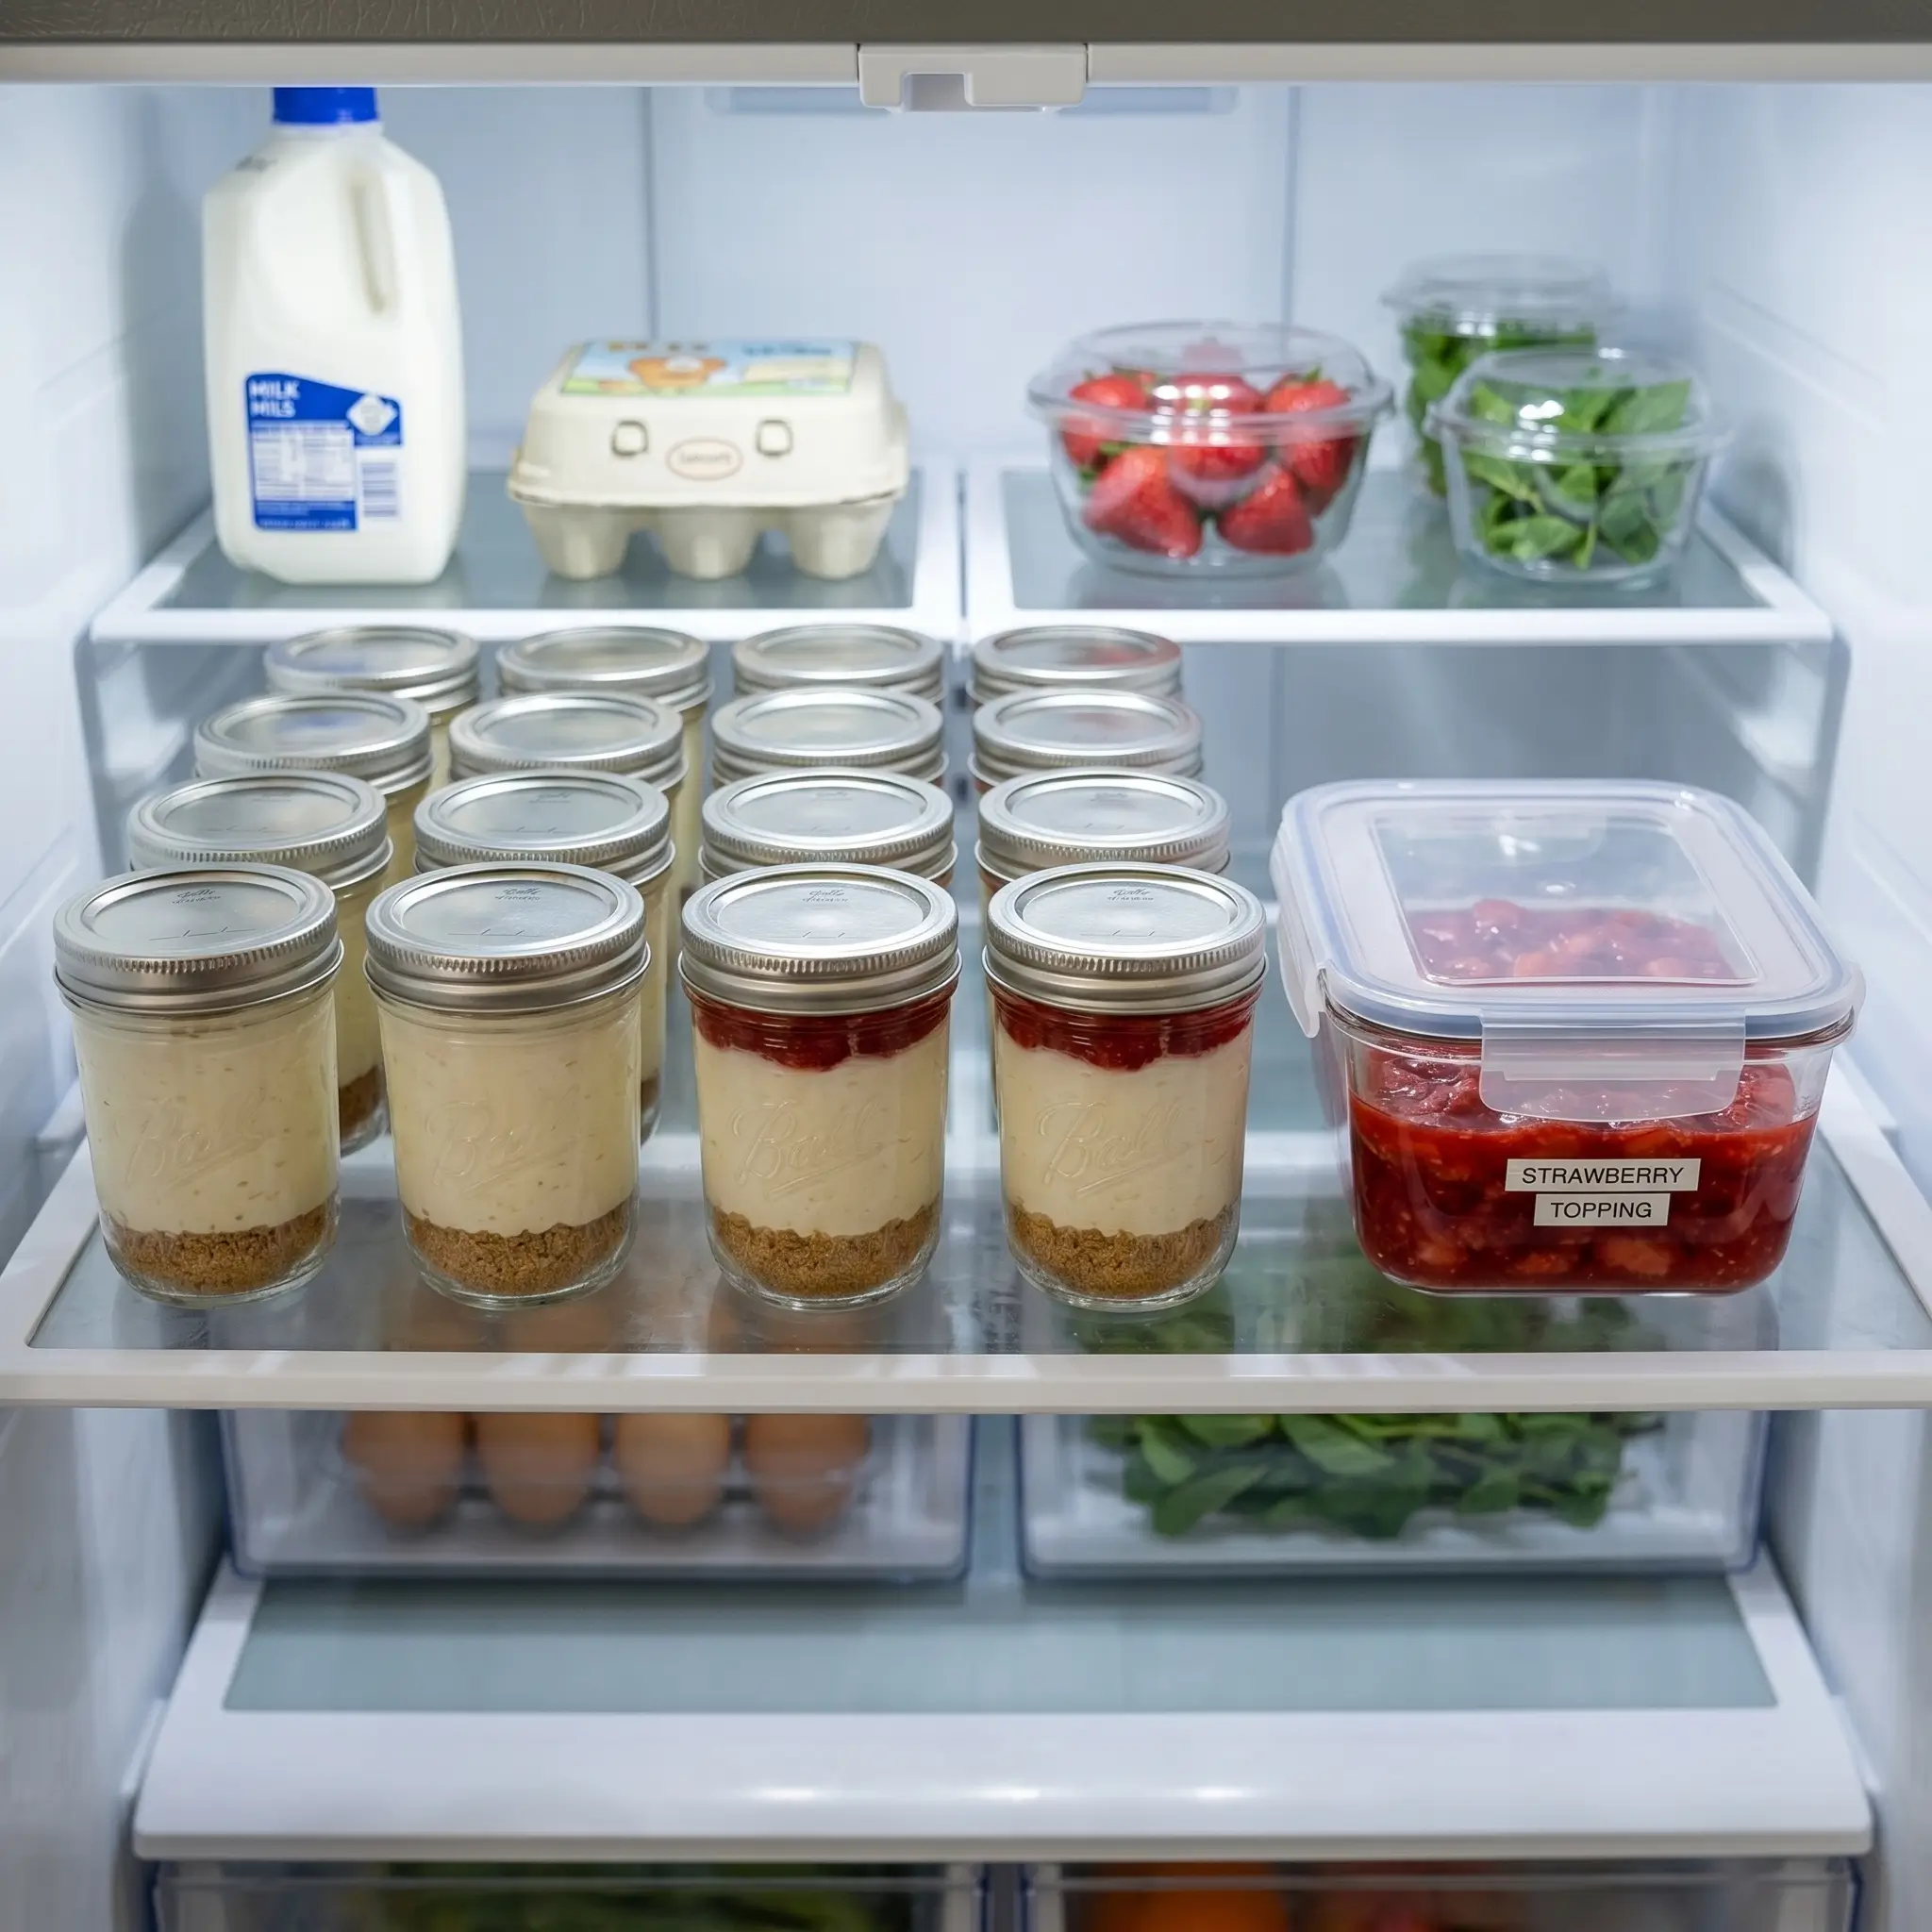
Proper storage keeps your no-bake strawberry cheesecake cups fresh and delicious for days. Here is everything you need to know.
Refrigerator
Store assembled jars covered with lids or plastic wrap in the fridge for up to 4 days. Flavors actually deepen and improve after the first 24 hours.
Up to 4 daysFreezer
Freeze without the strawberry topping for up to 1 month. Seal tightly. Thaw overnight in the refrigerator and add fresh topping just before serving.
Up to 1 monthMake-Ahead Strategy
Prepare crust and filling up to 2 days ahead. Store the strawberry topping separately in an airtight container in the fridge for up to 3 days — add just before serving.
Up to 2 days aheadFresh Topping Warning
Fresh strawberries release moisture over time and can make the filling watery. Add fresh toppings no more than a few hours before serving.
Add within 2–3 hrsTransport Tip
Seal the lids tightly when transporting to a party or picnic. The self-contained jar format makes these ideal for on-the-go desserts with zero mess.
Travel-readyPro Tip: For the best possible texture and flavor, make the jars the evening before and let them chill overnight. Store the strawberry topping in a separate jar in the fridge and spoon it on just before serving.
Conclusion
Mini Mason Jar Strawberry Cheesecakes are the kind of dessert that looks like you spent hours in the kitchen but actually comes together in about 20 minutes of active work. They are creamy, fresh, perfectly sweet, and just the right size for a satisfying indulgence. With no baking required and endless ways to customize the toppings and flavors, this is one recipe that earns a permanent spot in your dessert rotation.
Whether you are making them for a special occasion or just treating yourself on a quiet evening, these individual cheesecake cups deliver big flavor in a small, charming package. Try the recipe, then come back and leave a comment letting us know how yours turned out. And if you loved this one, explore more no-bake dessert recipes right here on RecipeTastyBites.com.
Recipe Card
Mini Mason Jar Strawberry Cheesecakes
A no-bake, creamy cheesecake layered with buttery graham crust and fresh strawberry topping — served right in the jar.
Ingredients
🟤 Crust
- 1½ cups graham cracker crumbs
- 3 tbsp granulated sugar
- 5 tbsp unsalted butter, melted
🍦 Filling
- 16 oz cream cheese, softened
- 1 cup powdered sugar
- 1 tsp vanilla extract
- 2 tbsp fresh lemon juice
- 1 cup heavy whipping cream
🍓 Topping
- 2 cups fresh strawberries, diced
- 3 tbsp granulated sugar
- 1 tsp lemon zest
Instructions
-
01Make the crust. Mix graham cracker crumbs, sugar, and melted butter until combined. Press firmly into the bottom of each mason jar and refrigerate while you prepare the filling.
-
02Whip the cream. Whip heavy whipping cream to stiff peaks and set aside in the refrigerator.
-
03Make the filling. Beat cream cheese, powdered sugar, vanilla extract, and lemon juice until completely smooth. Gently fold in the whipped cream until just combined.
-
04Fill and chill. Pipe or spoon the filling into the jars over the chilled crust. Refrigerate for at least 2 hours until set.
-
05Make the topping. Cook diced strawberries with sugar and lemon zest over medium heat until jammy. Cool completely, then spoon generously over each chilled jar before serving.
Pro Tip: These jars are even better made the night before. Add the strawberry topping no more than 2 hours before serving to keep the filling from getting watery.
Frequently Asked Questions
Absolutely. These are one of the best make-ahead desserts you can have in your repertoire. Prepare the crust and filling up to 48 hours in advance and store covered in the fridge. Add the strawberry topping within a few hours of serving for the freshest result.
No baking is needed. The combination of melted butter and the weight of the filling is enough to hold the crust together when chilled. However, if you prefer a toasted, crunchier crust, you can bake it at 350°F for 8 minutes and let it cool completely before adding the filling.
Half-pint mason jars (about 8 oz) are the ideal size for individual strawberry cheesecake in a jar. They provide the perfect ratio of crust to filling to topping. Quarter-pint jars work for bite-sized portions, and wide-mouth pint jars can be used if you want a larger serving.
Yes, frozen strawberries work wonderfully for the cooked compote topping. Thaw them slightly before cooking and drain any excess liquid. They will be slightly softer than fresh strawberries but deliver the same sweet, tangy flavor. For a fresh topping, however, fresh strawberries are strongly recommended.
Stored covered in the refrigerator, these easy mini cheesecake desserts stay fresh for up to 4 days. The texture is actually best between day 1 and day 3 as the filling firms up beautifully. Store the strawberry topping separately if making ahead to prevent the filling from getting watery.
Definitely. Oreo cookie crumbs, digestive biscuits, vanilla wafers, or even almond flour and coconut oil work as great crust alternatives. Each brings a slightly different flavor profile that pairs deliciously with the creamy cheesecake filling.
Pro Tip: Make a double batch of the strawberry compote and store it separately in the fridge for up to a week — it works beautifully on yogurt, pancakes, and oatmeal too.
Your Feedback Helps Us Grow!
There are no reviews yet. Be the first one to write one.