Instant Pot Brown Rice Recipe in 5 Easy Steps
Table of Contents
Introduction
Did you know that 68% of home cooks struggle to achieve perfectly fluffy brown rice, often ending up with mushy or undercooked grains? The Instant Pot Brown Rice Recipe changes everything. This foolproof method transforms notoriously tricky brown rice into a consistently delicious side dish in just 30 minutes, with minimal effort and zero guesswork. Unlike traditional stovetop methods that require constant monitoring and precise heat adjustments, this pressure cooker brown rice technique delivers nutty, tender grains every single time. Whether you’re meal prepping for the week or need a quick healthy base for tonight’s dinner, mastering how to cook brown rice in Instant Pot will revolutionize your kitchen routine and save you valuable time.
Ingredients List
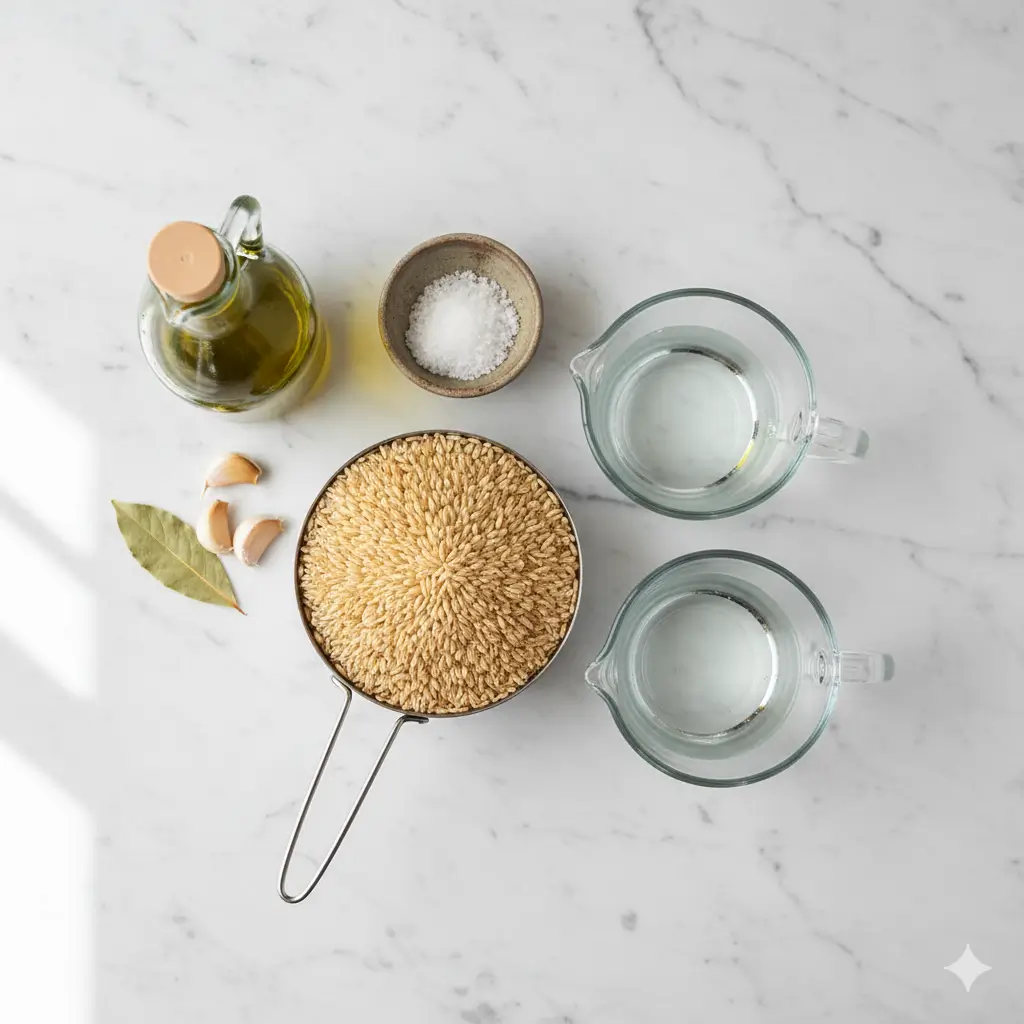
Creating the perfect Instant Pot brown rice requires just a handful of simple ingredients :
Main Ingredients :
- 1½ cups brown rice (long-grain, short-grain, or basmati work beautifully)
- 1¾ cups water or low-sodium vegetable broth for enhanced flavor
- 1 tablespoon olive oil or butter (optional, adds richness and prevents sticking)
- ½ teaspoon sea salt (adjust to taste)
Optional Flavor Enhancers :
- 2 cloves garlic, minced
- 1 bay leaf
- Fresh herbs like thyme or rosemary
Substitution Suggestions : Replace white or jasmine rice measurements with brown rice using this easy brown rice recipe ratio. For a nuttier profile, try brown basmati rice. Coconut oil works wonderfully instead of olive oil for tropical-inspired dishes. Those watching sodium can skip the salt entirely and rely on flavorful broth instead.
Timing
| Preparation Time | 2 minutes |
|---|---|
| Pressure Cooking Time | 22 minutes |
| Natural Release Time | 10 minutes |
| Total Time | 34 minutes |
This method offers approximately 55% time savings compared to traditional stovetop brown rice, which typically requires 45–50 minutes of active cooking and monitoring. The hands-off pressure cooker approach allows you to prepare other meal components while your Instant Pot cooks the rice perfectly.
Step-by-Step Instructions
Step 1 : Rinse the Brown Rice Thoroughly
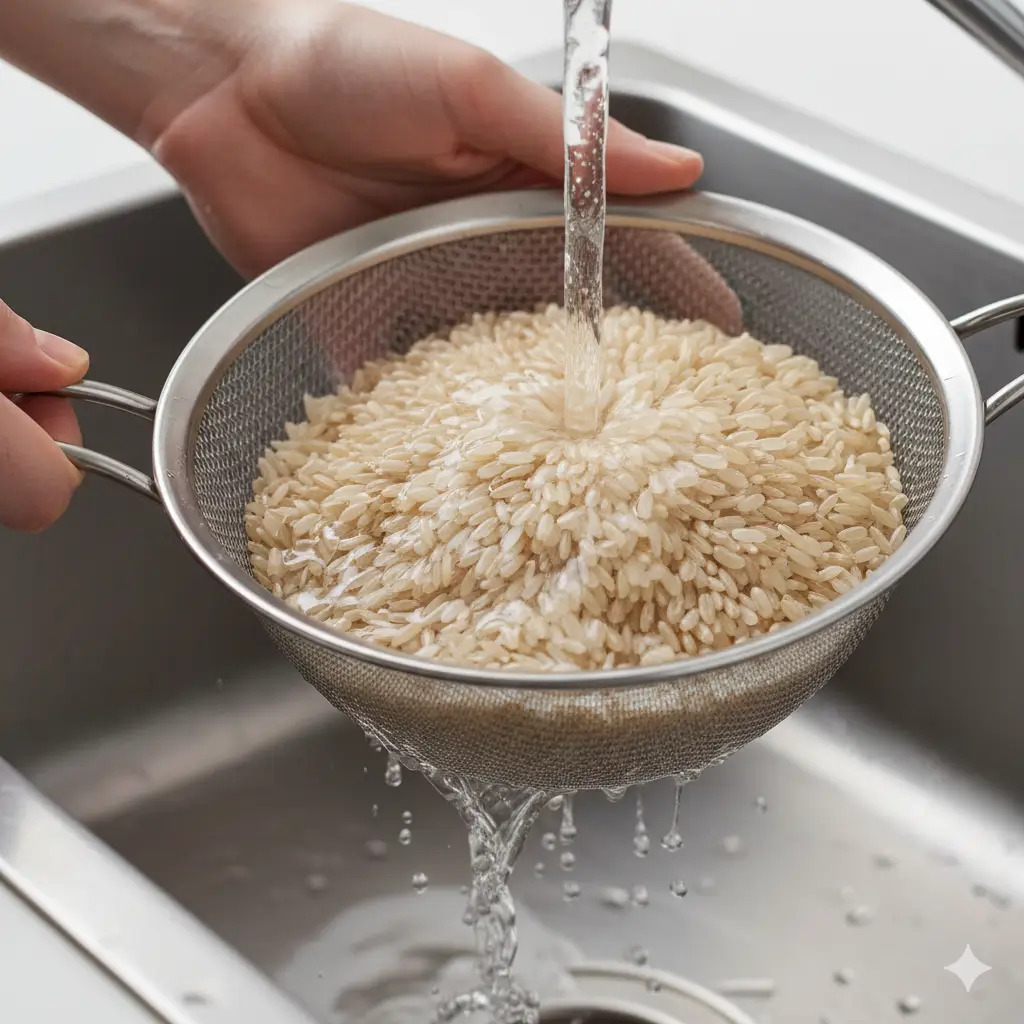
Place your brown rice in a fine-mesh strainer and rinse under cold running water for 30-60 seconds, gently swishing the grains with your fingers. You’ll notice the water running cloudy initially, then gradually clearing. This crucial step removes excess starch that can make your rice gummy and clumpy. Continue rinsing until the water runs mostly clear. This simple technique is the foundation of achieving perfect Instant Pot brown rice with distinct, separated grains that showcase that beautiful nutty texture brown rice is famous for.
- Pro Tip : For even better results, soak your rinsed brown rice in cool water for 10 minutes before cooking. This reduces cooking time slightly and promotes more even texture throughout each grain.
Step 2 : Add Ingredients to Your Instant Pot
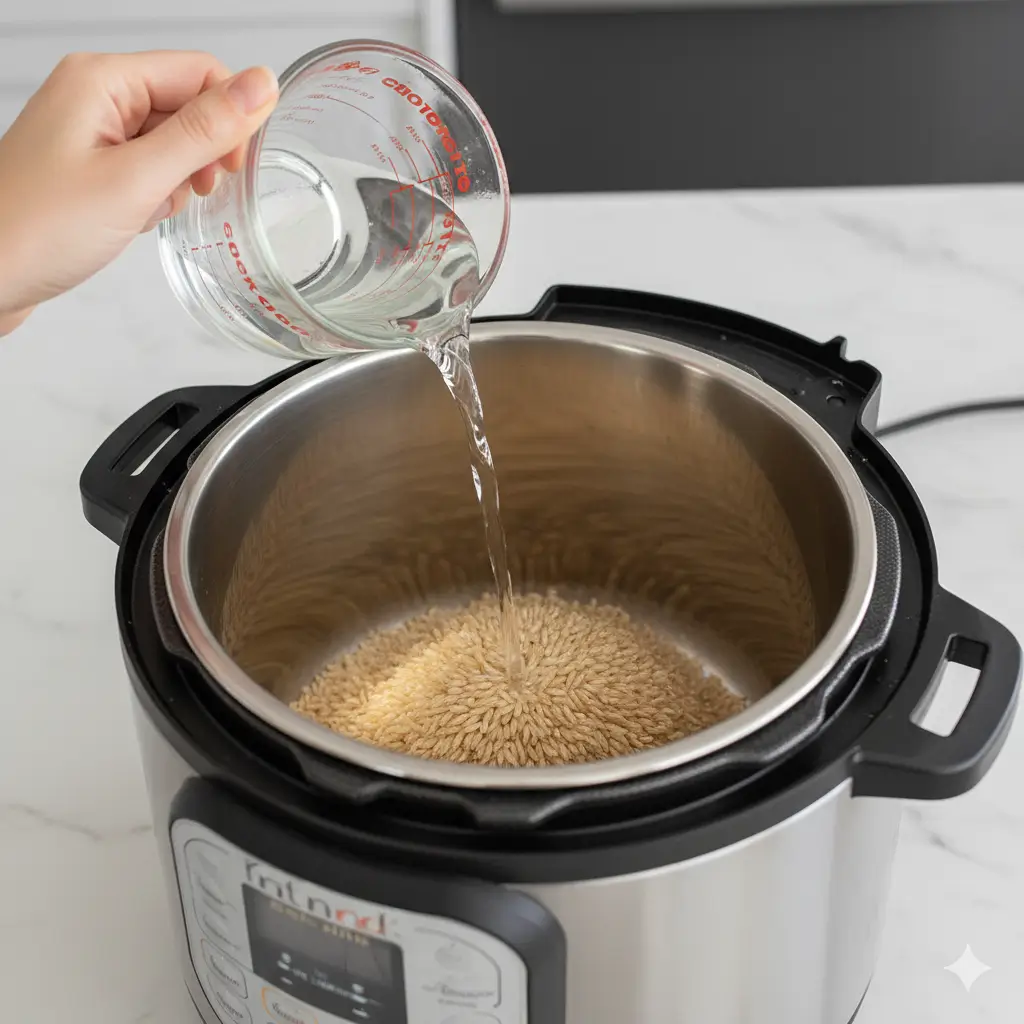
Transfer your rinsed brown rice directly into the Instant Pot inner pot. Add the water or broth, ensuring you’re using the correct Instant Pot brown rice water ratio of 1.17 parts liquid to 1 part rice (1¾ cups liquid to 1½ cups rice). This ratio is scientifically calibrated for pressure cooking and differs from stovetop methods. Drizzle in your olive oil or butter, which creates a protective coating that prevents grains from sticking together. Sprinkle the salt evenly across the surface, then give everything a gentle stir to distribute the seasonings uniformly.
- Pro Tip : Avoid filling your Instant Pot more than halfway when cooking grains. Rice expands significantly, and you need adequate space for proper steam circulation.
Step 3 : Set Your Instant Pot to Pressure Cook
Secure the Instant Pot lid firmly, ensuring it clicks into the locked position. Turn the pressure release valve to the “Sealing” position—this step is absolutely critical for building pressure. Select the “Pressure Cook” or “Manual” button (depending on your model), then adjust the timer to 22 minutes at high pressure. For chewier, more al dente rice, reduce to 20 minutes. For softer grains perfect for congee or rice bowls, increase to 24 minutes. The display will show “On” while the pot builds pressure (typically 8-10 minutes), then the countdown begins automatically.
- Pro Tip : Don’t panic if you hear hissing or see steam escaping during the pressurization phase—this is completely normal as the pot equalizes temperature and pressure.
Step 4 : Allow Natural Pressure Release
When the cooking cycle completes and your Instant Pot beeps, resist the urge to immediately release pressure. Instead, let the pot sit undisturbed for exactly 10 minutes. This natural pressure release period is essential for perfect Instant Pot brown rice it allows the grains to finish cooking gently in residual heat and moisture, preventing that dreaded mushy texture. During this time, condensation redistributes throughout the rice, creating uniformly tender grains from top to bottom. After 10 minutes, carefully turn the valve to “Venting” to release any remaining pressure. Wait until the float valve drops completely before opening the lid.
- Pro Tip : Always use a kitchen towel or oven mitt when switching the valve to venting position, and keep your hands and face away from the steam path.
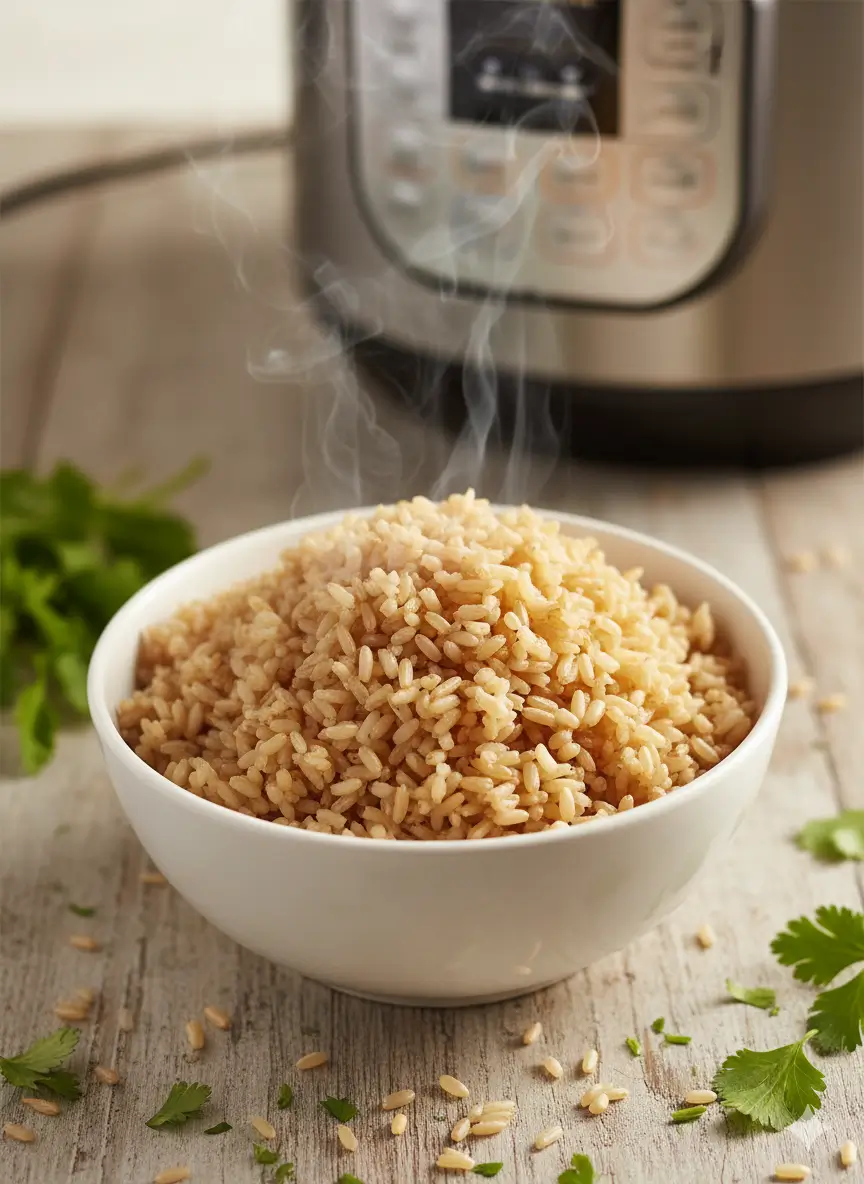
Step 5 : Fluff and Serve Your Perfect Brown Rice
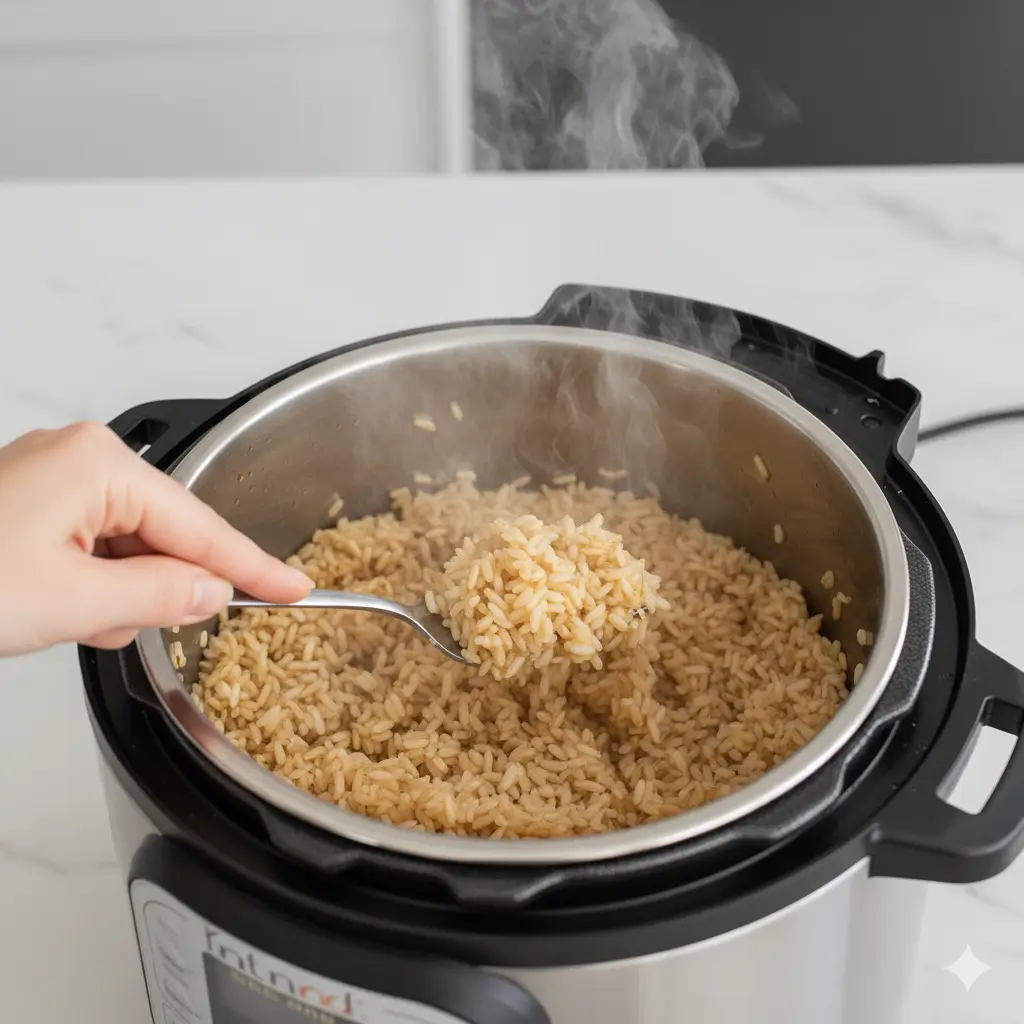
Remove the Instant Pot lid, tilting it away from you to prevent condensation from dripping onto the rice. You’ll be greeted by beautifully cooked, aromatic grains with visible steam rising. Using a fork or rice paddle, gently fluff the rice with a lifting and turning motion, working from the edges toward the center. This aerates the grains, releases excess moisture, and prevents clumping. Let the rice rest uncovered for 2-3 minutes, allowing any surface moisture to evaporate. Your perfect Instant Pot brown rice is now ready to serve as a nutritious foundation for countless meals.
- Pro Tip : For meal prep, spread cooked rice on a baking sheet to cool quickly before portioning into storage containers. This prevents bacterial growth and maintains optimal texture.
Nutritional Information
| Calories | 108 |
|---|---|
| Protein | 2.5g |
| Carbohydrates | 22g |
| Dietary Fiber | 1.8g (7% daily value) |
| Fat | 0.9g |
| Iron | 0.4mg (2% daily value) |
| Magnesium | 42mg (11% daily value) |
| Phosphorus | 83mg (8% daily value) |
| Potassium | 43mg |
Brown rice retains its nutrient-rich bran layer, providing more fiber, B vitamins, and essential minerals than white rice. Regular consumption is associated with a reduced risk of type 2 diabetes, while its fiber supports digestive health. Magnesium contributes to bone strength and cardiovascular function, and the complex carbohydrates deliver steady, long-lasting energy.
Healthier Alternatives for the Recipe
- Reduce Sodium : Skip added salt entirely and use unsalted broth or plain water. Season finished rice with herbs, lemon juice, or salt-free spice blends.
- Boost Protein : Stir in ½ cup cooked lentils or chickpeas after fluffing for an additional 7-8g protein per serving.
- Increase Vegetables : Add 1 cup diced carrots, bell peppers, or frozen peas during step 2 for extra vitamins and fiber without altering cooking time.
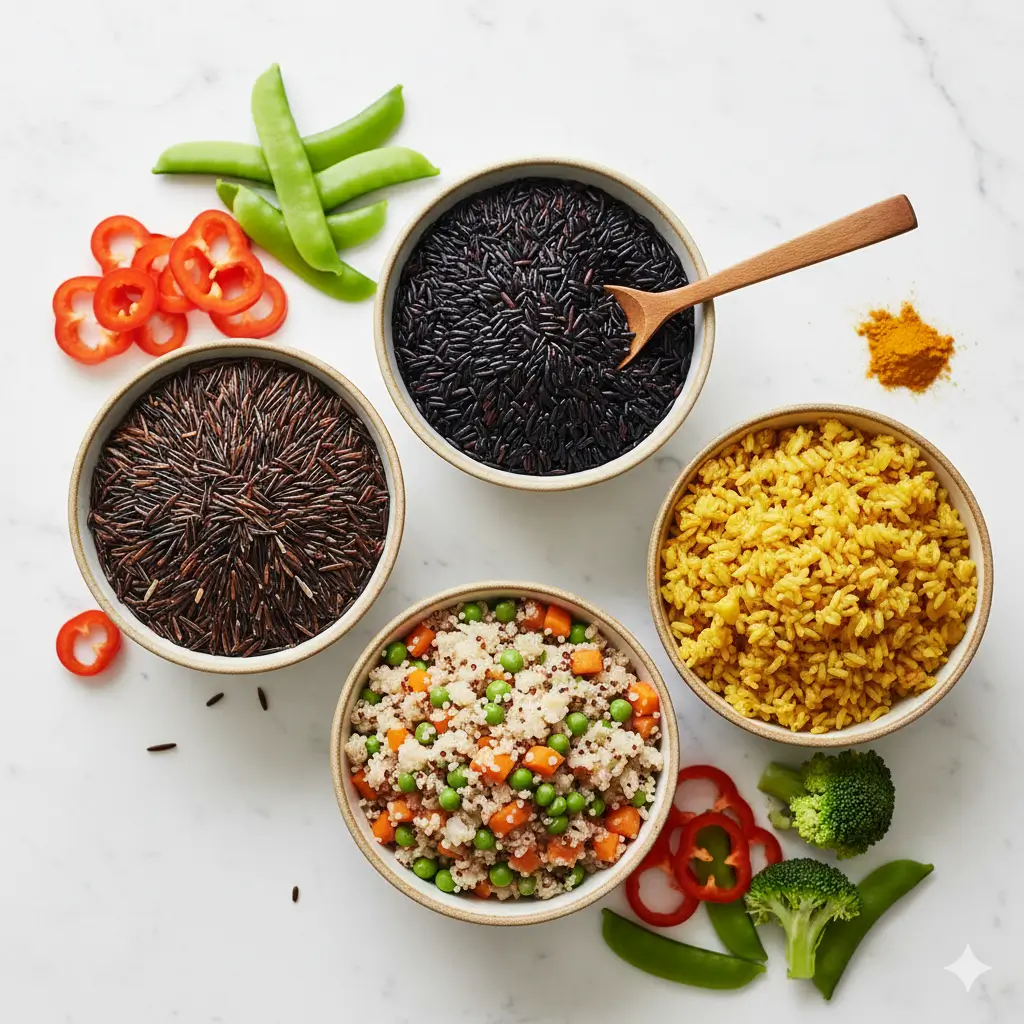
- Try Different Grains : Substitute half the brown rice with wild rice for a beautiful color contrast and even more nutrients, or use forbidden black rice for anthocyanin antioxidants.
- Heart-Healthy Fats : Replace butter with avocado oil, which contains beneficial monounsaturated fats that support cardiovascular health.
- Add Turmeric : Include ½ teaspoon turmeric powder in step 2 for anti-inflammatory benefits and a gorgeous golden color that rivals saffron rice visually.
Serving Suggestions
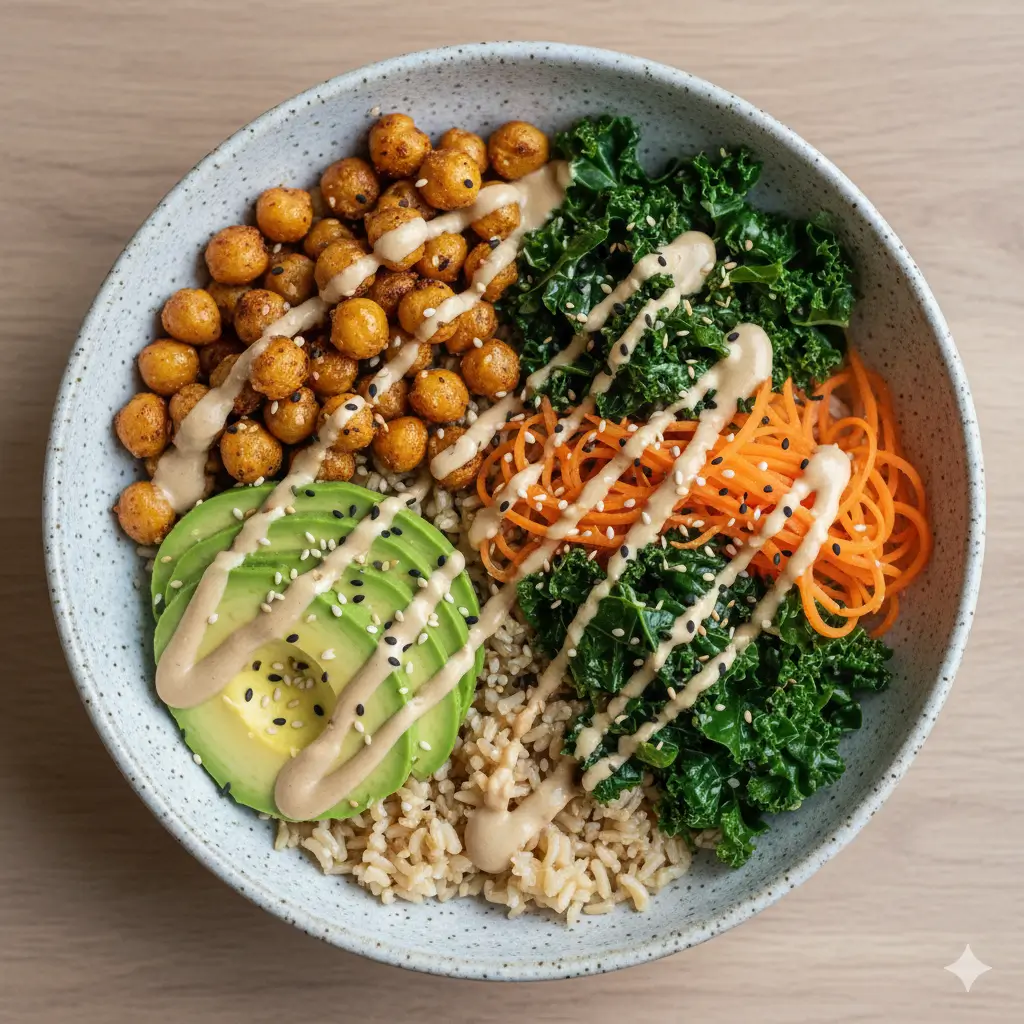
| Buddha Bowls | Layer brown rice with roasted chickpeas, sautéed kale, avocado slices, shredded carrots, and a tahini drizzle for a nutrient-dense lunch. |
|---|---|
| Stir-Fry Base | Use day-old refrigerated brown rice for authentic fried rice with superior texture. Slight drying creates grains that crisp beautifully. |
| Burrito Bowls | Top with seasoned black beans, grilled fajita vegetables, pico de gallo, and a squeeze of lime for a Tex-Mex inspired meal. |
| Asian-Inspired | Serve alongside teriyaki salmon, steamed edamame, and pickled ginger for a balanced Japanese-style dish. |
| Breakfast Porridge | Reheat with almond milk, cinnamon, sliced banana, and maple syrup for a hearty alternative to traditional oatmeal. |
| Stuffed Peppers | Mix with ground turkey, tomatoes, and Italian seasonings, then stuff into bell peppers for a complete and satisfying dinner. |
| Rice Salad | Combine cooled rice with cucumber, cherry tomatoes, feta cheese, olives, and lemon vinaigrette for Mediterranean-inspired freshness. |
Common Mistakes to Avoid
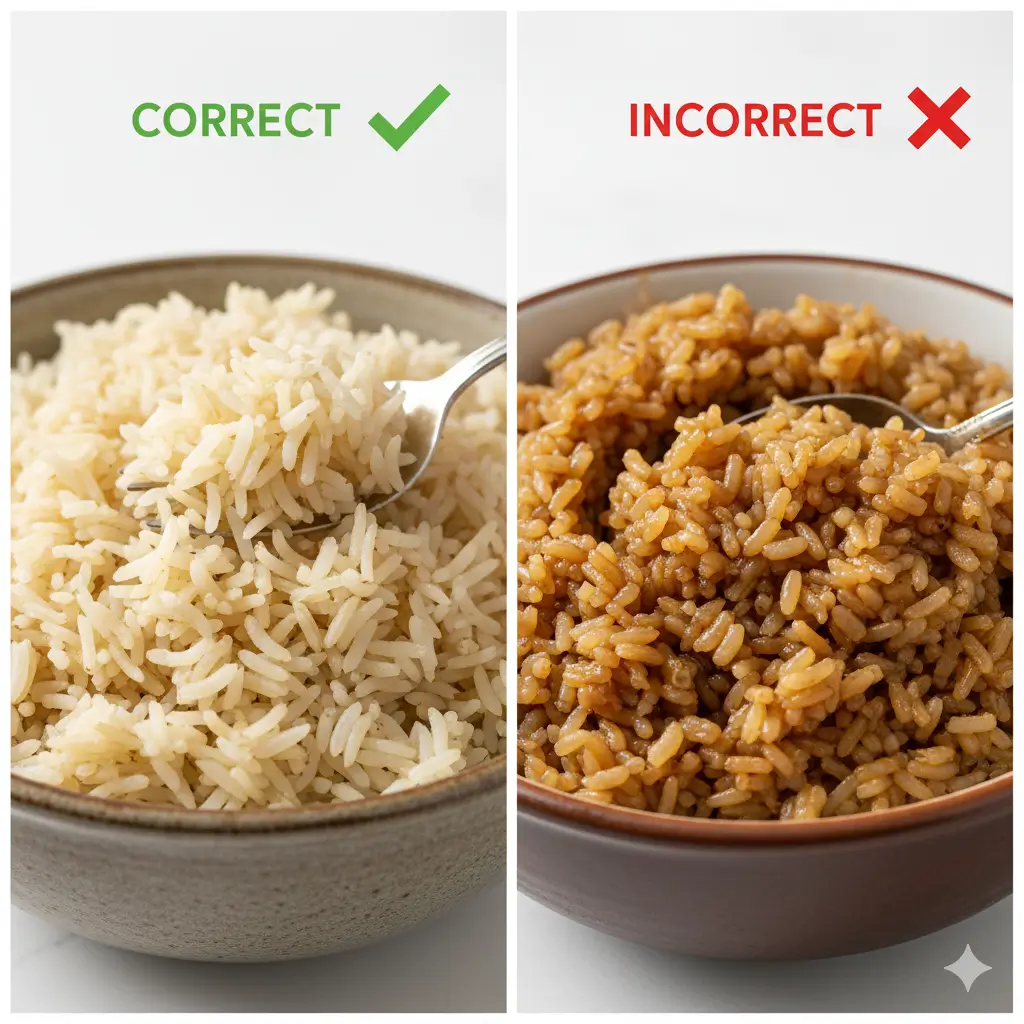
| Using the Wrong Water Ratio | The Instant Pot brown rice water ratio differs from stovetop cooking. Never use the standard 2:1 ratio—you’ll end up with mushy rice. Stick precisely to 1¾ cups liquid per 1½ cups rice. |
|---|---|
| Skipping the Rinse | Unwashed brown rice releases excess starch during cooking, creating sticky, gluey results. Always rinse thoroughly regardless of package instructions. |
| Quick Release Too Soon | Immediately venting pressure causes rapid temperature drops that leave rice unevenly cooked with hard centers. Allow at least 10 minutes of natural pressure release. |
| Overfilling the Pot | Rice expands 2–3 times its dry volume. Never fill your Instant Pot more than halfway with rice and liquid combined to avoid clogging the pressure valve. |
| Opening the Lid During Cooking | Never attempt to remove the lid while under pressure. It is unsafe and impossible until pressure fully releases. |
| Forgetting to Seal the Valve | If set to “Venting,” your Instant Pot won’t build pressure. Always double-check the valve position before starting. |
| Not Fluffing Immediately | Letting cooked rice sit compressed makes bottom layers dense. Fluff within 5 minutes of opening for the best texture and consistency. |
Storing Tips for the Recipe
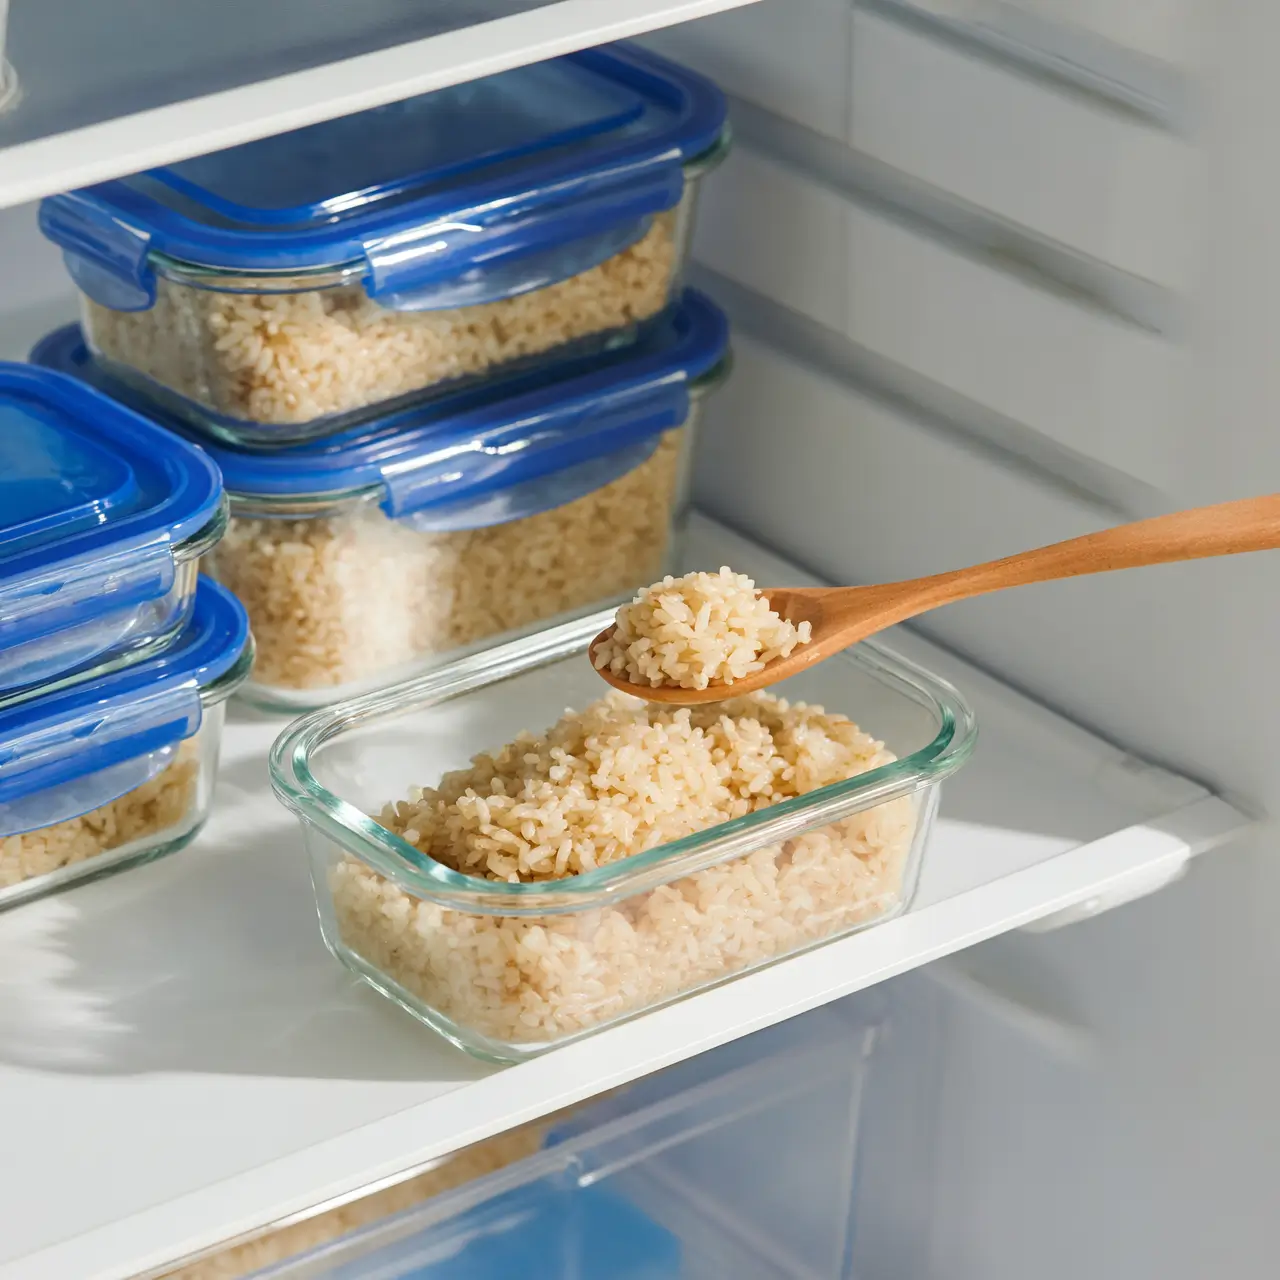
| Refrigerator Storage | Transfer cooled brown rice to airtight containers within 2 hours of cooking. Properly stored, it maintains quality for 4–6 days. Portion into single-serving containers for grab-and-go convenience throughout the week. |
|---|---|
| Freezer Storage | Brown rice freezes exceptionally well for up to 6 months. Spread cooled rice on a parchment-lined baking sheet and freeze until solid (about 2 hours), then transfer to freezer bags, pressing out excess air. This prevents rice from freezing into one solid block and allows you to remove exact portions as needed. |
| Reheating Methods | Microwave individual portions with 1 tablespoon of water per cup of rice, covered, for 1–2 minutes. Alternatively, steam rice in a covered pot over low heat with a splash of water for 5 minutes, fluffing occasionally. The rice will taste freshly made. |
| Meal Prep Strategy | Cook a double batch using 3 cups of rice and 3½ cups of liquid (following the Instant Pot brown rice water ratio). This feeds a family for multiple meals or provides individual portions for an entire week of lunches. |
| Quality Check | Properly stored brown rice should smell neutral and pleasant. Discard if you notice sour odors or a slimy texture, which indicate spoilage. |
Conclusion
Mastering this Instant Pot Brown Rice Recipe transforms one of cooking’s most temperamental grains into a reliable, nutritious staple you can prepare with absolute confidence. The precise pressure cooking environment, combined with the foolproof water ratio and natural release method, guarantees consistently perfect results that outperform traditional stovetop techniques in both quality and convenience. Whether you’re building meal prep bowls, creating family dinners, or exploring international cuisines, this foundational recipe opens endless culinary possibilities while supporting your health goals with whole grain nutrition.
Ready to experience perfectly fluffy brown rice tonight? Try this easy brown rice recipe and discover why thousands of home cooks have abandoned their stovetop pots forever. Share your results in the comments below, tag us on social media with your creative serving ideas, or explore our collection of Instant Pot recipes for more time-saving meal solutions. Your path to effortless, delicious brown rice starts with just one click of that pressure cook button.

FAQs
Can I double this recipe in my Instant Pot ?
- Absolutely! Use 3 cups brown rice with 3½ cups liquid, maintaining the same Instant Pot brown rice water ratio. Keep cooking time at 22 minutes—pressure cooking time doesn’t increase with quantity. Just ensure you don’t exceed the halfway fill line on your pot.
Why is my brown rice still crunchy after cooking ?
- This indicates insufficient liquid or cooking time. Verify you used 1¾ cups liquid per 1½ cups rice. If your rice is old (over 6 months), it may require 2-3 extra minutes of pressure cooking time as grains become drier with age.
Can I use this method for white rice ?
- Yes, but adjust the ratio and timing. Use 1:1 liquid to rice ratio and reduce cooking time to just 3 minutes with 10 minutes natural release for perfect white rice.
Do I need to adjust timing for different types of brown rice ?
- Short-grain brown rice cooks perfectly at 22 minutes. Long-grain and basmati brown rice may benefit from 20 minutes for a firmer texture. Wild rice requires 25-28 minutes since it’s technically a grass seed, not true rice.
My Instant Pot displays “Burn” warning. What happened ?
- This occurs when rice sticks to the bottom before pressure builds. Always add liquid first, then rice, and give it a gentle stir. Ensure your pot is clean without residue from previous cooking. Deglaze the pot with a wooden spoon if you sautéed aromatics before adding rice.
Can I add seasonings or vegetables directly to the pot ?
- Absolutely! Garlic, onions, bay leaves, and firm vegetables like carrots cook beautifully alongside rice. Add them in step 2. Avoid delicate vegetables like spinach or tomatoes, which become mushy—stir these in after cooking instead.
How do I prevent rice from sticking to the bottom ?
- The tablespoon of oil creates a protective barrier. Also, avoid stirring after you start cooking, and always use the natural release method. These techniques combined virtually eliminate sticking when using how to cook brown rice in Instant Pot methods.
Is brown rice healthier than white rice ?
- Nutritionally, yes. Brown rice contains 3.5 times more fiber, double the magnesium, and significantly more B vitamins since the nutrient-rich bran layer remains intact. It has a lower glycemic index, causing slower blood sugar rises compared to white rice.
Your Feedback Helps Us Grow!
There are no reviews yet. Be the first one to write one.